As an Amazon Associate, we earn from qualifying purchases. Some links on this site are affiliate links at no extra cost to you. Our recommendations are based on thorough research and editorial judgment.

Door Painting Methods: On Hinges vs Off Hinges (Pros, Cons, Setup)
When it comes to painting a door, you might find yourself facing the dilemma of whether to paint it on the hinges or take it off. It’s a common question, and the method you choose can make a big difference in your finished project.
You may be interested


Painting on hinges can definitely save a lot of time and effort—you don’t have to deal with heavy lifting. But there’s a catch: you might end up missing some edges, which can lead to a less polished look. On the flip side, removing the door allows you to tackle every inch of surface area, resulting in a much cleaner finish and sharper edges.
So, how do you prepare for either method? First off, you should mask the hinges well if you decide to go that route. Sanding down the surfaces is crucial too; it helps the paint stick better. Don’t forget to lay down drop cloths to catch any drips. Trust me; cleaning up paint splatters is not fun!
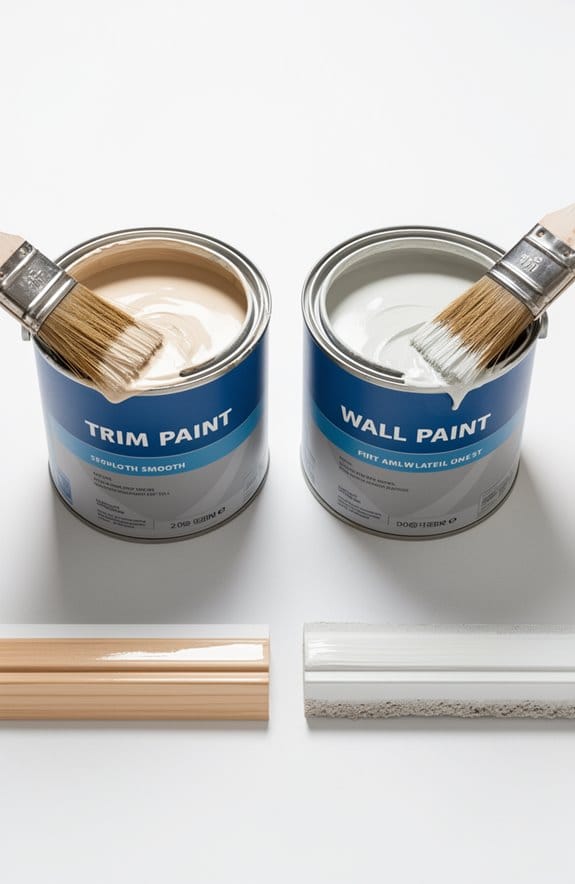
Here’s the trick: you need to pick the right tools for the job. For smooth surfaces, a quality paintbrush or roller can make all the difference. If you’re working with tricky areas, a smaller brush can help you reach those tight spots without any hassle. Honestly, it’s all about finding what works best for you.
Truth is, whichever method you decide to use, prep is everything. A little effort upfront can lead to a finish that looks professionally done.
So before you dive in, take a moment to weigh your options and think about how much time you’re willing to spend on this project. It’s all about what will give you the look you want with the effort you’re ready to put in.
In the end, whether you paint on or off hinges, just remember to consider what works best for your situation. Which method are you leaning towards for your next door painting project?
Key Takeaways
- Painting on hinges is quicker and easier but may lead to inconsistent finishes around the hinges if not properly masked.
- Removing the door for off-hinge painting ensures complete coverage and allows for a more professional-looking finish.
- Proper preparation, such as sanding and cleaning, is vital for paint adhesion and a smooth application regardless of the method used.
- Using quality paint and tools, like foam rollers and painter’s tape, can significantly enhance the durability and appearance of the final coat.
- Consider the stability and drying time of the door when choosing between painting methods to achieve the best results.
Pros and Cons of Painting Doors On Hinges vs. Removing

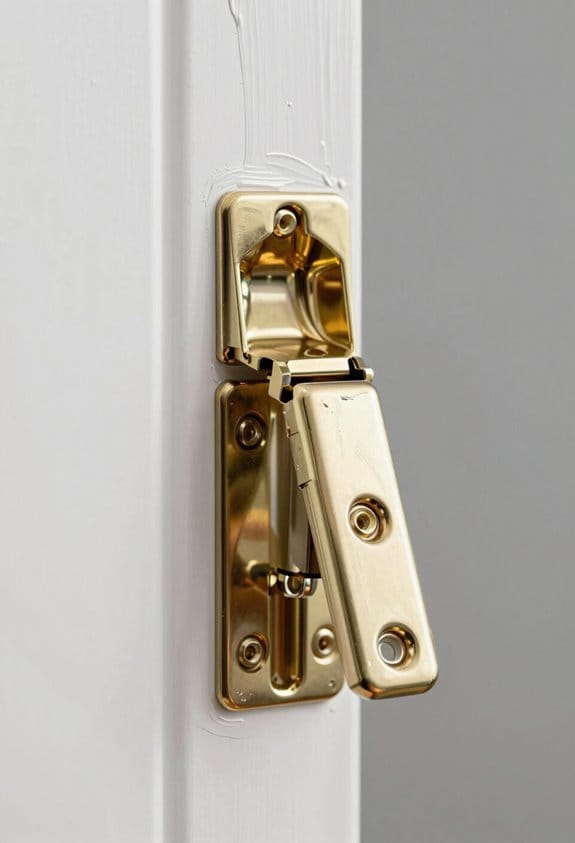
When it comes to painting doors, you might find yourself stuck at a crossroads: should you keep them on their hinges or go through the hassle of taking them off? It’s a real dilemma! On one hand, painting a door while it’s still hanging means you have easy access and definitely saves time. Plus, you can skip the whole reinstallation process afterward. Just remember to mask off the hinges with painter’s tape, so the paint doesn’t interfere with how the door operates.
But let’s be honest for a second—leaving the door on can lead to those awkward little areas around the hinge that don’t get enough paint and can mess with how your finished project looks. Isn’t it frustrating to notice those inconsistent finishes?
Now, if you decide to remove the door, you’ll find some perks there too. Taking it off gives you a chance for a complete paint application, ensuring that every nook and cranny is covered. It also means you can avoid drips or runs since you’ll likely have better control when the door is lying flat.
So, what’s the best approach? Here’s the trick: consider the specific door you’re working with, how difficult it is to remove, and how much time you have to invest. You might even want to weigh convenience against the quality of your finish.
In the end, whether you decide to keep that door hanging or take it down, each method has its own set of pros and cons. Just think about your priorities and what will work best for you. What’s your go-to method for painting doors? Also, using a scaffold with adjustable heights can help you reach all parts of the door comfortably when painting on hinges.
Benefits of Removing Doors for Painting

Have you ever tried painting a door while it’s still hanging? It can be a hassle, and that’s where taking the door off its hinges comes in handy.
Removing doors for painting has some real perks. For starters, you can access every edge of the door, which means you’ll get a smooth finish without worrying about drips. Laying the door flat on sawhorses also helps with getting even coats and reaching those pesky intricate details like corners and grooves. Plus, doing this lets you clean hidden areas that often get overlooked.
So, why does this matter? Well, once the door’s painted, putting it back on is a lot easier, too. You won’t have to deal with misalignment issues, which means a better fit when you hang it back up.
Here’s the trick: before you start painting, take a few minutes to remove the door, and honestly, you’ll be glad you did. It leads to a polished look that makes your effort worth it. Using proper surface preparation before painting can also significantly enhance adhesion and finish quality.
In short, removing doors before painting can improve your results and save you some headaches later on. Why not give it a try next time?
Critical Factors to Consider When Painting Doors On Hinges
Ever thought about giving your doors a fresh coat of paint without taking them off the hinges? It’s a common dilemma for many homeowners facing the daunting task of door painting. Here’s the deal: you can paint them right where they stand, making the process quicker and easier.
First off, grab some painter’s tape and go around the hinges. This simple step will prevent any pesky paint from sticking to them later on. Now, think about stabilizing the door with a drop cloth or towel. Not only does it help with drips, but it also promotes a smooth finish. And let’s be honest, dealing with heavy doors can be a hassle if you take them off. Keeping them mounted helps you avoid any unnecessary damage.
When it comes to applying paint, keep it light. Start with thin coats and let each layer dry well. This not only saves you time but can also give you a neater finish without all the fuss of trying to reinstall a door later. So, why does this matter? Because who has time for multiple trips back and forth to correct mistakes?
The best part is that painting your doors on the hinges can really refresh the look of your space without the hassle. It’s all about being smart and efficient. Have you tried painting doors while they’re still in place? If not, maybe it’s time to give it a go. Using a brush with an ergonomic structure can significantly improve comfort and precision during the process.
Recommended Products

Elevate your painting precision with the Bates trim brush set, featuring three brushes in distinct sizes tailored for a diverse range of detailing and trim work needs.

COMPLETE 5-PIECE BRUSH SET FOR EVERY PAINTING TASK — Includes 1 Inch Flat, 1.5 Inch Angle, 2 Inch Flat, 2 Inch Angle Stubby, and 2.5 Inch Angle brush giving you every size professional painters use daily. Get all 5 for less than the price of a single brush from hardware store brands — professional grade performance at a fraction of the cost. Perfect for walls, trim, cabinets, doors, furniture, and detailed cutting-in work on any project.

Paint Brush Set: Featuring three brushes (0.6", 0.75", 1") in distinct sizes tailored for a diverse range of detailing trim work needs
What You Need to Prep Before Painting Your Door
What’s the deal with painting your door? It can feel daunting, especially if you want that perfect finish everyone raves about. Well, here’s the scoop: prepping your door before diving into paint is key.
Start by removing all the knobs and hardware from your door. This little step is so important because it ensures you won’t face any paint blockage later. Then grab a sanding sponge and lightly sand the door surfaces. Why? It helps the paint stick better and creates a smooth base for your gorgeous color.
After sanding, it’s super important to clean the door properly. Vacuum up any dust, then wipe it down with a tack cloth. Don’t skip this part; it really makes a difference. If your door has hinges or lock insets, make sure to cover those with painter’s tape. You want to keep them paint-free!
And don’t forget to lay down a drop cloth. Trust me, you’ll thank yourself later when paint drips don’t land on your floor. Before you start painting, check that everything is dry—especially if you’ve been any sanding or cleaning.
For best results, choose a painters tape with medium adhesion that will protect your hardware without leaving residue.
Getting everything ready might take a little time, but it’s worth the effort for that beautiful paint finish. Are you excited to give your door a fresh look?
Recommended Products

【ADHESIVE MASKING FILM 】After fixing the position of the plastic masking tape. When plastic sheeting protective masking film is covered, it can be freely attached to the surface of objects such as the automotive body、furniture and the wall surface to ensure complete protection.

PERFORMANCE: Faster, easier prep with precision vs. applying 3M paper-backed tapes by hand

TACKLE INDOORS AND OUTDOORS: Resists UV rays, sunlight and moisture so you can use it as an indoor or outdoor tape
Step-by-Step Guide to Painting Doors After Removal
Have you ever looked at your door and thought it could use a little TLC? Giving your door a fresh coat of paint can really brighten up a space, and it’s not as hard as you might think.
Start by carefully tapping out the hinge pins. This lets you remove the door while leaving the hinges attached. It’s best to place the door on two sawhorses. This way, you get a stable surface to work on.
Now comes the prepping. Lightly sand the surface to help the paint stick better. Don’t forget to vacuum up the dust and then give it a quick wipe with a tack cloth. This step is essential for achieving a smooth finish.
When you’re ready to paint, here’s the trick: use a foam roller for the flat surfaces and a brush for the edges. Start applying the first coat from the top down, which helps to avoid drips. The best part is letting each coat dry completely before moving on to the next. I usually recommend at least two coats to get that professional look.
For even more efficient and smooth application on your trim and edges, consider using a paint sprayer with an adjustable spray pattern tailored for detailed work.
So, why does this matter? A well-painted door isn’t just about looks; it can also protect against wear and tear. Once you’re finished, reinstall the door, and enjoy the fresh look you’ve created.
In short, the method may seem simple, but it packs a punch. What’s your favorite color to paint doors?
Recommended Products

Complete 4" Mini Paint Roller Kit: This all-in-one professional painting kit includes (5) high-density foam roller covers, a sturdy 4-inch roller frame, a deep-load paint tray, and a disposable tray liner. Perfect for small projects and touch-ups, it saves you time and money—no need to buy components separately

Paint Roller kit 10 Pack: 2 inch foam paint roller covers 6 pack, 2 inch plastic paint tray, 2 inch paint tray liners 2 pack, small paint roller frame

Small Paint Roller Kit: Includes 4 inch foam paint roller 5 covers, 1 roller frame, 1 plastic paint tray, 1 tray liner, a complete set for your painting projects
Top Painting Techniques for Great Coverage
Painting your doors can be a bit tricky, especially when you’re aiming for that flawless finish. Let’s face it, nobody wants to deal with unsightly drips or uneven coverage. You might be wondering how to avoid those common pitfalls, right? Start by tackling your doors from the top down. This way, any extra paint can roll downward rather than pooling at the bottom.
When it comes to picking your tools, a thick nap roller works wonders on flat surfaces. For those grooved sections, a smaller brush is just the ticket. And don’t forget to paint in the direction of the wood grain; it makes all the difference in texture and appearance. It’s often the little details that elevate your project from decent to stunning.
Make sure to cover every inch, including the edges and around any hardware. Consistency is key here. If you want your doors to really shine, aim for at least two coats of paint. Give each layer enough drying time before applying the next—this ensures a solid, long-lasting finish. For best results, consider using a quality adhesion primer to enhance paint bonding and surface durability.
Overcoming Common Challenges in Painting Doors
Painting doors can sometimes feel like a daunting task, right? With a few solid tricks up your sleeve, you can definitely make the process smoother. Start by using painter’s tape to cover the hinges. This little step can really help keep your finish clean and professional-looking.
If you’re aiming for great paint adhesion, try lightly sanding the door surface with some fine-grit sandpaper. It’s amazing what a bit of prep work can do! And don’t forget to place a drop cloth underneath. This keeps your floor protected from any pesky drips while you paint and makes cleanup a breeze.
When it comes to applying the paint, think about your door type. For flat doors, a foam roller can manage excess paint really well, which is super helpful. Edges or grooves? A brush works wonders for those areas, giving you a neat finish. Here’s the trick: if you decide to paint while the door is still on its hinges, wedge a towel beneath it. This keeps it stable and in place, letting you work without any unexpected movements.
For the best results, use a premium painters masking tape that offers medium adhesion and clean removal to protect areas like hinges without leaving residue.
Recommended Products

READY. SET. TAPE!: 1 roll of 1.41 inches x 60 yards tan Scotch General Purpose Masking Tape, a versatile solution for painting, labeling, bundling and general masking applications on non-damageable surfaces with a 3-inch core

BLUE PAINTER'S TAPE: Includes One 1.88 in x 60 yd roll of ScotchBlue Original Painter's Tape, a blue masking tape for painting that helps protect surfaces by preventing paint bleed

Professional Mask Tape - Multi-Surface adhesive tape made of high quality blue crepe paper not easy to lift or curl, has sunlight, UV, heat, moisture resistant, sturdy to use. So, blue tape painters tape is very much suitable for indoor and outdoor, office, home decoration, classroom. And, its paper use environment friendly material, harmless to human body, using blue paint tape can reduce the natural burden. Excellent blue masking tape for packaging, closing, and light duty masking and sealing.
Tools and Materials for Your Door Painting Project
Is your door in need of a fresh coat of paint? Before diving into this project, you’ll want to gather a few essential tools to make the process smoother.
First off, grab a good paintbrush or foam roller to apply that high-quality paint. You’ll also need some sandpaper to prep the surface; this will help your paint stick better and give you a nice finish. And don’t forget a craft knife for precise cuts when you’re applying painter’s tape. Speaking of tape, using painter’s tape to cover hinges and doorknobs will make a world of difference. Just press it down firmly along the edges to ensure clean lines.
Then, there’s the mess factor—having a drop cloth ready will save your floors and nearby furniture from potential drips or spills. If you spot any holes or scratches on the door, wood filler is your best friend here; it’ll smooth things out nicely.
Finally, when it comes to paint selection, I recommend going with something durable like BEHR Ultra Premium. It may cost a bit more, but it’s worth it for that long-lasting finish you’ll love. Also, consider using a paint tray with multiple wells to keep your colors organized and make your application more efficient.
Recommended Products
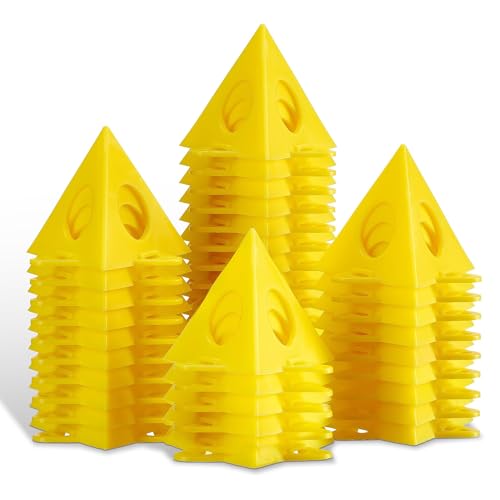
Minimal Contact Painting: 36-pack mini non-stick painters pyramid stands securely elevate or raise project off the work surface, allowing you to paint or stain both sides without sticking

Bates paint roller kit includes 19 essential pieces for home painting, prep, and cleanup projects.

Get everything you need for any painting project with this all-in-one set: 1 sturdy 4-inch roller frame with a soft ergonomic handle, 1 durable magnetic paint tray, 2 tray liners, 5 high-density foam roller covers, 1 angle 2-inch paintbrush, and a drop cloth. Designed for easy use and cleanup, this kit is ideal for DIYers and professionals alike
Frequently Asked Questions
Should You Take Doors off Hinges to Paint?
We believe door removal’s advantages, like improved painting efficiency and finish quality, outweigh the time investment. By following proper preparation steps and safety considerations, we can ease reinstallation with helpful tips for a successful outcome.
What Is the Best Way to Paint Door Hinges?
To paint door hinges effectively, we should use hinge protection methods, consider hinge removal techniques, and choose a brush or spray. Proper hinge cleaning tips guarantee a smooth finish while maintaining hinge functionality and selecting the right color.
How Not to Paint Door Hinges?
To avoid painting door hinges, we can use painter’s tape for clean edges, adhere to proper hinge cleaning techniques, and guarantee careful paint application to prevent mistakes, while considering hinge replacement options for hardware care.
What Is the Best Method for Installing Door Hinges?
For best hinge installation techniques, we should guarantee proper door alignment, use the right tools, and consider door weight distribution. Let’s also remember hinge maintenance tips for lasting performance in our home improvement projects.