As an Amazon Associate, we earn from qualifying purchases. Some links on this site are affiliate links at no extra cost to you. Our recommendations are based on thorough research and editorial judgment.

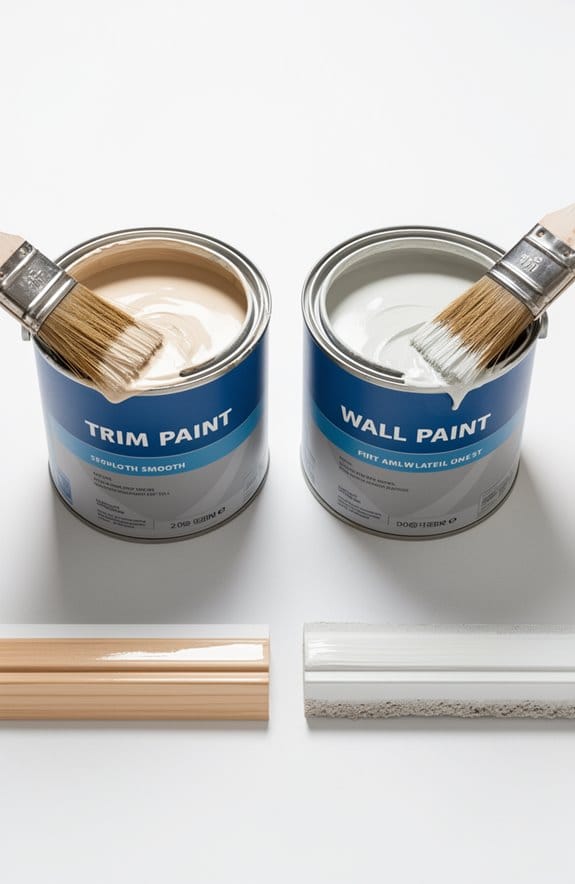
Paint Thinning and Straining: When It’s Necessary and How to Do It Right
Ever struggled with paint that’s just too thick to work with? It can be frustrating when you’re trying to get a smooth finish, but there are some simple steps to help you out.
You may be interested


Start by checking for clumps or streaks; those are signs that your paint needs a little adjustment. If it feels heavy, try mixing in some brand-recommended extenders. A good rule of thumb is to add around 10-15% to get the consistency you want.
Straining the paint with a fine mesh strainer is also a must—it’ll get rid of any impurities and give you that smooth, polished look you’re aiming for.
Avoid using water with certain paints, as it can ruin the formula. You don’t want to end up with brush contamination either! Before you commit to thinning, test whatever method you choose on a small, inconspicuous area first. That way, you can see how everything reacts without risking your whole project.
So, how do you know what tools and tips work best? Honestly, it’s all about experimenting to find what suits you. Keep an eye on the types of brushes you use and the surfaces you’re painting, too.
In summary, getting the right paint consistency is key to achieving that flawless finish. Have you ever had a project turn into a struggle because of thick paint? Don’t let it happen again!
Key Takeaways
- Test paint texture for thickness or clumps to confirm the need for thinning before application.
- Use brand-recommended paint extenders or glazes to enhance fluidity and depth of color.
- Strain paint with a fine mesh strainer or cheesecloth to eliminate impurities and ensure a smoother finish.
- Avoid common mistakes like using water with specific paints or dipping brushes directly into paint jars.
- Prioritize safety by ensuring good ventilation and using protective gear while working with thinners and paint.
How to Determine If You Need to Thin Your Paint?

How can you tell if your paint needs thinning? Start by checking its texture. If it feels thicker than usual or has clumps, it’s a clear sign it needs to be thinned out. Have you noticed streakiness when applying? That’s another red flag that the paint’s viscosity is off.
When working with older paint, keep an eye out for any signs of aging, like inconsistency in texture. This could mean it’s time to thin it down. It’s crucial to follow painting guidelines. For example, Fusion Mineral Paint recommends using specific thinners, like extenders, instead of water. Why does this matter? Using the wrong thinner can lead to a less-than-ideal finish on your project.
Before you go all in, try this: create a small test batch after you’ve thinned your paint. This will help you see if the consistency is right for your project. Trust me, this step can save you a lot of frustration down the line.
In a nutshell, keep an eye on your paint’s condition and don’t hesitate to thin it out when necessary. Also, make sure to select a compatible paint thinner to avoid compromising the adhesion or finish. Have you ever faced issues with paint consistency before? It’s always better to double-check than to risk a rough finish later on!
Recommended Products

LATEX PAINT THINNER: Wagner Paint Easy is a latex paint conditioner that thins water based latex paints without diluting for trouble-free spraying, easier brushing or rolling

Formulated for Acrylics: A 4-ounce pint bottle of water-based acrylic airbrush paint thinning reducer and extender base. This solution is designed to make colors thinner, increase transparency, and improve color flow for detailed airbrush work.
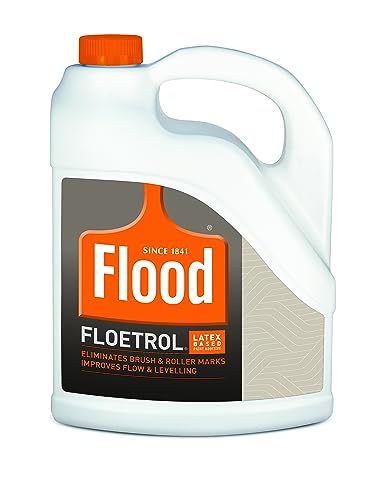
IMPROVES PAINT FLOW & LEVELING: Floetrol latex paint additive conditions acrylic and latex paint so it flows smoothly, self-levels, and dries to a professional finish without thinning.
Best Methods for Thinning Paint

When you’re tackling a painting project, getting the paint consistency just right can be a real challenge. Have you ever opened a paint can and found it too thick to work with? It’s frustrating, but there are a few methods that can really help.
First up, consider using paint extenders recommended by brands like Fusion Mineral Paint. These are designed to keep the paint’s quality intact while making it easier to apply. It might just be the little push your paint needs to flow smoothly.
Another technique worth trying is incorporating glaze into your mixture. Just a touch can really improve fluidity, and it also adds some neat depth to the color. You might be surprised at how much of a difference this can make, especially on larger projects.
Now, let’s talk about storing your paint. Proper storage is crucial. Keeping paint jars tightly sealed will stop them from thickening over time, which means you can use them later without worry. Here’s a tip: always give your paint a good stir before using it again, too.
Before you go pouring extenders or glazes into your entire can, do a small test batch first. This way, you can ensure you’re getting the right consistency without risking a whole batch. The goal is to end up with paint that’s manageable and easy to work with.
For best results, remember to use extenders that match your paint type to avoid issues with drying time and finish quality, as paint compatibility is key.
Recommended Products

A unique formulation that extends drying time up to 40% for blending with acrylics

IMPROVES PAINT FLOW & LEVELING: Floetrol latex paint additive conditions acrylic and latex paint so it flows smoothly, self-levels, and dries to a professional finish without thinning.

Achieving a Smooth Finish With Straining

Have you ever finished a painting project only to be frustrated by a less-than-perfect finish? You’re not alone! A big part of achieving a smooth look is straining the paint. It might seem like a small step, but straining can really make a difference in how your paint goes on and how it looks when dried.
Try this: before you pour your paint into a roller tray or a separate container, strain it using a fine mesh strainer or even some cheesecloth. This process helps to filter out any clumps or debris, which can mess up your application. Plus, starting with a clean paint solution keeps things consistent as you work through your project. That consistency can help improve adhesion and, as a result, reduce those pesky brush strokes or roller marks.
So, why does this matter? If you have older paint sitting around, you might find that it has thickened or settled over time. Regularly straining it can really breathe new life into what you’ve got. Honestly, a little bit of effort goes a long way in terms of texture and even drying times.
At the end of the day, remember that taking this simple step can elevate your painting results. It’s all about the little things adding up to a big impact. Using strainers made with durable nylon mesh ensures impurities are effectively filtered out without clogging your tools, helping maintain smooth and efficient application.
Are you ready to give it a try and see how straining improves your finishes?
Recommended Products

Great Quantity:There are 10pcs paint strainer bags in the package, if you don't want to wash them after use, you can replace them at any time. Fully meet your daily needs
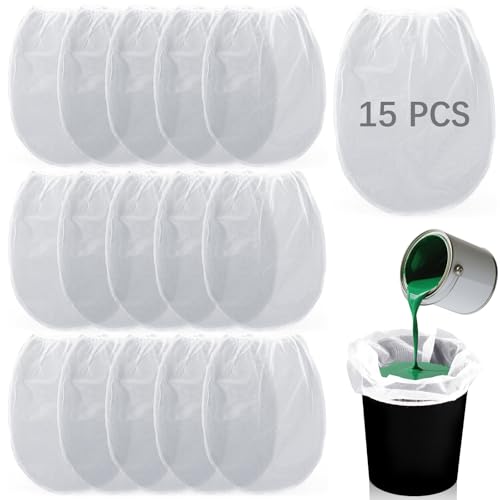
【Package contains】You will receive 15 pieces paint strainer bags 5 gallon with elastic top opening. Enough quantities to meet your work needs or differents daily needs

1. Fits 5 Gallon Buckets: Stretch-to-fit elastic top seals tightly on 5-gal buckets-zero slippage or leaks during pouring, even with thick paints/stains
Top 5 Mistakes to Avoid When Thinning and Straining Paint
What are the common pitfalls when thinning and straining paint? It’s easy to make simple mistakes that can ruin your project. For example, using water with Fusion Mineral Paint is a big no-no. It messes with the paint’s viscosity. Instead, go for a paint extender or a glaze; they work much better.
Another mistake? Dipping your brush straight into the paint jar. I know it seems harmless, but it introduces moisture and other contaminants that can mess up the whole batch. Instead, try pouring a little paint into a separate container for your brush. Keeps things cleaner and helps maintain quality!
Always test your thinning method on a small batch before tackling the big project. Trust me, you’ll want to make sure you’ve got everything just right. It’s all about getting your application technique down before you dive in.
Also, when you’re straining your paint, use a fine mesh strainer or a paint straining bag. This helps get rid of any chunky debris that could throw a wrench in your plans. And let’s be real, nobody wants a bumpy finish!
Finally, don’t forget to securely close your paint containers after you’re done. Leaving them open brings in air, which can speed up drying time and thicken the paint way too quickly. After all your hard work, the last thing you want is to fight with paint that’s become a rock.
For cleaning brushes and surfaces, consider eco-friendly paint removers like Motsenbockers Lift Off, which effectively tackle dried paint while being safer for your workspace and the environment.
Recommended Products

Large quantity: 30 pieces mesh elastic top bag strainers for 5 gallon bucket (bucket is not included), sufficient quantity can meet your various different needs

FINE MESH FILTER: The paint strainer bag is designed with ultra-fine mesh, which can filter particles larger than 250 µm, ensuring the smoothness and quality of paint or liquid, preventing the clogging of the paint sprayer, so that you won't be disturbed by dust particles during the painting process, and the paint will be applied evenly and look good

【Durable & Reusable Paint Strainer】: These bags are made of quality nylon material. Durable, sturdy, non-toxic and odorless, safe to use. Allows you to use again and again after cleaning. Save your money
Staying Safe While Using Paint Thinners
Guaranteeing safety while using paint thinners is crucial, especially when you just want to get the job done right. Ever found yourself surrounded by fumes? It’s not exactly the healthiest situation. Make sure you work in areas with plenty of ventilation. Open those windows wide or step outside if you can!
Another key to staying safe? Gear up with protective items like gloves, goggles, and a mask. You want to keep your skin, eyes, and lungs safe from those harsh chemicals. It might feel a bit like you’re gearing up for a space mission, but it’s worth it to protect your health.
When it comes to storage, be smart about it. Keep your paint thinners in tightly sealed containers, and stash them away from heat sources and direct sunlight. This can help avoid any flammability risks that might come up. Familiarizing yourself with the specific safety data sheets (SDS) for the paint thinner you’re using is also a must. Different products have different hazards, so don’t skip this step!
How do you dispose of paint thinners properly? Following local guidelines for disposal is essential. Not only does it keep the environment safe, but it also helps you stay compliant with regulations you’re supposed to follow.
For optimal protection from fumes and vapors, consider using a respirator with organic vapor filters specifically designed for solvent-based products.
Common Questions About Thinning and Straining Paint?
Have you ever wondered why thinning or straining paint is important before jumping into your next DIY project? It can really make a difference in how your finished piece turns out. When paint gets old or sits in storage too long, it tends to thicken, making it a real challenge to apply smoothly. Instead of reaching for water to thin it out, try using paint extenders. They help maintain that nice texture and quality you want in your paint.
As for straining, this one’s a no-brainer. It helps you get rid of any clumps or dried bits that could lead to a rough finish on your walls. Plus, nobody wants to deal with clogged brushes or rollers halfway through a project. So, here’s the trick: Before you start thinning or straining, give a small sample a test run. This way, you can see how it impacts the paint without risking your entire batch.
When you prep properly, you’re not just setting yourself up for a great outcome—you’re also extending the life of your paint, which is a win-win! So, next time you’re painting, ask yourself: Am I making these simple adjustments for the best results? Every little step counts towards a stunning finish. Be sure to consider the paintability and finish quality to ensure your project looks professional and lasts long.
Best Tools for Thinning and Straining Paint
When you’re in the middle of a painting project, have you ever struggled with thick paint that just won’t cooperate? It can be frustrating! To make the process a breeze, having the right tools to thin and strain your paint is really important.
First off, grab some paint strainers made of mesh or fine fabric. These are great for filtering out any chunks or impurities that could ruin your finish. Next, you’ll want to have a sturdy paint mixer or stirring stick handy. These tools are essential for breaking up any thickened paint, ensuring a smooth and consistent texture.
Here’s the trick: if you’re pouring, use a funnel with a built-in strainer. It makes the whole task a lot easier and helps keep everything tidy. Don’t forget about choosing the right size containers for mixing and straining; it can really save you from messy spills.
The best part is when it comes to thinning your paint, consider specialty paint extenders instead of plain old water. These are designed to maintain the color integrity of your paint, which can make a huge difference in the final look. So, why settle for less?
Also, using tools made from durable materials can simplify cleanup and extend the life of your equipment.
Now that you’re geared up with these tools, you can tackle your paint projects with confidence. Remember, taking a little time to prepare can lead to much better results. What’s the next painting project you’re excited to tackle?
Recommended Products

Bulk Quantity Strainer Filter Pack: 50 count of "Pure Blue" ultra-flow fine nylon mesh paint filter funnel, each cone strainer with extremely fine 190-micron filter tips.
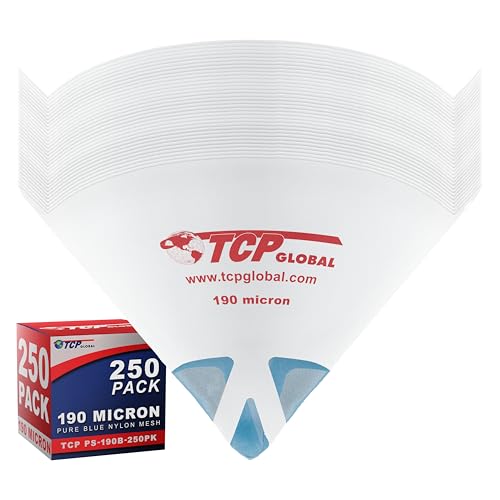
Bulk Quantity Strainer Filter Pack: 250 count of "Pure Blue" ultra-flow fine nylon mesh paint filter funnel, each cone strainer with extremely fine 190-micron filter tips.

【Product Features】Resin Filter Funnel with Strainer can effectively filter the agglomeration and pollutants in the printing resin liquid, and recover the SLA/DLP/LCD photosensitive resin into the resin bottle for the next printing use
Frequently Asked Questions
How to Properly Strain Paint?
To properly strain paint, let’s use effective paint straining techniques by pouring it through a fine mesh strainer. Avoid common straining mistakes, like rushing, to maximize filtering paint benefits for a smoother finish.
How to Thin Paint Correctly?
To thin paint correctly, we should explore solvent alternatives, compare thinning techniques, and follow manufacturer guidelines. Let’s remember to test our thinned paint first, ensuring the right viscosity for our projects.
What Did Bob Ross Use for Paint Thinner?
Like a painter with a palette of possibilities, we admire Bob Ross’s choice of odorless mineral spirits for his oil paints. His painting techniques showcase how a little thinning creates magic without losing color depth.
How to Use Paint Thinner Correctly?
To use paint thinner safely, we should work in well-ventilated areas and wear protective gear. Let’s explore paint thinner alternatives and always store thinner properly in sealed containers away from heat sources.