As an Amazon Associate, we earn from qualifying purchases. Some links on this site are affiliate links at no extra cost to you. Our recommendations are based on thorough research and editorial judgment.

Brush Cleaning Methods: Water-Based vs Oil-Based Cleanup Workflows
Have you ever felt frustrated after finishing a painting project, only to be faced with the task of cleaning your brushes? It can definitely feel like a chore, but using the right methods for cleaning brushes can make all the difference.
You may be interested


When you’re working with water-based paints, it’s surprisingly simple. Start by rinsing your brushes right away—don’t let the paint dry! Use warm water along with some mild dish soap. Keep rinsing until the water runs clear. Easy, right?
Now, when it comes to oil-based paints, things get a little different. You’ll want to start with mineral spirits to break down the paint. After that, give your brushes a wash with warm soapy water. It sounds like a bit of extra work, but trust me, it’s worth it for keeping your brushes in top shape.
Here’s a quick recap:
- For water-based paints: Rinse with warm water and dish soap.
- For oil-based paints: Start with mineral spirits, then wash with soapy water.
Before you put those brushes away, reshape the bristles. It helps them hold their form for your next painting session. Store them flat or with bristles down to prevent any splaying.
So, why is all this important? Taking good care of your brushes not only extends their life but also improves your painting experience. After all, who wants to deal with a frayed brush when you’re trying to create a masterpiece?
Remember, cleaning brushes doesn’t have to be a headache—it’s all about knowing what works best for the type of paint you’re using. What cleaning method have you found most effective?
Key Takeaways
- Rinse water-based paint brushes immediately with warm water and dish soap to avoid dried paint damage.
- For oil-based paints, use mineral spirits to clean brushes before washing with warm soapy water.
- Always continue rinsing water-based brushes until the water runs clear to ensure complete cleanliness.
- Reshape brush bristles after cleaning and lay them flat to air dry for optimal maintenance.
- Use non-toxic cleaning agents and dispose of solvents responsibly to prioritize health and environmental sustainability.
The Importance of Cleaning Your Brushes

When you’re in the zone painting, cleaning your brushes might not be top of mind. But trust me, it’s super important for making sure your brushes perform well. If you don’t clean them regularly, the paint can dry and ruin those bristles, which is a bummer.
After using water-mixable oil paints or traditional oils, make it a habit to rinse your brushes right away. This is key to keeping your brushes in tip-top shape. If you give them a little TLC now, they can last you for years, which is definitely worth it.
Neglecting your brushes not only causes those annoying color mixes but can also mess with the overall vibe of your art. Think about it: how frustrating is it to deal with muddy colors when you’re trying to create something fresh?
Here’s the trick: when using oil paints, grab some paint thinner for cleaning. For those water-based options, just rinse with water. Either way, keeping your brushes clean helps you enjoy smoother strokes in your next projects.
So, why does this matter? Well, both beginners and seasoned artists can benefit from good brush hygiene. When you care for your tools, they’ll treat you right in return.
The best part is, it doesn’t take much time! Just a quick rinse after each session can make a world of difference.
In fact, using protective gloves during cleaning can prevent skin irritation and contamination, so consider latex-free vinyl gloves as a safe and comfortable option.
In the end, set aside those few extra moments to clean your brushes. It could really elevate your artwork. What’s your go-to tip for keeping your art supplies fresh?
What You Need to Clean Your Brushes
Cleaning your brushes can feel like a chore, but it’s crucial for keeping them in shape and ready to perform. Have you ever pulled out a brush only to find it caked in dried paint? Let’s be real; it’s frustrating! But with a few simple tools, you can make the cleaning process so much easier.
If you’ve been using water-based paint, gather these essentials: warm water, some mild dish soap, and a brush comb. The comb is a handy little tool for getting rid of tough paint residue. Here’s a quick tip: always rinse your brushes right after use. It saves you a lot of hassle later on.
When it comes to oil-based paint brushes, it gets a bit different. You’ll want to grab some mineral spirits or paint thinner to break down that stubborn paint. Once you’ve let the brushes soak a bit, wash them in soapy water like you would with your water-based tools. Don’t forget to keep a rag or paper towel nearby for wiping off excess paint before rinsing.
After all that rinsing with warm water, the final touch is using a brush guard while they dry. It keeps the bristles in shape, whether you’re dealing with synthetic or natural bristle brushes.
The best part is, by having these tools on hand, you’ll end up with cleaner brushes and longer-lasting performance. It’s all about taking that little extra step to keep your supplies in good condition. So, what’s stopping you from giving those brushes a good clean? It’s worth the effort! Using a Razor Blade Scraper Tool can also help efficiently remove dried paint from brush handles and ferrules for a thorough cleanup.
Recommended Products

Automatic Paint Brush Cleaner Set: With a silicon lid of electric paint brush cleaner rinse cup, you can perfectly clean several brushes at once. This will make your painting application much faster and more pleasing to retain your inspiration for every creation. With a portable silicon brush cleaner mat which could provied more thoughouly cleaning, and a paintbrush holder with 26 holes for variable sizes, both are the good helpers for countertop organizer. It also could used as automatic makeup brush cleaner


2 Side Painters Comb
How to Clean Brushes After Water-Based Paint

Ever found yourself staring at a pile of brushes covered in dried paint, wondering how you’ll ever get them clean? Trust me, cleaning brushes after using water-based paint isn’t just another chore—it’s about keeping your tools in good shape for your next project. Let’s break down the steps to make it easier.
First things first, rinse those brushes under warm running water right away. Don’t wait! The longer the paint sits, the harder it is to clean. Once you’ve rinsed them, add a drop of dish soap to the bristles. Gently massage that soap in; this helps break down any stubborn paint residues.
After that, take your fingers or a brush comb and work through the bristles. It helps to really get in there, so don’t skip this step! Rinse again until the water runs clear—this tells you you’re on the right track.
Now, here’s the trick: Once you’ve cleaned them, give the brushes a good shake to remove any excess water. Reshape the bristles to their original form—this is key for keeping them functioning well. Finally, lay them flat on a clean surface to air dry. Avoid standing them upright because that can lead to misshapen bristles, and nobody wants that!
Taking the time to properly clean your brushes can really extend their life. Using regular rinsing techniques can prevent residue buildup that impairs performance. So, next time you paint, think about your brushes and give them the care they deserve. How do you usually handle cleaning your painting tools?
Recommended Products

Stainless-Steel Teeth: Removes paint from your brush and straightens the bristles enabling them to dry straight
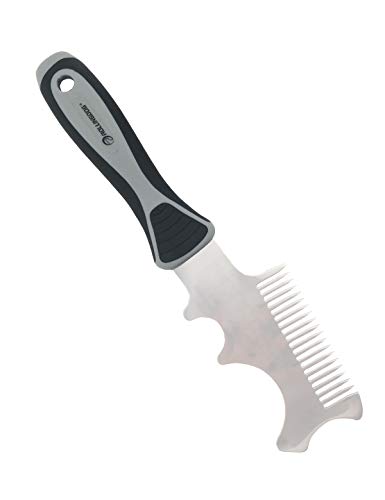
RUGGED & CORROSION-RESISTANT: Made of strong 420 stainless steel that flexes without breaking. Stays sharp and resists rust, even with frequent use

DEEP CLEANING: Equipped with 35mm-long, 1.4mm-thick stainless steel teeth, this paint brush cleaner penetrates deep into brush bristles to remove paint residue
How to Clean Brushes After Oil-Based Paint
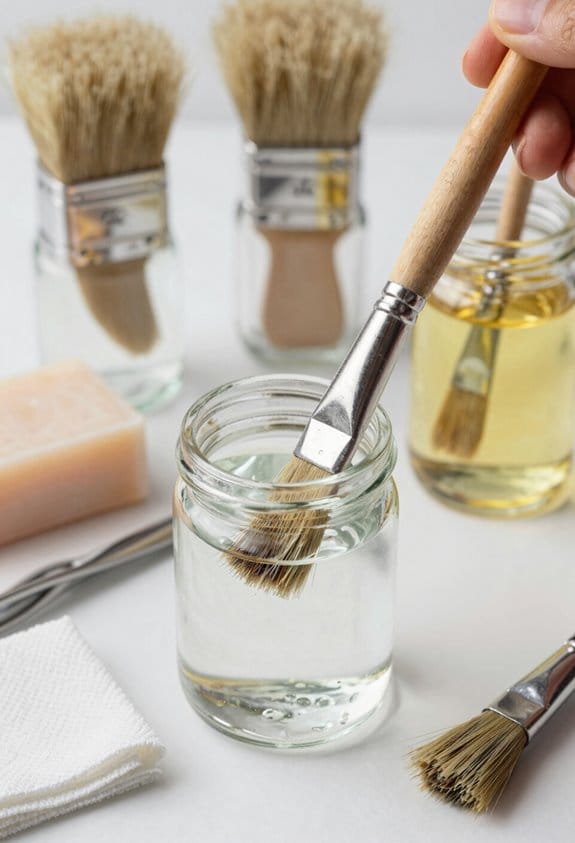
Cleaning brushes after using oil-based paint can feel like a task in itself, right? But it doesn’t have to be a hassle. First, grab a container and fill it with about an inch of solvent like mineral spirits or paint thinner. Then, just swirl the brush around gently. This helps to break down the paint and get rid of any stubborn residues.
Once you’ve worked out most of the paint, it’s time to give your brush a bath in warm, soapy water. This step is crucial for ensuring you get every last bit of paint out. Rinse it thoroughly under running water to wash away any soap—nobody wants sticky brushes for their next project. After rinsing, pat the brush dry with a towel, reshape the bristles so they’re nice and neat, and lay it flat to air dry.
Oh, and about that waste—make sure to dispose of it properly. The chemicals in solvents can be hazardous, so it’s best to check local regulations on how to get rid of it safely. Using products with durable materials can also help maintain your tools’ longevity during cleanup routines.
Recommended Products

Removes oils, acrylics, watercolours, stains, & varnishes

Cleans and Restores Paint Brushes and Rollers Helps remove dried paint, coatings, and residue from brushes and rollers, supporting better performance and extending tool life.

✅ GENTLE ON HANDS, TOUGH ON PAINT: No paint thinner, no turpentine — just a powerful natural cleaner that removes wet or dry paint in seconds. Safe to use directly on your hands and brushes.
Tips for Maintaining Brush Quality and Longevity
Ever wonder why your paintbrushes seem to wear out faster than they should? Keeping those brushes in top shape can make a big difference in how they work and how long they last.
Start by getting into the habit of cleaning your brushes right after you’re done using them. Trust me, letting paint dry on the bristles is a sure way to ruin them. For water-based paints, warm soapy water and a little mild dish soap do the trick nicely. On the other hand, cleaning oil-based paint brushes isn’t as straightforward; you’ll want to use paint thinner first, then wash them with soapy water to keep those bristles looking good.
Now, let’s talk storage. It’s important to store your brushes correctly to help them keep their shape. Aim to keep them flat or hanging bristles down. This technique really helps maintain their form. Also, using brush guards during drying and storage is a smart move. Regularly reshaping the bristles after washing can further ensure you’re ready for your next project.
So, why does this matter? Well, taking care of your brushes not only makes painting easier but extends their life, saving you money in the long run. With just a bit of attention, you can keep your favorites in prime condition and ready for anything. Choosing brushes with synthetic bristles can also make cleaning and maintenance easier due to their durability and resistance to wear.
Recommended Products

【5-in-1 Multi-Function Paint Tool】 Combines a paint brush comb, standard roller cleaner, large roller cleaner, mini roller cleaner, and a sturdy hammer base with hanging hole. This all-in-one design replaces multiple tools, saving you time, money, and space in your toolbox. Perfect for deep cleaning, reshaping bristles, and maintaining all your painting equipment

For Conditioning And Cleaning Paint Brushes

【8-In-1 Painter's Tool】Perfect paintbrush comb for flat, angled, round paint brush of all sizes, Paint roller cleaner tool for 2", 4", 9", 12", 18" paint roller covers of all naps, Straight scraper, Putty knife scraper, Gouger, Hammer. A reliable painting tools for every professional and hobby painter.
Troubleshooting Common Brush Cleaning Challenges
Cleaning brushes can feel like a real hassle, especially when it comes to different types of paint. You might be wondering how to best avoid those pesky cleanup issues. For water-based paints, you really need to rinse those brushes right away using warm water and some dish soap, since waiting too long can let the paint dry and ruin the bristles. Keep rinsing until the water runs clear, and you’ll save yourself some major headaches.
When it comes to oil-based paints, the process is a bit different. Start off with mineral spirits to help break down the paint. Swirl that brush around to really get in there, then follow it up with some soapy water to finish the job.
Here’s a tip that could save your favorite brushes: prevent bristle damage by always storing oil-based brushes with the bristles facing down. This helps keep their shape and extend their lifespan. And if you’re worried about waste, consider using a container for rinsing. It’s a small step to help manage the solvents. Choosing non-toxic products can also minimize harmful chemical exposure during cleanup.
Recommended Products
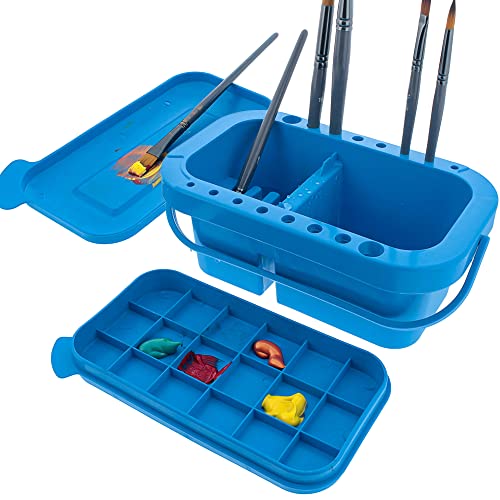
Multi-Functional Paint Brush Cleaner Tool – Doubles as a paintbrush holder organizer, holding 16 brushes with 18 paint palette wells, a palette lid, and 3 cleaning basins—a must-have for artists’ painting supplies.

Bottle cleaning brushes with multiple usage includes 7.9-12.5 inches straw tube cleaning lab brushes, 16 inches long handle beer bottle brush, 14 inches sports water bottle brush, 10 inches multifunction sponge brush and 4.3 inches spout cleaning brush; You can hang them on hook for drying and storage.

3 in 1 DESIGN: It can be used for makeup brush of cleaning, upside down drying and storage. One side is like a bowl with a multi textured bottom for washing your makeup brushes well, the other side has mesh portions which could be hold makeup brushes upside down for drying. (Brushes and Sponge Are Not Included)
Frequently Asked Questions
Why Paintbrushes Used With Oil-Based Paints Cannot Be Cleaned Effectively With Water?
Paintbrushes used with oil-based paints can’t be cleaned effectively with water due to oil properties. Cleaning solvents dissolve paint residue, ensuring brush maintenance and extending brush lifespan, while water promotes drying time and poor paint adhesion.
When Using Oil-Based Stains and Finishes, What Is the Best Method for Cleaning the Brushes?
When we consider brush maintenance, we envision bristles returning to their former glory. Using proper solvents, we can master cleaning techniques that guarantee brush preservation, effectively remove oil residue, and promote our tools’ longevity with eco-friendly options.
How Do You Clean Brushes With Oil-Based Paint?
To clean brushes with oil-based paint, we dip them in suitable solvents, swirl gently, and wash with soapy water. Let’s remember safety precautions, manage drying times, and store brushes properly for ideal care.
What Is the Golden Rule of Oil Painting?
It’s tempting to throw paint haphazardly onto the canvas, but the golden rule of oil painting reminds us to layer wisely—lean to fat guarantees our vibrant colors and textures thrive over time.


