As an Amazon Associate, we earn from qualifying purchases. Some links on this site are affiliate links at no extra cost to you. Our recommendations are based on thorough research and editorial judgment.
Cabinet Prep Workflow: Removing Hardware, Labeling, and Staging Parts
When prepping cabinets for painting, don’t you hate when you accidentally strip a screw or lose a piece? To avoid damage and ensure a thorough clean-up, start by removing all hardware. You’ll want a good screwdriver for this. Plus, labeling the parts with masking tape makes it easier when it’s time to put everything back together.
You may be interested


Organizing screws can be a little daunting, but here’s the trick: stow them in zip-top bags so there’s no mix-up later on. While you’re at it, covering your work area with drop cloths will keep things neat and tidy. You might want to use a degreaser to clean all surfaces well—it’s vital for paint adhesion.
Have you ever noticed how much smoother a project goes when everything’s in order? Staging parts by grouping them according to doors and drawers really helps streamline your workflow. The best part is, when you’ve got everything organized, you can spend more time being crafty and less time hunting for screws.
Honestly, taking a little extra time in the prep stage can save you a lot of headaches down the road.
So, what’s your favorite way to keep a project organized?
Key Takeaways
- Remove all hardware carefully using a quality screwdriver to prevent damage and ensure effective cleaning and painting.
- Label components with masking tape or permanent markers to avoid confusion during reassembly.
- Use labeled zip-top bags to organize screws and small parts, keeping them easy to access.
- Clear the workspace and cover surfaces with drop cloths to protect against paint splatters and damage.
- Clean cabinets thoroughly with degreaser to enhance paint adhesion and ensure a smooth finish.
The Importance of Hardware Removal for Successful Cabinet Prep
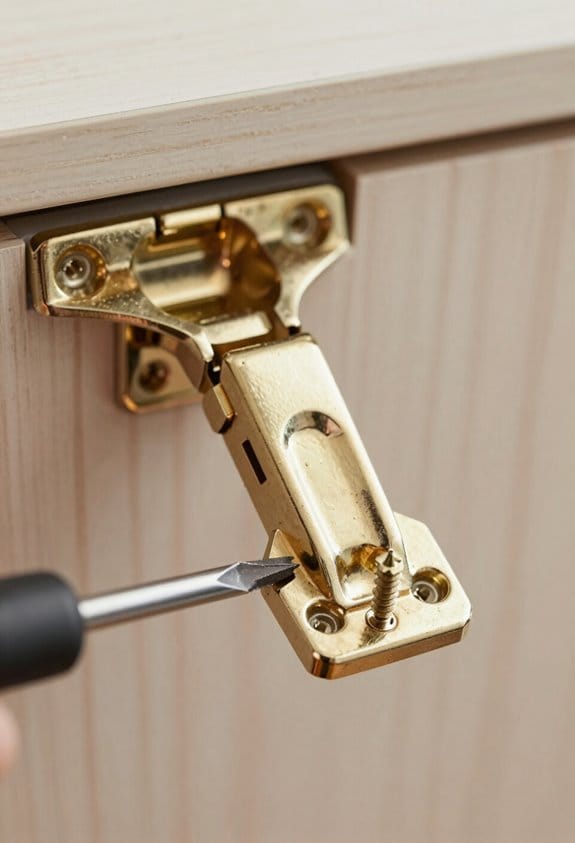
When you’re getting ready to paint your cabinets, have you ever considered how crucial it is to remove the hardware? Start by taking off all the knobs and hinges. This step isn’t just about aesthetics; it helps prevent damage while painting. Trust me, you don’t want to ruin a beautiful finish by neglecting this part.
Labeling each door can save you from a total headache later. Just grab some masking tape and write down where each door goes. It’s a simple way to keep everything organized. Similarly, keeping screws in labeled Ziplock bags is a real lifesaver. You’ll have everything you need right at your fingertips when it’s time to put them back.
Taking the hardware off gives you a chance to clean and sand the surfaces effectively. Why does this matter? Good surface prep boosts paint adhesion, making that new finish stick like glue. Engaging a buddy during this process can make things safer and a whole lot easier. Why do it alone if you don’t have to?
In short, follow these steps and you’re on your way to a professional-looking result on your cabinets. It’s all about the prep work. So, are you ready to tackle that cabinet painting project? Applying a high-quality primer sealer after prep can significantly improve the durability and finish of your paint job.
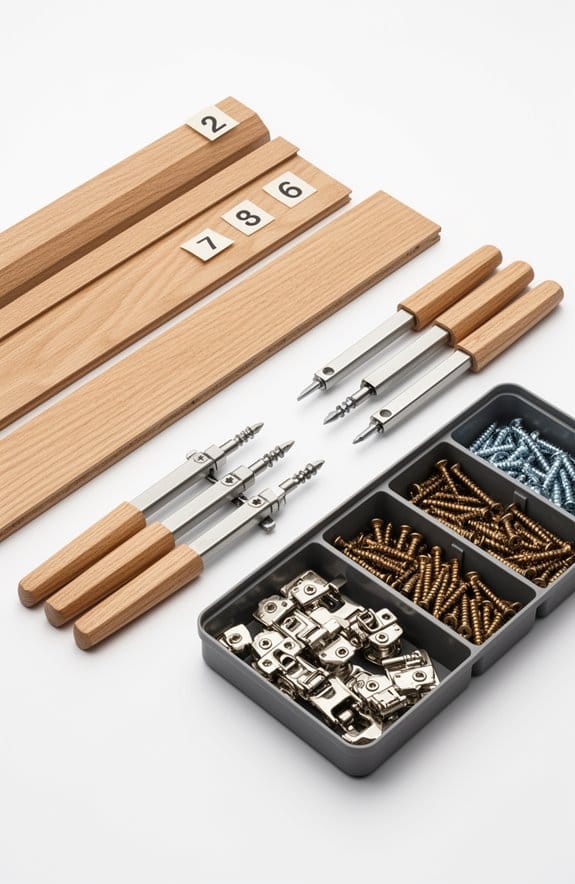
Must-Have Tools and Supplies for Cabinet Disassembly

Disassembling cabinets can feel overwhelming at first. Ever had one of those days where everything seems like a bigger task than it should be? Having the right tools and supplies on hand can make cabinet disassembly a breeze.
First off, you’ll need a quality screwdriver. This is your go-to for removing knobs, hinges, and other hardware. Don’t forget painter’s tape; it’s a simple but effective way to label each component securely. Keeping everything organized saves so much hassle later on.
For storing hardware, zip-top bags work like a charm. Use a permanent marker to clearly label each bag. This little trick can save you from a lot of confusion when you’re ready to put everything back together. Honestly, who wants to be guessing which screws go where?
Before you dive in, prep your workspace. Cover it with drop cloths to prevent any accidental damage—trust me, it’s worth it. You might find some dirt or grease on those cabinets, so keep some cleaning cloths and degreaser close at hand.
If you’re tackling heavy cabinet doors, consider getting a buddy to help. Not only will they make it easier to lift those awkward pieces, but they can also help keep everything neatly staged.
Including a reliable paint can opener in your toolkit can make accessing paint and other finishes quick and efficient during remodeling.
Labeling Techniques to Simplify Reassembly

Ever tried reassembling cabinets only to feel like you’re solving a puzzle with missing pieces? It can be a real headache! To make the whole process smoother, effective labeling techniques can really come to the rescue.
Start by labeling each cabinet door and the corresponding hardware using masking tape and a permanent marker. This simple step ensures you can easily identify everything when it’s time to put it back together. Also, don’t forget to gather all your hardware—screws, hinges, and all—and toss them into labeled ziplock bags. It’s a great way to keep everything organized and avoid any missing components later on.
Taking photos of the hardware layout before you dive into disassembly is another trick that can save you a lot of frustration. A quick snap gives you a visual reference to follow when you’re putting things back in place. It’s easy to forget where everything belongs, so this simple measure is super helpful. And make sure to clearly label adjustable shelves and detached drawer components, too. Keeping these parts organized helps maintain their original positions, which can be a lifesaver.
Another good idea? Organize all these labeled components in a specific spot. Keeping your workspace tidy not only prevents the parts from getting mixed up but also makes it easier to find what you need when you need it.
For an even more professional finish, consider using texture application tools during the final cabinet surface preparation to achieve a smooth and durable look.
Following these steps can really take the stress out of reassembling your cabinets. So, why not give it a shot? You might find it easier than you thought!
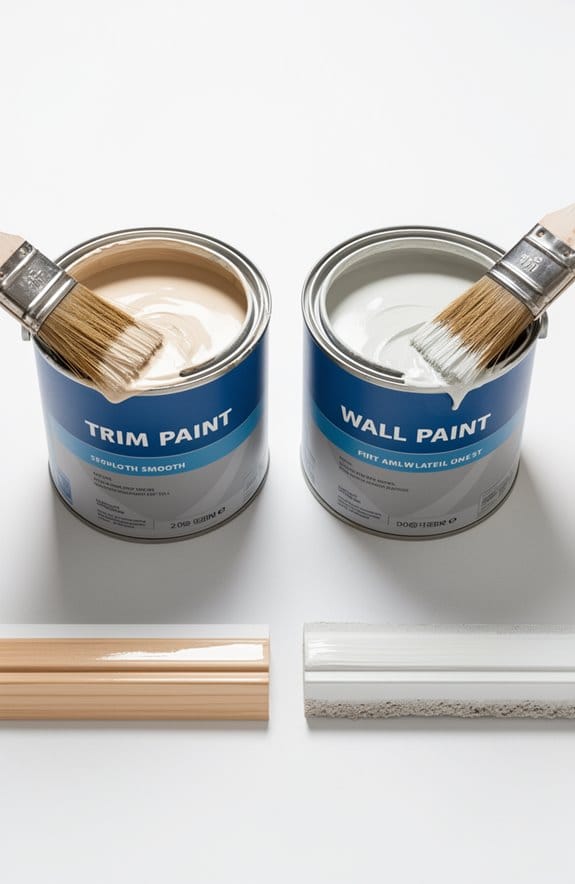
Tips for Preparing Your Cabinets for a Flawless Paint Job
Preparing cabinets for a flawless paint job can feel a bit overwhelming, right? But trust me, the effort you put into this process is what makes all the difference in the final look.
Start by taking off all the hardware, like knobs and hinges. Don’t forget to keep track of what goes where—label each piece so reassembly is a breeze later on. A simple tip here is to use labeled Ziplock bags for screws and small parts; it keeps everything organized and easy to find.
Next up, you’ll want to clear out the area around your cabinets. It’s definitely a good idea to throw down some drop cloths to protect your surfaces from any accidental paint splatters. You know what they say, a clean space means a clear mind, and that rule definitely applies here.
To ensure the paint sticks, cleaning your cabinets is crucial. A degreaser like trisodium phosphate (TSP) works wonders. It’ll remove any grime or grease, setting you up for success. And let’s not forget about keeping track of all those pieces by grouping them together according to their respective doors and drawers—this makes staging and reassembly a lot simpler.
Why does all this matter? Well, taking these extra steps ahead of time is the secret sauce to achieving that flawless finish you’re aiming for. Using paintable caulk around the cabinetry gaps after prepping can help ensure a smooth, professional finish.
Key Mistakes in Cabinet Prep for Painting
When it comes to prepping cabinets for painting, it’s easy to overlook some crucial steps that can really throw off your project. Have you ever found yourself staring at a pile of hardware, wondering how it all fits back together? Neglecting to label and document those pieces during disassembly can lead to a whole lot of confusion later on.
Cleaning is another vital step that shouldn’t be skipped. Grime, grease, and dust can seriously mess with paint adhesion. Grab a degreaser or TSP and give your cabinets a thorough scrub down before diving into painting. Trust me, it makes a world of difference.
Also, let’s talk about sanding. Using a grit between 120 and 150 for that initial scuffing? That’s key for creating a surface the paint will actually stick to. Getting this step right can save you major headaches down the line.
And while you’re at it, make sure to store those smaller hardware pieces in labeled bags. It’s so easy to misplace them, and trust me, a lost screw can turn into a frustrating detour on your painting journey.
Finally, resist the urge to rush through disassembly. Hurrying can cause damage to your cabinet materials, and you definitely don’t want to compromise the quality of your project. Taking your time here pays off!
For safety during painting, remember to wear a full-body protective suit to guard against paint splashes and fumes.
Frequently Asked Questions
What Is the 1/3 Rule for Cabinet Hardware?
So, we thought hardware placement was just a wild guess! But really, the 1/3 rule guarantees aesthetic balance, guiding handle types and knob selection. It creates visual flow and cohesive style through proper installation tips and spacing guidelines.
What Are the 9 Steps in Organizing Kitchen Cabinets?
To organize our kitchen cabinets effectively, we’ll follow these steps: declutter, sort utensils, group dishware, maximize storage, label containers, arrange spices, categorize cookware, optimize shelf space, and enhance accessibility for daily use.
What Is the Process for Cabinet Refacing?
Beginning an exciting cabinet refacing journey, we explore cabinet design trends, compare refacing materials, consider style choices, and share DIY tips, budget planning, installation methods, and painting techniques for a stunning transformation.
How to Prep Cabinet Hardware for Painting?
To prep our cabinet hardware for painting, we’ll employ effective hardware removal techniques, establish labeling systems, and follow painting prep tips. Let’s consider drying times and choose the right paint types for flawless finishing touches.