As an Amazon Associate, we earn from qualifying purchases. Some links on this site are affiliate links at no extra cost to you. Our recommendations are based on thorough research and editorial judgment.

Prep-to-Paint Layout: Setting Up a Room for Speed and Less Mess
Ever try to paint a room only to find yourself knee-deep in chaos? Getting started can feel overwhelming, but it doesn’t have to be messy. Here’s how to set up your space effectively and keep your painting process smooth.
You may be interested


First off, clear out the furniture. You don’t want anything getting knocked over or splattered with paint. Once you’ve created some room to work, don’t forget to cover your surfaces with canvas drop cloths. They’re a real lifesaver!
Remove hardware like doorknobs and switch plates to avoid accidents, and be sure to apply painter’s tape along the edges. This will help you achieve those crisp lines we all love.
Cleaning your walls can make a huge difference too. Before you even think about picking up a brush, give your surfaces a good wipe-down. This step helps the paint stick better.
For tools, go for angled brushes and high-density foam rollers. You’ll get a smoother finish that way. The best part is, having the right tools will save you time and effort later.
So, what’s the trick? Set up a little caddy with everything you need—paint, brushes, tape—so you can grab it all in one go.
So why does this matter? Preparing the room not only cuts down on mess but also speeds up your painting process. You can focus on getting the color just right instead of worrying about paint drips everywhere.
In short, by taking a little time to prep, you can make the painting process way easier and more enjoyable. Give these tips a try next time you pick up that paintbrush! What’s your biggest painting challenge?
Key Takeaways
- Clear the room by moving furniture out of the way and covering it with drop cloths to prevent damage and minimize mess.
- Prepare surfaces by cleaning them thoroughly for better paint adhesion, reducing the risk of peeling and bubbling.
- Use painter’s tape along edges and trim for sharp lines, ensuring a professional appearance and reducing touch-up work.
- Organize painting tools, keeping a high-density foam roller and angled brush ready for efficient application and accuracy.
- Lay down drop cloths on the floor to catch drips and splatters, simplifying cleanup and maintaining a tidy workspace.
How to Efficiently Setup Your Room for Painting

Setting up your room for painting can feel overwhelming, but it doesn’t have to be. Do you want to avoid a mess and make the painting process smoother? Here are some practical tips to get everything ready before you crack open that paint can.
Start by moving furniture out of the way or pushing it to the center of the room. Cover it with canvas drop cloths—this protects your belongings and helps absorb any drips you might have. It’s a simple step that can save you a lot of cleaning later.
Next, think about simplifying your job. Remove switch plates, outlet covers, and any hardware that’s in the way. This small task makes painting the walls so much easier and keeps your focus where it needs to be.
As you prepare to paint, don’t forget the edges! Apply painter’s tape along the trim, windows, and doors. This ensures that you get those clean lines you’re looking for. It’s worth taking the time to make sure there aren’t any gaps in the tape.
A clean surface is essential, so grab a degreaser or TSP soap to wash your walls. It’ll help the paint stick better and give you a neater finish. Honestly, it’ll make a difference in how your final project looks.
Finally, be sure to lay down drop cloths on the floor and cover any fixtures that can be damaged. It might seem like an extra step, but it’s going to protect your space and minimize any mess. No one wants to deal with paint splatters on the carpet!
For best results, choose a drop cloth with reinforced hems and seams to prevent fraying and increase durability during your project.
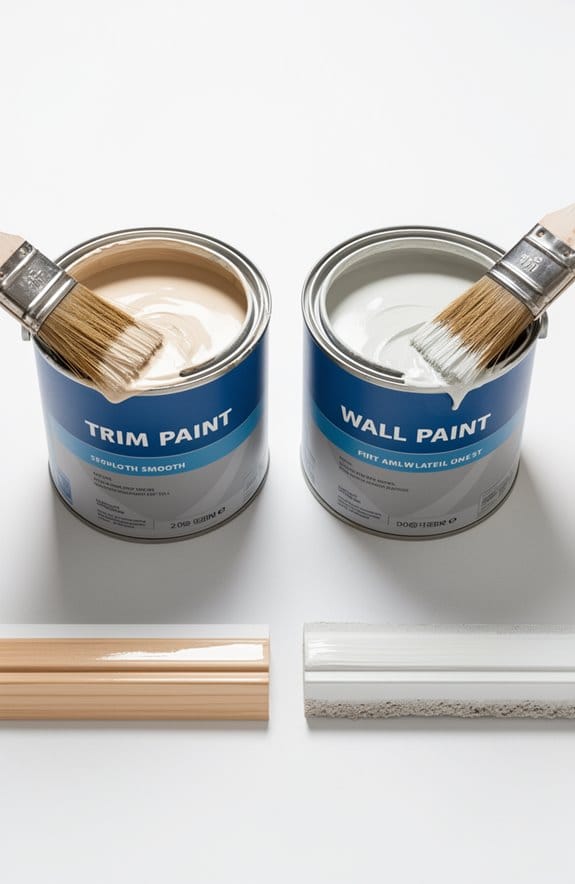
Essential Tools for a Smooth Painting Process

Painting can feel like a daunting task, right? But trust me, having the right tools can truly make the process much simpler. Start with a good-quality angled brush for those tricky cut-in spots, and don’t skimp on a high-density foam roller for a smooth finish. One little thing you definitely want to have on hand is painter’s tape. It really helps you get those sharp edges; just make sure to press it down firmly to block off any areas you don’t want to paint.
And, of course, drop cloths are a must. They’ll save you from the headache of cleaning up splatters later on. Ever found yourself making several trips back to the can for paint? A handheld paint kettle can be a lifesaver for that—just fill it, and you keep painting without the interruptions.
You can’t forget about paint trays, either. They help with even paint distribution, ensuring you get decent coverage on your walls. Cleanup isn’t too bad if you prep right, either. Have warm soapy water ready for latex paint and some mineral spirits for oil-based paints.
Proper maintenance of your tools can save you time and keep everything neat while you work. Using deep-capacity paint trays can also reduce the frequency of refills and spills, speeding up your project. So, what’s stopping you from diving into your painting project? You’ve got this!
How to Protect Your Furniture and Floors During Painting

Protecting your furniture and floors during a painting project can feel like a daunting task. Ever had a splash of paint land right on your favorite couch or beautiful hardwood floors? It’s a real headache! Here’s a simple plan to keep everything safe while you’re sprucing up your space.
If you can, move your furniture completely out of the room. But, if that’s not possible, just push it to the center and cover it with canvas drop cloths. These cloths are great because they really soak up any drips that might happen. Plus, don’t forget about your floors — lay down some drop cloths or plastic sheets to shield all areas that might be at risk from splatters.
Another thing to consider is removing light switch and outlet covers. Store those tiny screws in a plastic bag so they don’t go missing when you need them again. It’s one less thing to worry about!
Here’s the trick: use painter’s tape around edges and corners. This keeps your lines nice and clean, plus it protects your walls from accidental paint contact. I can’t stress enough how much easier cleanup is when you take those small precautions.
So, why does all of this matter? It not only prevents damage but also means you can focus on your painting project without stressing over what might get ruined. For added convenience and protection, consider using tear-resistant plastic drop cloths designed to withstand heavy-duty tasks and prevent spills from seeping through.
Why Clean Surfaces and Good Edge Protection Matter?
Have you ever noticed how a fresh coat of paint can elevate a room, but it all starts with the prep work? Clean surfaces and good edge protection really do make a world of difference. Cleaning surfaces with a degreaser like TSP can significantly improve paint adhesion. By removing grease, oils, and dirt, you’ll ensure the paint sticks well, which means a smoother finish.
Good edge protection is equally important. Using painter’s tape gives you those sharp, clean lines that make your work look professional. This little step not only enhances your project’s appearance but also cuts down the time spent on touch-ups later around trim and ceilings.
Honestly, taking the time to prepare your surfaces properly can save you a lot of headaches. When surfaces are ready, you can avoid problems like bubbling and peeling, and you might even find you need fewer coats of paint. Plus, dust and other particles can ruin your finish and create an uneven texture. So, why does this matter? Because anything less than perfect can lead to disappointing results.
Here’s the trick: take the time to clean and protect your surfaces before you start painting. It may seem like a hassle upfront, but in the end, the quality of your work will speak for itself. Additionally, wearing a NIOSH-approved respirator while preparing and painting can protect you from harmful particles and fumes.
To recap, starting with clean surfaces and good edge protection sets you up for a professional-looking finish. What’s your go-to tip for prepping a space for painting?
Effective Painting Techniques for Speed and Accuracy
Got plans to paint your space? You’re not alone—many of us dread the thought of touch-ups and messy walls. A more efficient approach works wonders for keeping your project on track.
First off, consider painting from top to bottom and left to right. This technique can cut down on those pesky touch-ups and keeps things moving smoothly. When you’re ready to roll, try using a “W” motion. This helps spread the paint evenly and avoids those annoying roller marks that can ruin a great finish.
Don’t forget to cut in along the edges—around ceilings and baseboards—before you start with the roller. It really helps create that seamless look we all want. And here’s a tip: keep your tools clean and organized. It might seem like a small detail, but it’ll make a big difference in how fast and efficiently you work.
So, why does this matter? Well, allowing enough drying time between coats is key. Most water-based paints need about 2 to 4 hours to dry properly. Rushing this step can lead to issues down the road, and trust me, nobody wants to repaint.
Professional painters often rely on these techniques, and they can certainly save you a lot of headaches. As you paint, keep these tips in mind for better results, quicker progress, and less stress.
Using a high-quality paint sprayer with adjustable pressure settings can also speed up your project and ensure an even finish.
Ready to tackle your painting project? With these tricks, you’re set for success! What area of your home are you considering giving a fresh coat?
How to Clean Up After Painting
Cleaning up after painting can feel like a chore, but keeping your space tidy and your tools in good shape shouldn’t be ignored. So, what’s the best way to go about it?
Start with those brushes and rollers. You’ve gotta clean them right after you’re done. For latex paint, warm soapy water does the trick. If you’ve used oil-based paint, grab some mineral spirits. Don’t let them sit around all day—clean them promptly to avoid a sticky mess later.
Spills happen to the best of us, right? That’s why keeping some damp cloths handy is ideal. It’ll save you a huge headache because dried paint can transform into a real hassle to clean up.
When you’re done, empty out those paint trays. And about that leftover paint? Put it in clearly labeled containers for any future touch-ups you might need down the line. Trust me—having painted surfaces can make touch-ups so much easier.
Don’t forget about your drop cloths. They’ve saved your floors, so give them a good wash and they’ll be ready to go for your next project.
Lastly, give your painted surfaces some time to cure before moving your furniture back. Allowing a few days lets the paint set, helping you avoid smudges or stickiness when you rearrange.
Also, consider wearing powder-free gloves during cleanup to protect your hands from paint and cleaning chemicals safely.
Troubleshooting Common Painting Problems for a Flawless Finish
Have you ever tackled a painting project only to face unexpected issues? It can be frustrating when things don’t go as planned. If you notice peeling paint, it’s usually a big clue that the prep work wasn’t done well enough. Cleaning surfaces with TSP soap can make a world of difference—good adhesion is key to a successful paint job.
If you run into drips or runs while you’re painting, don’t let them sit. Just grab your brush or roller and smooth them out right away; it’s much easier to fix them then rather than dealing with a bigger mess later on. When it comes to painting ceilings, a common problem is brush or roller marks. The trick here is to avoid overloading your tools and to use long, even strokes. It really helps to keep things looking neat and professional.
One vital tip to remember is to allow for proper drying time—between 2 to 4 hours between coats is ideal. This helps prevent bubbling or lifting, making sure you can move through your room quickly while still getting that gorgeous finish, even on old paint. Using ergonomic painter’s tools can also reduce fatigue and improve precision, especially during large projects. So, what’s your next project? Remember, a little prep work and attention can go a long way!
Frequently Asked Questions
How to Paint a Room Without Making a Mess?
To paint a room without making a mess, we’ll use drop cloths, painter’s tape, and smart furniture arrangement. Utilizing proper brush techniques and roller methods, plus taking care of drying time, helps us achieve flawless results.
How to Speed up Painting a Room?
To speed up painting a room, we focus on time-saving techniques like wall preparation, tool organization, and utilizing painter’s tape. Project planning and efficient brush techniques enhance rolling speed, while paint drying intervals optimize cleanup efficiency.
What Is the Correct Order to Paint a Room?
We should start by applying primer types and painting the ceiling, then walls with edge techniques. Next, we tackle trim using appropriate finish options, considering drying times, while keeping safety measures and clean up tips in mind.
How to Paint Fast and Efficiently?
To paint fast and efficiently, we’ll focus on brush techniques, proper color selection, surface preparation, and tool organization. With good ventilation, we’ll manage drying times, apply primer, and use paint rollers for quick coverage and easy cleanup.