As an Amazon Associate, we earn from qualifying purchases. Some links on this site are affiliate links at no extra cost to you. Our recommendations are based on thorough research and editorial judgment.

Skim Coating Basics: Tools, Technique, and Common Mistakes
Are you tired of dealing with uneven walls or a rough finish in your home? Skim coating might be what you need! It’s a great way to smooth out those imperfections and give your walls a fresh look.
You may be interested


To dive into skim coating, you’ll need a few basic tools: grab a 12- or 14-inch taping knife, a mud pan, and a power drill with a mixer attachment. Before you start, make sure to clean your walls and give them a good once-over for any flaws. You’ll want to apply the joint compound in thin layers. Start out with a 6-inch knife to get the hang of it, then switch to the bigger knife for that smooth final touch.
So, what mistakes should you watch out for? First off, don’t skip the prep work. If you don’t clean your surfaces or use dirty tools, you’ll just end up facing more problems later. Trust me, the time spent prepping makes all the difference.
The best part is that this process isn’t as tricky as it sounds! Just take your time, and you’ll get there. Remember to stay patient, as achieving that perfect finish can take a little practice.
In summary, skim coating is a handy skill to have for any home project. What wall would you love to transform?
Key Takeaways
- Essential tools include a taping knife, mud pan, power drill with mixer, sanding pads, and protective gear for safety and efficiency.
- Proper surface preparation involves cleaning walls, inspecting for imperfections, and using quality materials to enhance adhesion and durability.
- Follow a step-by-step technique: mix joint compound, apply coats using progressively larger knives, and sand lightly between applications for a smooth finish.
- Common mistakes include skipping surface prep, applying too thick layers, neglecting sanding between coats, and using dirty tools, which can lead to poor results.
- Consistent technique, good lighting for inspection, and patience are key to mastering skim coating and achieving a professional finish.
Essential Tools for Successful Skim Coating

Ever tried skim coating and felt overwhelmed by the mess it makes? It can be quite a hassle, but having the right tools makes all the difference. You’ll want a solid 12-inch or 14-inch taping knife to spread that joint compound smoothly. And don’t forget about a good mud pan to keep everything organized while you work.
Mixing can be a chore, but a power drill with a mixer attachment can really make things easier. You want to get that joint compound mixed with water to a thick cake batter consistency – trust me, it makes a world of difference. And for the finishing touches, having sanding pads in 220 and 180 grit ready will help you achieve that flawless look.
If you’re tackling larger areas, you’ll find a skimming blade handy to extend your reach. But remember to gear up! Protective gloves, goggles, and a dust mask are must-haves to keep you safe from the dust and debris that comes with the job.
Using plastic sheeting with proper thickness and durability can help protect your workspace and keep the area clean during skim coating.
Recommended Products

TIME = MONEY | Make the shift from hand finishing tools to automatic tools and dramatically increase your finishing speed with no compromises in quality.

FULL SET OF TAPE-TECH DRYWALL TAPING TOOLS PLUS BONUS EXTENDABLE HANDLES AND 2 ANGLE HEADS

GENUINE LEVEL5 | If quality, performance, and reliability of your finishing tools matters, choose LEVEL5 brand tools.
Your Guide to Skim Coating: Step by Step

Are your walls looking a bit rough around the edges? You’re probably wondering how to get that smooth, professional finish without calling in a pro. Start by cleaning the walls with some mild detergent and warm water to make sure the joint compound sticks like glue.
Now, let’s talk about mixing. Combine the joint compound with water until it’s nice and creamy. This consistency makes it a lot easier to spread later on. So, grab a 6-inch drywall knife and apply your first coat, working from top to bottom. After that, grab a larger 10-inch knife or a skimming blade to smooth it all out. Trust me, taking your time here pays off.
Drying time is crucial, so don’t rush this step. Giving each coat enough time to dry helps eliminate imperfections that could mess up your finish. Once everything’s dry, look over each layer carefully. It’s easier to spot flaws under bright lighting. If you notice any, just sand them down gently.
The best part is, if you’re still not satisfied with how it looks, don’t hesitate to slap on another coat or two. It’s all about those little details!
In the end, a flawless finish can really transform your space. Ready to take on that skim coating project? Using the right tools and materials ensures a safer and more effective process from start to finish.
Recommended Products

top of the packing line for drywall tape and finishing with a bonus Delko Banjo Taper at no extra cost...the best banjo All-Wall!

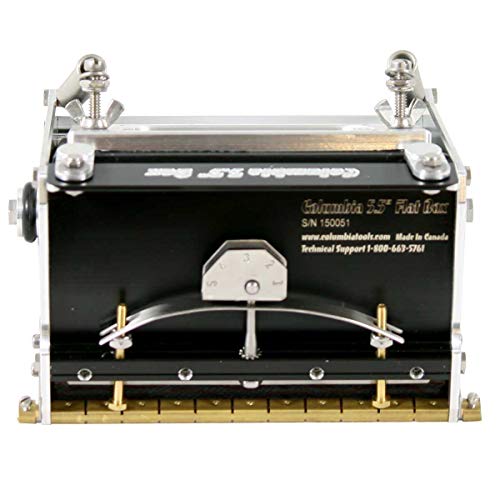
CONTRACTOR GRADE 10/12 FLAT BOX SET AT A VALUE PRICE

FAST LEARNING CURVE | Once you've used automatic drywall finishing tools, you'll wonder why you didn't start sooner.
Avoid These Common Skim Coating Mistakes

Ever tried skim coating and ended up with a mess? Let’s talk about some common mistakes that can really trip you up.
First off, don’t skip the surface prep. It’s crucial to have a clean, smooth surface before you even think about applying that joint compound. Dust, dirt, or any kind of imperfection can seriously affect how well the skim coat sticks. It might seem like a hassle, but it’s worth taking that extra time upfront.
When it comes to applying the joint compound, here’s the trick: go for thin layers! If you load it on thick, you’re asking for issues like cracking or peeling down the line. And don’t rush the process. Each coat needs enough time to dry—give it some time, especially if the humidity or temperature is high.
Now, let’s not forget about sanding between coats. Ever wonder why that last coat doesn’t look as good as you hoped? If you skip that sanding part, those little flaws will show through once it’s all done. So grab that sander and smooth things out—it’s a step that pays off big time.
Keeping your tools clean is another essential step. Dirty tools can leave drag lines and create uneven surfaces. Believe me, this can make your hard work feel like it’s for nothing. With clean tools, you’re setting yourself up for a smoother finish.
Additionally, protecting your workspace with polyethylene sheeting can help keep dust and debris from ruining your progress.
Recommended Products

Sandsmart control continuously monitors the load on the drum motor and automatically regulates the speed of the conveyor motor

Sandsmart control continuously monitors the load on the drum motor and automatically regulates the speed of the conveyor motor

Efficient Sanding: Powered by a 1.75HP powerful motor at 1440 RPM, this VEVOR 22" drum sander with open stand delivers consistent, high-efficiency sanding. Handles boards up to 22" wide and 1/32"–4" thick for smooth finishing and fine results
Why Surface Preparation Matters in Skim Coating
Ever thought about skipping straight to skim coating? It’s an easy trap to fall into, but trust me, taking the time for proper surface preparation is crucial for the best results.
Start by giving those walls a good clean. Dust and grease can seriously mess with how well your joint compound sticks, so make sure to wipe everything down. After that, check for any bumps or uneven spots. This is where sanding or smoothing comes into play. Imperfections on the surface can really mess up your finish, so don’t skip this step!
Think about what happens if you don’t clear out debris. It can lead to bubbling and flaking down the road, which nobody wants after all that hard work. By putting effort into these prep steps, you set yourself up for a project that not only looks great but also lasts longer.
One more thing to remember: priming is key. It provides a nice base for your paint or wallpaper. The best part is, following these steps is going to make everything look smooth and professional when you’re finished. Using high-quality materials during repair also ensures durability and long-lasting results.
Troubleshooting Skim Coating Problems
Have you ever faced a situation where your skim coating just didn’t turn out right? It’s frustrating, isn’t it? One common issue is bubbles. These pesky little things often show up when the joint compound is applied too thick. To avoid that, stick to applying multiple thin coats instead.
Uneven surfaces can be another headache during this process. When you feel those bumps and dips, it’s a good idea to sand between your applications thoroughly. This step can really help you achieve that smooth finish you’re after. As for cracking, that’s usually a sign that your materials weren’t properly acclimatized. Give them time to adjust to your room’s conditions before diving in.
Now, if you notice visible seams or lumpy spots, it might be time to look closely at your application technique. Using static blade angles can lead to those hard edges that stand out like a sore thumb. So, adjust your angles to get a better blend.
Also, don’t skip the inspection under bright lighting before painting. You want to catch every little imperfection because painting over those can lead to peeling paint later on.
In short, skim coating requires patience and attention to detail, but with a few tweaks, you can achieve fantastic results. Proper ventilation with an inline fan can also improve drying times and surface quality. What challenges have you faced while skim coating? Let’s swap tips!
Recommended Products

Narrow flat box is ideal for tight areas and detail finishing

GENUINE LEVEL5 ›› If quality, performance, and reliability of your finishing tools matters, choose LEVEL5 brand tools.
How Can You Fix Common Skim Coating Problems?
Dealing with skim coating problems can be frustrating, can’t it? If you’ve noticed bubbles or imperfections in your work, don’t fret—there’s a straightforward fix. Just sand down the affected areas lightly, and then reapply a thin layer of joint compound. It’s crucial to let it dry completely before you sand it again for that smooth finish.
Now, if the finish looks uneven, try this: reapply a thin coat with your taping knife held at an angle, and make sure to use even pressure. It’s all about getting that nice, flat look. And when it comes to sections where you might’ve put the joint compound on too thick, simply sand them down, feathering the edges, then add multiple thin layers instead of one thick one.
Cracks? They’re often a common issue, but using a flexible joint compound can work wonders here. Remember to keep your eyes peeled for any flaws. So, why does this matter? Regularly checking your work in good lighting can help you catch those imperfections before they become a bigger headache. Using the right brush types can also improve the smoothness and application of joint compound.
Recommended Products

LIGHTWEIGHT BUILD FOR LONG HOURS Weighing just 7.1 lb, the Mirka electric drywall sander reduces fatigue during extended sanding on ceilings and walls—ideal for popcorn ceiling removal, painting prep, or full-room renovation work.

PVC HEATING BLANKET: Makes it quick and simple to create bends with an 16-in. radius, offsets, or saddles in 3-1/2-in. to 4-in. PVC pipes

PROFESSIONAL GRADE | The flexible brass blade allows you to provide the proper compound application and crown - whether you're applying the first fill coat or the final finish coat. Butt and flat joint edges are also feathered to perfection.
Frequently Asked Questions
What Are Common Skim Coating Mistakes?
We often overlook surface preparation and drying time, struggle with thickness control and mixing consistency, and rush application speed. Proper tool maintenance and texture matching help avoid common skim coating mistakes for flawless results.
How to Use Skim Coat for Beginners?
To hit the ground running with skim coat application, we should focus on wall preparation and mixing compound well. Prioritize coat thickness and drying time, perfect our sanding techniques, and follow DIY tips for an effortless cleanup process.
What Tools Are Needed for Skim Coating?
For skim coating, we’ll need a putty knife, drywall trowel, mixing bucket, sanding sponge, joint compound, paint roller, safety gear, and a flexible blade. Ladder stability’s important too, especially when using a texture roller.
How to Skim Coat Without Leaving Lines?
To skim coat without leaving lines, we should focus on consistent pressure and feathering edges with gentle strokes. Mixing consistency matters, too. Practicing our smoothing techniques under proper lighting helps us avoid bumps and achieve a flawless finish.


