As an Amazon Associate, we earn from qualifying purchases. Some links on this site are affiliate links at no extra cost to you. Our recommendations are based on thorough research and editorial judgment.

Feathering Edges After Scraping: How to Make Old Paint Disappear
Ever tried to get rid of old paint but found it just won’t budge? You’re not alone! It can be such a hassle when you just want a fresh start on your walls.
You may be interested


Luckily, there’s a straightforward way to feather the edges and make that old paint disappear.
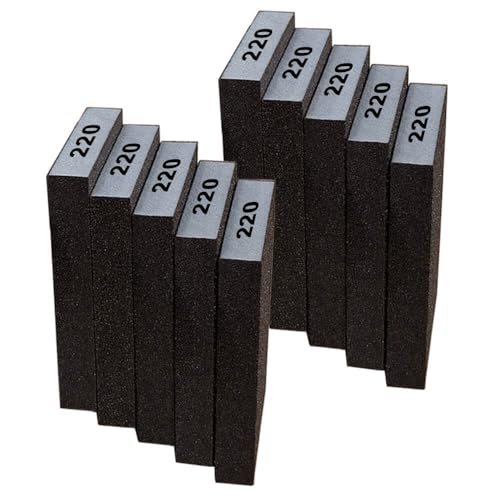
Start by lightly sanding the edges with 220-grit sandpaper. This ensures a smooth transition from the old to the new and prevents that rough look. You want it to feel nice and soft to the touch—trust me, it makes a difference later on.
Next up, fill in any gaps with thin layers of spackle. Don’t rush this; let each layer dry completely before adding the next. It might seem tedious, but take your time. A well-filled gap will pay off in the final look.
Once the spackle is dry, it’s time to prime the repaired areas. Go for a high-quality primer to help with an even color all around. This step is crucial. If you skip it, you might end up with color differences that are hard to fix later.
After priming, you’re ready to paint! Use multiple thin coats of latex paint, but make sure to lightly sand between each coat. This little trick helps to blend everything nicely for that seamless finish.
So, why does this matter? Well, a well-prepared surface means your paint will adhere better and last longer. Honestly, it’s all about the prep work—putting in that effort now will save you headaches down the road.
In short, feathering edges after scraping is key to making old paint vanish. You can tackle that painting project with confidence.
What’s your next DIY adventure going to be?
Key Takeaways
- Start by lightly sanding the edges of old paint with fine grit sandpaper (120-220 grit) for a smooth transition.
- Apply a thin layer of drywall compound to gaps or imperfections, ensuring it blends with the surrounding surface.
- Allow each layer of compound to dry thoroughly before sanding to achieve a uniform surface.
- Prime all repaired areas to enhance adhesion and help match the color of old and new paint.
- Use multiple thin coats of latex paint, sanding lightly between layers for a seamless finish.
Why Feathering Edges Matters?

Feathering edges is super important if you want a paint job that looks flawless. Ever notice how new paint can stand out from old paint? Those visible lines or ridges can be a real eyesore. That’s where proper feathering techniques come in—they’re essential for blending those transitions so everything looks seamless.
When you feather edges, you’re essentially creating a gentle slope between different paint layers. This not only helps with blending but also boosts paint adhesion. After all, the last thing you want is for your freshly painted surface to start peeling or chipping, especially in spots that see a lot of traffic. Here’s the trick: sand down the edges or apply some spackle to create that gradual slope.
Another tip? Always use a good primer after feathering. This step can really help to conceal those edges and give you a more uniform color across your surface. Frankly, it’s the little details that make a big difference. By mastering these feathering techniques, your repairs will look professional rather than rushed. For best results, consider using no-sanding spackle to save effort while ensuring a smooth finish on your repairs.
Essential Tools and Materials for Effective Edge Feathering

When you’re getting ready to feather edges, it can be frustrating if you don’t have the right tools on hand. Trust me, having the right stuff can make all the difference in getting that clean, professional look you’re after.
Start with some fine grit sandpaper—220 grit is what you’re looking for. It helps smooth out the transition between surfaces without messing up what’s underneath. You’ll also want a putty knife or drywall knife for spreading thin layers of spackle or drywall compound. Here’s the trick: let each layer dry completely before you start sanding again. If you skip this step, you’re just asking for a bumpy finish.
Then, consider grabbing a sanding block. It helps to apply even pressure, which goes a long way toward a smoother finish. Don’t forget about high-quality primer; it’s crucial for making the surface uniform and reducing color differences.
And let’s be real—safety first, right? So, make sure you wear protective gear, like dust masks and safety goggles. It may not seem like a big deal, but it’s better to be safe than sorry while you’re working on your projects.
In short, having the right tools and taking safety precautions can set you up for success. Using the appropriate paint thinner compatibility helps ensure that the finishing touches blend seamlessly without damaging the surface. What projects are you planning to tackle next with these tips in mind?
Recommended Products

Premium european high density foam - robust and durable foam sanding blocks for hand sanding

Material:The sanding sponge is made of high quality brown corundum and high density sponge. Flexibility can rebound quickly, durable and not easy to tear
10Pcs Fine Sanding Block Set: Provides a range of options for different levels of sanding and cleaning.
Step-by-Step Edge Feathering Guide

Ever tackled a tricky paint job where the edges just don’t blend? It can be super frustrating, but don’t worry! With some edge feathering know-how, you can make those cuts disappear into the background. Let’s dive into some straightforward steps that can really make your project shine.
First off, you’ll want to grab some fine grit sandpaper, ideally between 120 to 220 grit. Lightly sanding the edges of the paint helps create that smooth transition to your new surface. It’s a small step, but trust me, it’s important.
Next, if you notice any gaps or rough spots where the paint’s been removed, fill ’em in with spackle or filler. This will help create an even canvas for your primer. Speaking of primer, don’t skip this part! Applying a high-quality primer on those feathered edges helps improve adhesion and lessens the contrast.
When it comes time to put on your latex paint, here’s the trick: opt for multiple thin coats instead of slapping on one thick layer. Thin layers dry faster, allowing you to blend the paint much more seamlessly. And guess what? Lightly sanding between each of those coats can take your finish to the next level—smooth as silk.
So, why does this matter? Well, these little extra efforts can save you from a less-than-perfect finish and make your project look professional. Just remember, patience is key in this process.
Also, selecting the right primer with strong adhesion capabilities ensures the new paint bonds well to feathered edges for a lasting finish.
To wrap things up, take your time with each step, and you’ll end up with a flawless edge that’s anything but noticeable. Have you tried edge feathering before? What tips do you have?
Achieve a Smooth Transition Using These Tips
Have you ever struggled with achieving a flawless paint job? It can be frustrating when the transition between old and new paint isn’t seamless. A smooth shift is key to getting those professional-looking results you want.
Try this: start by lightly sanding the edges where the old paint meets bare surfaces with 120-grit sandpaper. This creates a gentle slope that helps the new paint stick better. Next, grab some spackle or drywall compound and apply a thin layer over those scraped areas. Make sure to blend it well into the surrounding paint—it’s all about creating that smooth transition.
Don’t rush this process. Give the spackle enough time to dry before doing any further work. Once it’s dry, sand that area lightly with fine grit sandpaper (320-grit or higher) to ensure a smooth texture. When you’re ready for the final coat, go for a high-quality paintbrush or roller—this makes a huge difference in coverage and the overall look.
So, why does this matter? It’s about protecting your hard work. Think about adding a clear coat at the end. Not only does it preserve your new finish, but it also takes the appearance of your project up a notch. For the best results, consider using a fast-drying primer before painting to improve adhesion and smoothness.
In short, a little care goes a long way in painting! What have you found most challenging when it comes to painting projects?
Mistakes to Avoid in Edge Feathering Techniques
Feathering edges might look simple, but it can quickly go sideways with just a few common blunders. Let’s dive into how to avoid the pitfalls that can ruin your hard work.
First off, don’t start with coarse sandpaper. Instead, grab some fine grit to gently blend those edges. You want a smooth transition, not a rough one. And be careful when you’re sanding—not removing too much existing paint is key. If you create visible dips, good luck hiding them later!
Cleaning up is another step you can’t afford to skip. After scraping, make sure everything is thoroughly cleaned. Any dust left behind can mess with the primer adhesion, which is the last thing you want for a solid finish. Honestly, going through with a clean slate sets the stage for better results.
Now, once you’ve smoothed everything out, don’t forget about primer. It might seem like an extra step, but it’s essential. Skipping it could lead to those annoying color contrasts that can ruin your project. The best part? A little time spent on primer can pay off big in the end.
And really, take your time with this whole process. Rushing through will only lead to regrets. Let those multiple thin coats of clear paint dry fully between each application. This patience is what helps achieve that seamless finish everyone hopes for.
Also, using tools like a flexible putty knife can greatly assist in the smooth application and removal of old paint, ensuring cleaner edges and better prep work.
In short, keep these tips in mind: choose fine sandpaper, clean well, always apply primer, and don’t rush your coats. So, what’s your next project, and how will you make sure to avoid these mistakes?
Finishing Touches for Feathering Edges
Have you ever stared at a wall, frustrated by the old paint that just won’t budge? Once you’ve scraped away that stubborn layer, the next step is to tackle those feathered edges. It’s all about creating that smooth transition between the old and new paint so your finish looks sharp.
Start by grabbing some fine 120-grit sandpaper and gently sand those edges. This step can make a world of difference, transforming rough edges into a seamless blend. After that, you might notice some gaps; don’t panic. Filling those with a drywall compound is your next move. Just apply it in thin layers to keep the sanding to a minimum later on. Remember to let each layer dry fully before adding the next.
Now, onto priming. It’s super important to prime those repaired areas, as it helps the new paint stick—and it’ll help everything match up color-wise too. Honestly, missing this step might lead to some serious mismatches later. So, take your time and check for any low spots that might need an extra touch of compound. Taking a moment to fix these will ensure your repairs are nearly invisible.
For best results, consider using a primer with excellent adhesion properties to ensure a durable and flawless finish.
In short, a little patience now goes a long way in achieving that professional look you want. Instead of rushing through, why not savor the process? After all, what’s more satisfying than a beautifully finished wall that you worked hard on?
Frequently Asked Questions
How to Feather Out Paint Edges?
To feather out paint edges, we can use a brush technique by lightly blending the old and new paint. It’s essential to apply thin, even layers and allow each to dry before sanding for a smooth finish.
How to Feather Peeling Paint?
To feather peeling paint, we should scrape gently, sand edges for smoother changes, and apply layers of drywall compound. This enhances paint adhesion, ensuring a seamless blend between old and new paint without visible repairs.
How to Make Paint Lines Disappear?
To make paint lines disappear, we blend colors like artists on canvas. We sand edges for a smooth changeover, apply primer, and use multiple thin coats, ensuring a seamless finish that’ll fool the eye beautifully.
How Do You Scrape off Old Paint?
To scrape off old paint effectively, we start at the edges and work inward, using a putty knife. If necessary, we can use a chemical stripper, but let’s always prioritize safety during paint removal.


