As an Amazon Associate, we earn from qualifying purchases. Some links on this site are affiliate links at no extra cost to you. Our recommendations are based on thorough research and editorial judgment.

Sanding 101: Grit Selection for Walls, Wood Trim, and Cabinets
Are you dealing with rough walls, trim, or cabinets that need a fresh look? You’re not alone! Getting that smooth finish can be tricky, but it all starts with picking the right sandpaper grit.
You may be interested


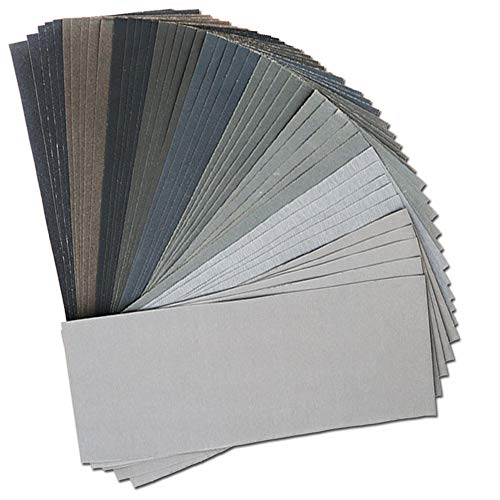
For those tougher jobs where you need to really remove material, coarse grits like 40-80 are your best bet. They’ll help you tackle the heavy lifting. After that, switch it up to medium grits in the 100-150 range. This step smooths out any scratches you might’ve created in the first pass.
Finally, finish with fine grits ranging from 180-240. This is where you’ll really enhance paint adhesion, making sure your new paint sticks just right.
Here’s the trick: don’t skip the cleanup after sanding. Dust can be pesky, and if you leave it on the surface, it can ruin that smooth finish you’re aiming for. A quick wipe-down ensures a quality paint job, and your efforts won’t go to waste.
So, why bother with all of this? Honestly, taking the time to understand grit selection can significantly elevate your project’s outcome. It’s all in the details, after all.
Whether you’re prepping for a big paint job or just refreshing some old trim, the right sanding technique can make all the difference.
To sum it all up, choosing the right sandpaper grit isn’t just nitpicking; it’s essential for achieving that smooth finish you want. What’s your next DIY project?
Key Takeaways
- For rough surfaces or old paint removal, use coarse grit sandpaper (40-80) to effectively smooth the area.
- Medium grit sandpaper (100-150) is ideal for eliminating scratches made by coarser grits and prepping surfaces for painting.
- Fine grit sandpaper (180-240) is essential for enhancing paint adhesion and achieving a polished finish on walls and trim.
- Extra-fine grits (320 and above) are recommended for high-gloss finishes, providing a smooth surface that enhances the final appearance.
- Always match sandpaper grit with the material type and project requirements to achieve optimal sanding efficiency and finish quality.
Understanding the Importance of Sanding for a Quality Paint Job

Why does sanding matter so much when you’re prepping for a paint job? If you’ve ever noticed those pesky imperfections in your finish, you’ll want to pay attention to this step. Sanding is key to getting a smooth surface on your walls, wood trim, and cabinets. It’s a simple detail that separates a good paint job from a great one.
Start with a coarser grit sandpaper for heavy-duty material removal, and then switch to finer grits for that finishing touch. This process helps smooth out the bumps, scratches, and dents that can ruin the look. Don’t skip on cleaning the surface after sanding; this is where dust can turn into a real problem for paint adhesion. A clean surface ensures your paint won’t peel or flake, which means your work lasts longer and looks better.
Here’s the trick: when choosing your sandpaper, take the time to pick the right grits. Think about it—rough surfaces need a heavy grit, while for polishing, a finer grit really shines. Skipping this step can lead to a paint job that’s not just flawed but could require you to start all over.
Honestly, investing a little time in proper sanding can make all the difference. It’s worth it to take those extra steps for a result that you’ll be proud of. So next time you tackle that paint project, remember to sand thoroughly and clean up afterward. Happy painting! Using sanding blocks with an ergonomic design can also reduce hand fatigue, making the process more comfortable and efficient.
Selecting the Right Sandpaper Grit for Different Surfaces

Choosing the right sandpaper grit can be a real puzzle, especially if you’re aiming for that smooth finish on your next painting project. Have you ever jumped into a repainting job only to find yourself stuck with rough patches or stubborn old paint? It all comes down to selecting the right grit for the job.
For those rough surfaces that feel like sandpaper themselves and desperately need some heavy lifting, reach for coarser grit sandpaper in the 40-80 range. This stuff can really strip away old paint without much fuss. Once you’ve got the surface leveled out, it’s time to switch gears. Medium grit, around 100-150, is perfect for smoothing out those pesky scratches that the coarser stuff leaves behind.
If you’re prepping a surface for painting, you’ll want fine grit sandpaper (like 180-240) to get it just right. This step is so important for enhancing paint adhesion! And let’s not forget about that high-gloss finish—especially if you’re working on cabinets. For that, you should definitely opt for extra-fine grits, 320 and above. Choosing the appropriate grit size based on your project needs will maximize sanding efficiency and result in a polished, professional look.
Recommended Products

Wide Variety of Grit - Perfect selection of different grits, Including 5 sheets of each grit: 400/ 600/ 800/ 1000/ 1200/ 1500/ 2000/ 2500/ 3000, total 45 sheets.

Multi-Stage Sandpaper Assortment: This Shineboc 9x3.6 inch sandpaper pack includes 21 sheets with 7 grits (120/220/400/600/800/1000/2000), 3 sheets per grit, suitable for all sanding stages from rough to fine
Sanding Techniques: Hand vs. Power Sanding – What’s Best for Your Project?

When it comes to sanding, you might find yourself caught in a bit of a dilemma: should you go for good old sandpaper or reach for a power sander? It really boils down to what you’re working on. Hand sanding gives you that precise control, which is perfect for those detailed jobs and tighter spaces. It’s particularly useful when you’re doing finishing touches on painted surfaces or dealing with smaller, intricate areas where you need a bit of finesse.
But don’t count out power sanding tools just yet. Devices like orbital or belt sanders can really speed up the process on larger projects. If you’re facing off against layers of paint or rough wood, these tools can save you a ton of time and effort while delivering a smooth finish quickly.
So, how do you decide which route to take? Think about the size and complexity of your project and your own comfort level with sanding tools. If it’s a big job, you might want to lean toward the power tools. For smaller or more detailed work, hand sanding is often the way to go.
Here’s the trick: start with a coarser grit for heavy removal, then switch to finer grits for that polished look. This method ensures you don’t underperform at any stage of the sanding process.
In the end, whether you choose hand sanding or power sanding will depend on your specific needs. Remember that using tools with ergonomic handles can reduce fatigue during longer sanding sessions. What’s your next project?
Cleaning Your Surface: The Foundation of Effective Sanding
A clean surface is crucial for effective sanding. Think about it—what happens if you sand over grime or leftover residue? You end up ruining all your hard work. So, let’s dive into the cleaning process.
Start by grabbing a non-toxic cleaner, like Krud Kutter, and give the wood surface a good scrub. This will get rid of any grime or residue that could mess with your finish. After that, it’s smart to wipe everything down with a damp cloth to make sure no cleaner is left behind. Remember, letting the surface dry completely is key. If you don’t, you might grind dirt into the wood grain, which could really compromise future paint adhesion.
When tackling spaces like kitchen cabinets, don’t underestimate how grease can build up and impact the quality of your work. Keep an eye out for any leftover dust or debris before you even think about starting to sand.
A clean surface not only makes the sanding process smoother, but it also leads to a final finish that’s more durable. It’s all connected! So, before you pick up that sandpaper, take the time to clean. Your future self will definitely thank you for it.
Why rush when taking a few extra minutes now can save you time later? Clean is the way to go! Using an air scrubber during sanding helps capture dust particles, improving air quality and maintaining a cleaner work environment.
The Tools You Need for Sanding
Got a project that needs some smoothing out? Getting the right tools for sanding can make a huge difference. Start off with hand-held sanding blocks. They’re perfect for those tight corners and little details where precision is key.
For DIY projects that cover more ground, consider using power tools like belt or orbital sanders. These tools work wonders when you need to tackle larger areas quickly. To get the best results, choosing the right sandpaper grit is essential. Start with coarser grits, like 80-120, for heavy material removal. Once that’s done, switch to finer grits—like 220-320—to get that impeccable finish everyone loves.
Here’s a tip: don’t overlook sanding sponges. They’re super handy for navigating curved surfaces smoothly. And if you want to keep your workspace tidy, think about getting a dust extractor or vacuum system. It really helps cut down on that annoying dust flying around.
Also, make sure to select sanding belts that are compatible with your sander’s size to avoid slippage and ensure optimal sanding performance.
With these tools at the ready, you’re all set to create some beautifully finished surfaces. So, what’s your next project?
Recommended Products

POWERFUL - With a 2.8 amp motor and 13,000 orbits per minute, it's able to deliver a smooth performance over a variety of sanding applications.

Dura-Gold Pro Series: 7-Piece Rectangle and Contoured Profile Hook & Loop Hand Sanding Block Set. Uniquely designed rectangle sanding blocks that are ideal for sanding intricate contoured, convex, and concave surface shapes. Professional hook & loop sanding blocks made from a durable, medium-density polyurethane foam, these hand sanders are built to last. The blocks measure from 1-1/2" to 2-3/4" wide, and are 5" to 10-3/4" long.

1.Versatile sanding set: Featuring 16 pieces of assorted shape sanding blocks, this set is perfect for all your woodworking needs. With a new improved design that allows for quick and easy changing of shapes, you'll be able to tackle any project with ease
Filling Imperfections: The Importance of Wood Filler
Filling imperfections in wood is more than just about looks; it’s a crucial step if you want a smooth finish. When tackling your wood projects, you’re likely to encounter holes, cracks, and blemishes. That’s where wood filler comes into play. Picking the right type—whether water-based or solvent-based—matters a lot, especially depending on what finish you’re planning to use later on.
When you apply wood filler, here’s the trick: use a putty knife to really press it into the defect. You want it to adhere well so that it seamlessly blends with the surrounding surface. Make sure to let it dry thoroughly. After that, grab some sandpaper and smooth it out to match the wood’s texture. This creates a clean, flawless surface that’s ready for painting or staining, making your finished project look polished while also sealing up any gaps that could cause trouble down the line.
So, why does this matter? Well, a solidly filled surface doesn’t just make your piece look good; it helps prevent future damage, too. Don’t rush this step—it can make all the difference in the final outcome!
In the end, a bit of wood filler can go a long way. Have you tried using wood filler in your projects? It might just be the upgrade you’ve been looking for! Proper material quality is essential to ensure durability and a smooth finish.
Recommended Products

Gorilla All Purpose Wood Filler is the go-to product for strong, durable repairs on cracks, gouges and holes.

10 in 1 Putty Knife: A mutifunctional paint scraper for home Improvement and professional painters

Sturdy Design: The blade and handle in our drywall knife are processed in one piece, which is very sturdy. Stainless steel blade has superior load-bearing performance for a long time to use
Safety First: Essential Precautions When Sanding
Sanding can actually be pretty overwhelming. Not only is it messy, but it also carries some serious risks if you don’t take the right precautions. Safety should be at the forefront of your mind, so make it a point to wear a dust mask and goggles. That wood dust can be harmful, and those little bits flying around? You definitely don’t want to catch one in your eye.
Good ventilation is also key here. Make sure your workspace is well-ventilated to keep dust and fumes to a minimum, especially if you’re working with older materials that might contain lead. By the way, do you know how to check for lead? It’s simple: grab a home test kit and check your materials before you start. If you find lead, it’s best to call in the pros.
Don’t forget about your skin. Sandpaper can be rough on the hands, so throw on a pair of gloves to avoid irritation from the dust and the material itself. And let’s talk about keeping your space clean. A tidy workspace makes all the difference, right? Use a vacuum or a dust extractor to manage any debris as you work.
To ensure effective respiratory protection, choose a dust mask with an adjustable fit to prevent air leaks and improve comfort.
In short, paying attention to safety can really enhance your sanding experience and save you from any unnecessary hazards. Are you ready to tackle that project with these tips in mind?
Recommended Products

PROTECTION : The AirGearPro G-500 Respirator mask and Safety Goggles are CE certified to ensure your protection during painting, woodworking, construction, sanding, renovation, demolition etc.

CE CERTIFIED COMPLETE RESPIRATOR KIT : The BREATHOO AirGuard half face respirator mask and anti-fog safety goggles are CE certified and designed for reliable performance. This complete kit includes a respirator mask, safety goggles, 2 filter boxes, 10 filter cotton pads, and filter covers, providing everything needed in one convenient package.

Dual Protection for Vapor, Dust & Eye Safety : BEESAFETY RD-518 respirator mask kit combines a half face respirator with safety goggles, designed to help reduce exposure to organic vapors, paint fumes and airborne particles such as dust and sanding debris. Provides both respiratory and eye protection, making it ideal for painting, sanding, resin work and construction environments
How to Effectively Clean Up After Sanding: Key Steps
Cleaning up right after sanding can feel like a chore, but trust me, it makes all the difference for a polished finish. If you leave the dust lying around, it can settle back on whatever you’ve just worked on and ruin your hard work. So, how do you tackle this cleanup?
Start by grabbing your vacuum cleaner with a HEPA filter. This will not only save time but also help you capture all that annoying sanding dust from surfaces and corners. Don’t skip the nooks and crannies; they can be dust magnets.
Next, take a damp cloth or a tack cloth and wipe down all the clean surfaces. This step? Absolutely crucial. It snags any leftover dust and keeps it from ruining your freshly sanded piece.
Now, let’s not forget about the dust itself. Be sure to dispose of it properly by following your local guidelines. You wouldn’t want to just toss it in the trash and contribute to a mess somewhere else.
Having a designated cleanup area with your supplies can really streamline this whole process. It’s all about being organized and efficient.
So, why does this matter? Protecting your work surface ensures that your sanding project will have the perfect finish. A little cleanup effort goes a long way, doesn’t it?
In short, tackle that mess right away to keep your space neat and your projects looking sharp. What’s your favorite tip for cleaning up after a project?
Remember, sandpaper with anti-loading coatings can reduce the amount of dust produced, making cleanup easier.
Tips for Achieving a Professional Finish With Sanding
Sanding can feel a bit overwhelming, can’t it? But with the right tips and tools, it’s actually pretty straightforward to achieve that professional finish you’re dreaming of.
Start with coarse sandpaper, often in the range of 80-120 grit, to tackle those bigger imperfections. Once that’s done, gradually work your way up to finer grits, like 220-320, to really polish things off. Remember, always sand in the direction of the wood grain. This little trick helps prevent any scratches that could ruin that gorgeous surface you’ve created.
If you’re planning to paint, lightly sanding between coats with a finer grit like 240 will really help with adhesion. Keeping your workspace tidy is also crucial. A dust extractor can be a lifesaver here. It helps maintain paint quality and ensures you’re working with clean surfaces. So, why does this matter? A clean space means fewer issues down the line. Additionally, using sanding discs with pre-punched dust collection holes can significantly improve dust management and overall sanding efficiency.
Frequently Asked Questions
What Grit Sandpaper Should I Use on Wood Cabinets?
For wood cabinets, we should start with coarse grit for preparation, then move to medium and fine grits. Let’s remember wood grain considerations, sanding safety measures, and finish types comparison for excellent results!
What Grit Is Best for Sanding Trim?
For sanding trim, we prefer medium grit (100-150) initially and shift to finer grits. Remember, using safety precautions and proper tools can prevent common mistakes and enhance finish application methods for a stunning result.
What Grit Should You Use for Sanding Walls?
For wall surface preparation, we recommend starting with medium grit (100-150) for beginners, followed by fine grit (180-220) to achieve smooth finishes. This guarantees paint ready surfaces after drywall repair methods. Happy sanding!
What Is the Golden Rule of Sanding?
In our crafting journey, the golden rule of sanding is simple: always sand with the grain. By using the right sanding techniques, grit levels, and prioritizing safety, we’ll achieve flawless surface preparation and stunning finishing touches together.


