As an Amazon Associate, we earn from qualifying purchases. Some links on this site are affiliate links at no extra cost to you. Our recommendations are based on thorough research and editorial judgment.

Caulk Like a Pro: Choosing the Right Caulk and Getting Clean Lines
Have you ever looked at a caulking job and thought, “I could do better”? Selecting the right type of caulk is key to making your projects look professional. Silicone caulk is your go-to for high-moisture areas like kitchens and bathrooms, while acrylic latex is perfect for indoor woodwork.
You may be interested


Before you dive in, you’ll want to prep your surfaces. Clean them thoroughly and strip away any old caulk to ensure a solid bond. It’s amazing what a little prep work can do, right?
After that, grab a caulk gun with a drip-free mechanism. When you’re cutting the tube, aim for a 45-degree angle—it makes all the difference for precision.
Here’s the trick: use painter’s tape along the edges to create clean lines. Apply the caulk, then smooth it out right after you apply it. Don’t wait too long, or you might end up with uneven edges.
So, why does all of this matter? It’s about achieving that polished finish we all admire. Mastering these small steps can really elevate your DIY game. Just remember, a little care goes a long way.
Ready to take on your next caulking challenge?
Key Takeaways
- Choose the right caulk: silicone for bathrooms, acrylic latex for woodworking, polyurethane for outdoor use, and elastomeric for flexible areas.
- Use a high-quality caulk gun with a drip-free mechanism for better stability and control during application.
- Apply painter’s tape on both sides of the joint for straight lines and to minimize smudges on adjacent surfaces.
- Cut the caulk tube nozzle at a 45-degree angle for optimal flow and apply in small sections for easier handling.
- Smooth out the caulk immediately using a damp finger or caulking tool for a professional finish, ensuring clean lines.
What Is Caulk and Why Is It Important?

Have you ever noticed those pesky gaps around your windows or cracks in the bathroom tiles? It might not seem like a big deal, but ignoring them can turn into a nightmare down the line. Caulk is one of your best friends when it comes to keeping your home safe and energy-efficient.
When you seal up those gaps and cracks, you’re preventing air and moisture from weaving their way into your home. This is crucial, especially in places like the kitchen and bathroom where water is often present. Using silicone caulk, for instance, can create a waterproof barrier and help stop mold from making itself at home. Don’t wait for mold to show up—regularly checking and re-caulking these areas will save you headaches later.
And let’s talk about energy efficiency. Ever think about how much those little gaps around doors and windows can actually raise your heating and cooling bills? It can be a lot! Sealing them up with the right caulk can make a noticeable difference.
So, here’s the trick: when you’re picking out caulk, think about what environment you’re working in. Different types cater to different needs, whether you’re tackling a household repair or a bathroom upgrade. Check the labels and choose wisely for the best results.
Truth is, understanding the role of caulk could save you from serious damage and costly repairs down the road. By taking care of those small gaps and ensuring everything is sealed properly, you’re not just protecting your home—you’re extending its life. What’s stopping you from tackling those gaps today? Using a caulk gun with a drip-free mechanism can also make the application cleaner and reduce waste.
What Type of Caulk Should You Use?

When you’re about to start a caulking project, have you ever wondered what type of caulk is right for the job? The place where you’ll be using it can really change your choice. For areas like bathrooms that get a lot of moisture, silicone caulk is usually the way to go. Its waterproof qualities and mold resistance make it perfect for wet spots.
If you’re handling interior woodworking, say, around your baseboards, consider using acrylic latex caulk. It’s really user-friendly because you can easily paint over it to match your surfaces. For those outdoor projects, I’d recommend polyurethane caulk. It’s known for its strong adhesion and can handle temperature fluctuations quite well.
And what about roofs or places that tend to move a bit? That’s where elastomeric caulk shines. Its flexibility is crucial for areas that expand and contract. So, why does this matter? Choosing the right caulk based on where and how you’re using it can mean better results and longer-lasting repairs.
Remember to keep these points in mind when you whip out that caulking gun! Got a project in mind? What’s stopping you from getting started? Also, selecting a quick curing caulk can help speed up your project timeline and get your surfaces paint-ready faster.
Recommended Products

100% Silicone Caulk Protection: This silicone caulk white provides ultimate waterproof protection, ensuring a reliable seal against water damage. Ideal for areas with consistent exposure, keeping your surfaces safeguarded and pristine under any weather condition.

100% Silicone Caulk Protection: This silicone caulk clear provides ultimate waterproof protection, ensuring a reliable seal against water damage. Ideal for areas with consistent exposure, keeping your surfaces safeguarded and pristine under any weather condition.

100% Silicone Caulk Protection: This silicone caulk white provides ultimate waterproof protection, ensuring a reliable seal against water damage. Ideal for areas with consistent exposure, keeping your surfaces safeguarded and pristine under any weather condition.
Essential Tools for Caulking Like a Pro

Ever stared at a gap in your home and thought, “I really need to fix that”? Caulking might be the answer, and starting with the right tools can make all the difference.
First up, grab a solid caulk gun. You can usually find one for around $12, but trust me, it’s worth it. A good gun gives you better stability and control over the pressure, which means less mess and more accuracy.
Now, let’s talk about cutting the caulk tube. Instead of a random cut, try using a utility knife to slice it at a precise 45-degree angle. That little adjustment can create a cleaner application. To keep everything tidy, apply painter’s tape on both sides of the joint. It creates straight lines and helps avoid any accidental smudging.
Don’t skip on a caulking tool, either! Smoothing out the latex caulk ensures you’ve got a neat and secure seal, which makes a huge difference in the end result. If you’re facing gaps that are over ¼ inch, make sure to use a backer rod. It’ll reduce the amount of caulk you need, plus it improves adhesion.
In addition, choosing a caulk gun with an ergonomic design can reduce hand fatigue, making your work much more comfortable and efficient.
So, why go through all this trouble? Because a neat caulking job not only looks great, but it also seals out moisture and can help prevent bigger issues down the line. Remember, taking your time to prep will make your project shine!
To sum it up, having the right tools and techniques can elevate your caulking game. Are you ready to tackle that project?
Recommended Products

Compact Convenience – Seal up windows, trim, tile, and more with your innovative no drip caulk gun from SILIGUN. Lay a uniform bead of latex, silicone, or polyurethane sealant with clean application.

NO DRIP & NO MESS DESIGN: Equipped with an on/off switch to prevent drips and waste, ensuring a clean and precise application every time with no mess to clean up

26:1 THRUST RATIO: 950 pounds of force easily extrudes the thickest of materials
How to Get Your Surfaces Ready for Caulking
Have you ever tried to caulk a surface only to find it didn’t stick? It’s super frustrating, but getting your surfaces prepped can make all the difference.
Start by giving those surfaces a good clean. Dust, dirt, and grease can seriously affect adhesion. Grab a vacuum or mix up a mild detergent solution to scrub everything down well. Once that’s done, you need to tackle any old caulk that’s still lingering. Using a utility knife or a specific caulk removal tool does wonders here. This not only clears the way but also creates a fresh surface that your new caulk can bond to.
Now, wipe the area down with a damp cloth to pick up any remaining debris. You don’t want anything messing up your fresh job. If you’ve got any gaps wider than a quarter-inch, consider using a backer rod. It’s a simple trick that’ll help you use less caulk and get a better seal.
And here’s the kicker: don’t forget to apply painter’s tape on both sides of the joint. This little step makes such a difference, giving you those clean lines that can make your work look really professional when you’re ready to apply the caulk.
Proper surface preparation, including cleaning and removal of old materials, is essential to ensure maximum adhesion and durability of finishes.
Recommended Products

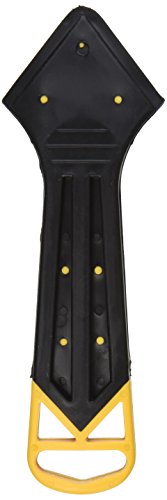
【Tips】Here's a quick tip for achieving that smooth, one-handed gliding sensation with your grout tool: consider loosening the screws on the backside ever so slightly.While a bit of loosening can enhance the user experience, be careful not to overdo it. We're aiming for a perfect balance, so keep it within the range where the tool feels comfortably snug in your hand, providing that silky-smooth maneuverability.

❤️【Multifunctional Caulking Tools】The 5 in 1 upgraded caulking remover tools can not only help you repair the gap and clean the residual glue, but also help you fill the caulk with glue. It will improve the agglutinating quality and the aesthetic sense of surface.

Multifunction 3-in-1 Caulk Tool: Comfortable soft-grip and made from strong engineering plastic
How to Apply Caulk Smoothly
Applying caulk can feel like a daunting task, especially when you’re aiming for that perfect, smooth finish. Have you ever looked at your DIY projects and thought they could use a little something extra? Getting your caulk game on point is just what you need.
First things first, cut the nozzle of your caulk tube at a 45-degree angle. This little tip makes a world of difference. It gives you better control over the flow of the caulk. When you start, apply even pressure on the caulk gun and tackle small sections—about 3 to 5 feet at a time. This helps prevent the caulk from curing before you can smooth it out.
If you want sharp, clean lines, painter’s tape is your best friend. Just stick it along the edges before you get started. Once you’ve dispensed the caulk, here’s the trick: grab a damp finger or a caulking tool and smooth it out right away. This gives you that professional finish that makes all the difference. Remember, timing is key—take the tape off before the caulk fully dries for those crisp edges.
Finally, don’t rush the drying process. Make sure to check the manufacturer’s instructions for how long it takes the caulk to cure. Why’s this important? Because exposing it to moisture or paint too soon can mess everything up.
Using a caulk gun with an adjustable thrust ratio can help you apply caulk more evenly and reduce hand fatigue.
In a nutshell, take your time and enjoy the process. With a bit of patience and these straightforward tips, you’ll have caulk lines that look like they belong in a magazine. So, what’s your next project where you could level up your caulking skills?
Recommended Products

🛠️【Caulking Tool Kit】include Multifunction caulking scrapers, silicone pads, different shapes sealant finishing tool, etc., This set of upgraded tools can help you repair the gap and clean the residual glue, Improve the Agglutinating Quality and the Aesthetic Sense of Surface. Which could help you caulk like a pro in seconds!
Smooths caulk for the Perfect Bead

First-Time Caulker-Friendly: These caulking tools remove guesswork — apply caulk, drag at 45° along the seam, then wipe excess. Pre-shaped tips give smooth lines without finger smear
Top 5 Caulking Mistakes and How to Avoid Them
Ever started a caulking project only to find it didn’t turn out quite how you imagined? You’re not alone! Here are a few common mistakes that can really trip you up, along with some simple tips to make sure your caulking goes smoothly.
First off, don’t underestimate surface preparation. If you take the time to clean and dry the area beforehand, you’ll set yourself up for better adhesion. It may seem like a small step, but it makes a big difference in how well the caulk sticks.
Another pitfall is overfilling gaps when applying caulk. Instead of letting it squeeze out all over, try to maintain a consistent bead. That way, you won’t have to spend extra time smoothing out the mess later. Trust me, a little bit of care in this step saves you a headache down the line.
Are you using the right type of caulk? This might seem like an obvious detail, but it’s crucial—especially in high-moisture areas like bathrooms or kitchens. Mold-resistant caulk is your friend here; it helps prevent future mold growth and keeps your surfaces looking great.
Now, let’s talk about curing time. Honestly, it’s tempting to rush this part, but you really need to let the caulk cure according to the manufacturer’s instructions before exposing it to stress or moisture. Skipping this step can lead to unsightly gaps or failures, which we definitely want to avoid.
Finally, keep your caulk guns and smoothing tools in good shape. A little maintenance goes a long way. If you’re using a reliable gun, you’ll get a more consistent application every time you grab a tube of caulk.
Additionally, just like primers provide better adhesion for paints, proper surface prep helps your caulk bond well, inspired by the importance of adhesion and versatility in primer applications.
To wrap it up, taking these points to heart can help you dodge the most common caulking blunders. Have you had any caulking fails you’d like to share?
Recommended Products
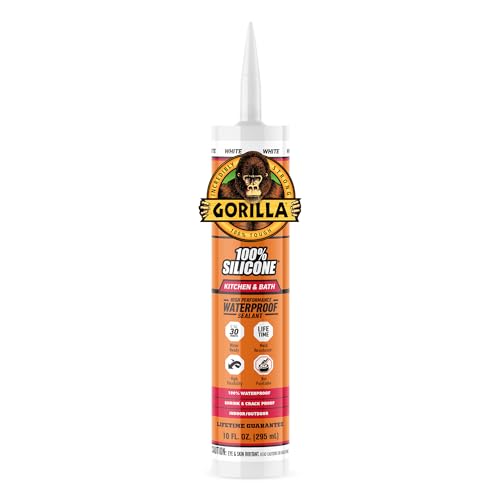
Kitchen & Bath Ready – Premium white silicone caulk formulated for kitchens and bathrooms, delivering a durable, long-lasting seal in wet, humid environments

Waterproof sealant: This white caulk seals out air, water, and moisture with 100% silicone as cured

Indoor/Outdoor 100% Waterproof Caulk – Durable, long-lasting white silicone sealant for indoor and outdoor use; ideal for showers, sinks, windows, doors, gutters, and vents
Frequently Asked Questions
How to Get Clean Lines When Caulking?
To get clean lines when caulking, we should prep surfaces thoroughly, use the right caulking tools, and apply tape for sharp edges. Plus, we’ll compare caulk types for effective sealing and tackle any issues that arise.
How to Get Straight Lines With Caulk?
To get straight lines with caulk, we should master caulk application techniques. Using painter’s tape, the best caulk types, and proper caulking tools essentials guarantees sharp edges while prioritizing caulk safety precautions and easy caulk removal tips.
How to Get Clean Edges When Caulking?
To get clean edges when caulking, we should use painter’s tape, cut the caulk nozzle properly, and smooth immediately. Let’s also choose the right materials and tools while avoiding common mistakes for best results.
How to Smooth Caulk Like a Pro?
To smooth caulk like pros, we’ll apply the best caulk types and use essential caulk tools. Following our smoothing techniques guide and avoiding common mistakes guarantees finishing touches look great. Let’s refine our caulking skills together!


