As an Amazon Associate, we earn from qualifying purchases. Some links on this site are affiliate links at no extra cost to you. Our recommendations are based on thorough research and editorial judgment.
How to Paint Panel Doors Without Heavy Edges in the Corners
To paint panel doors without those pesky heavy edges in the corners, let’s tackle this step by step. First, you’ll want to prep that surface. A quick wash with warm, soapy water is key, followed by a gentle sanding with fine-grit sandpaper. Trust me, this makes a big difference in how the paint goes on.
You may be interested


Next, grab a high-quality angled paintbrush for those corners. It helps in getting into those tight spaces without leaving a mess. When you apply primer, go for thin layers. This not only helps with adhesion but also sets the stage for a smoother finish. Remember, patience is your friend here.
Now, when it comes time to paint, use a foam roller for the flat areas. It’s easy to handle and gives a nice finish. Here’s the trick: after rolling, “tip off” the edges by lightly going over them with your brush. This softens any harsh lines that might form.
A tip I swear by? Lightly sand between each coat of paint. It guarantees that smooth finish we’re all aiming for.
So, what do you think? Are you ready to make those panel doors look fabulous?
Key Takeaways
- Use an angled paintbrush for corners to apply paint precisely without overloading the edges.
- Apply multiple thin coats to avoid paint buildup in the corners.
- Sand the edges lightly before painting to reduce pooling of paint.
- Use painter’s tape along edges to prevent paint from overflowing into unwanted areas.
- Blend edges using the “tipping off” technique with a brush for a smooth finish.
Essential Preparation Steps Before Painting Panel Doors

Have you ever looked at your panel doors and thought they could use a little love? Before diving into painting, it’s crucial to tackle some prep work that’ll make all the difference.
Start by giving your doors a good scrub. Mix up some warm, soapy water and wipe them down to get rid of dirt and grease. This ensures the paint sticks properly and doesn’t flake off later.
Now, don’t skip the sanding step! Grab some fine-grit sandpaper and gently sand the surface. This removes any rough patches, making for a smooth base that your paint will love.
Next up, applying primer is key. Use a high-quality primer made for wood—it’ll help the paint adhere better and keep any wood stains from showing through. Truth is, a good primer can save you a lot of headaches down the road.
Once your primer is dry, take a close look for any cracks or imperfections. Here’s the trick: Fill those in with wood putty and sand them down once they’re dry. You want a level and flawless surface to work with.
To protect those areas you don’t want painted, grab some masking tape. It’s a small step that goes a long way in ensuring clean lines in your finished product.
Taking these preparation steps seriously will set you up for painting success. Additionally, choosing a non-toxic paint remover can help eliminate old paint without damaging the door surface.
So, are you ready to transform those doors? Happy painting!
Tools Needed for Painting Panel Doors

Do you find yourself staring at those drab panel doors, wondering how to give them a fresh look? Painting them can seem daunting, but with the right tools, you can easily achieve a professional finish.
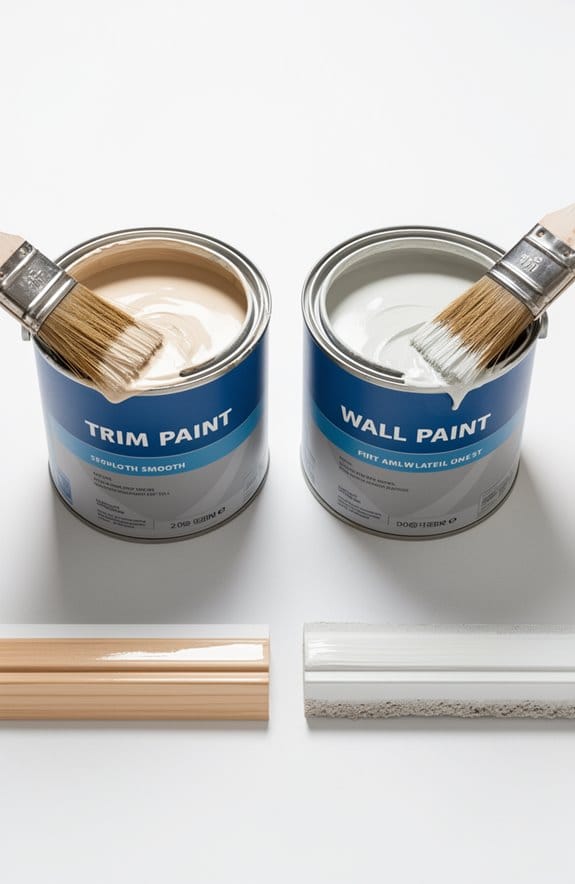
Start with a high-quality angled paintbrush. It’s perfect for those tricky corners and helps avoid heavy edges that can ruin your clean lines. Alongside the brush, grab a foam or synthetic roller with a low nap—about 3/8 inch is ideal. This will make sure your flat areas get smooth coverage without those annoying roller marks.
Here’s the trick: using a paint edger tool can save you so much time when it comes to clean lines along the frames and panels. Want to minimize the mess? A small paint tray or bucket with a liner makes cleanup a breeze, especially when you’re working with rollers or brushes. And don’t overlook the importance of painter’s tape. It can really help you achieve that clean separation between colors or just keep the paint off areas where you don’t want it.
Selecting the right painters tape width is essential to balance coverage and precision for a flawless finish.
Finally, keep a damp cloth nearby for quick clean-ups. Truth is, messes happen, and being prepared will make your painting experience much smoother.
With these tools ready for your panel door project, you’re well on your way to transforming your interior doors like a pro! So, what door project are you tackling next?
Essential Primer Application Techniques for Wood Doors

Got wood doors that need a fresh look? You’re not alone! Tackling primer application can feel a bit daunting, but with the right approach, you can get a smooth and lasting finish.
First things first: clean those doors. Seriously, you want to wipe away all that dust and grease so the primer sticks like it should. A quality primer made for solid wood is key here. It helps to stop tannins from bleeding through, which can ruin your hard work.
Here’s the trick: apply your primer in thin, even coats. This not only makes it easier to manage those tricky corners but also prevents heavy buildup. For the bigger areas, grab a foam or small nap roller. They work wonders! And for any detailed corners? A high-quality brush will do the trick.
Now, there’s one important step you shouldn’t skip: let that primer dry completely according to the manufacturer’s instructions. This helps ensure you get the best coverage and keeps the finish looking sharp.
Additionally, just like choosing the right material durability matters for hose connectors, selecting the right primer quality can significantly impact the longevity of your door’s finish.
In short, proper prep makes all the difference when painting wood doors. So, what are you waiting for? Dive in, and your doors will thank you!
Methods for Achieving Smooth Paint Application
Getting a smooth paint finish on your panel doors can feel daunting, but it’s all about using the right tools and techniques. Ever been frustrated by drips or uneven surfaces? A good place to start is with high-quality short nap rollers—3/8 inch or less works wonders for applying those thin coats. And when you get to the corners, don’t shy away from grabbing a brush to blend things together. This little trick, called “tipping off,” helps to blend any harsh lines and makes for a polished look.
Try adding a paint additive like Floetrol to your mix. It can really help with paint flow and gives you more time before it dries. That way, you can keep everything looking smooth and even. It’s crucial to apply several thin coats rather than just one heavy one. Why is that important? Because it helps prevent those unsightly build-ups at the edges, leading to a more professional finish.
Patience really pays off here. Take your time and let each layer dry before adding the next one. The best part is, this method keeps things looking fresh and neat. Using Floetrol also improves coverage and smoothness, making your paint job easier and more durable. So, are you ready to dive into your painting project? With these techniques, you’re well on your way to achieving that smooth, flawless appearance you’re after. Happy painting!
Sanding Between Coats for Flawless Results
Ever find yourself itching to apply that next coat of paint but then hit a snag? Before you rush in, let’s talk about a little step that can make a huge difference: sanding between layers. It might seem tedious, but trust me, it’s key for that smooth, polished finish you want.
Start off with a fine-grit sanding sponge—220 grit is ideal. This is where you’ll want to be gentle; sand the surface lightly, focusing on those panel edges and corners where paint can build up. You don’t want to sand too aggressively, or you might roll off those crisp, sharp edges that make your project pop.
Now, here’s the trick: be sure to let that previous coat dry completely before you start sanding. Pay attention to the manufacturer’s drying times to avoid damaging your hard work. Once you’ve sanded, go ahead and vacuum or wipe the area with a damp cloth. Cleaning off the dust is essential; it ensures that the next coat sticks properly and looks amazing.
So, why does this matter? Skipping this step can lead to a bumpy finish that no amount of paint will fix. Honestly, a few minutes of sanding can save you hours of frustration later on, and it’s such a simple step that makes a world of difference. Also, using a stand with stability tested features can help hold your door steadily, preventing damage during your painting process.
Handle Panel Door Corners and Edges Effectively
Have you ever noticed how the corners and edges of painted panel doors can really make or break the whole look? If you want to elevate your paint job, it’s all about how you handle those tricky spots.
Start by grabbing a quality angled brush to cut in around the corners. This ensures an even paint application without those annoying thick areas. Before you even think about painting, give those edges a light sanding. It sounds simple, but it really helps avoid paint pooling.
When you’re ready to paint, remember to apply thin coats. It might feel like a slow process, but waiting for each layer to dry before adding more is key for achieving that smooth finish. If you’re using rollers, make sure to pick a low-nap one — it’s perfect for smooth finishes and will help keep those edges sharp. And here’s the trick: after you roll, take a clean brush to tip off the corners. This little step can minimize excess paint and give you that polished look you’re after.
Choosing a brush with an ergonomic handle design can also reduce hand fatigue and improve precision during edging.
In short, it’s all about the little details when it comes to panel door corners and edges. How do you plan to tackle yours?
Prevent Drips and Uneven Texture
Ever find yourself staring at drips and uneven texture on your freshly painted panel doors? It’s frustrating, isn’t it? Thankfully, with the right tools and techniques, you can make your painting project go much smoother.
Start by choosing a good quality brush for those detailed corners. You want something that offers a smooth application without getting too much paint loaded on it. For the flat surfaces, a small nap roller with a nap of 3/8 inch or less is where it’s at. Just a heads up, don’t press too hard with the roller; doing so can accidentally push paint into the corners, which is a real pain to clean up later.
It’s usually best to apply multiple thin coats instead of one heavy coat. This method helps get that even finish you’re aiming for. Make sure to let each layer dry properly before you dive into the next one. A little tip: after each layer dries, lightly sand down the corners and edges. This will help smooth out any raised textures and keep your surface looking slick.
Using painter’s tape along the edges can be super helpful, too. It keeps your lines neat and prevents over-application, which can mess up your entire look. Honestly, it’s a simple step that can make a big difference. For safety and ease when painting those higher panels, consider using a ladder with non-slip wide pedals to maintain steady footing.
Incorporate Additives for Better Paint Flow
Have you ever struggled to get that flawless finish on your panel doors? If so, you might want to consider adding some specific additives to your paint. One that I’ve found really works is Floetrol. It extends drying time and improves the paint’s leveling, giving you a smoother result.
Try this: Mix 1 part Floetrol with 4 parts paint. This ratio helps enhance the flow of the paint without losing coverage. When you add this into the mix, the paint will wet the surface much more effectively, which is key for that sleek finish you’re aiming for. Just remember to mix it well into the paint to ensure consistent results across all areas.
Now, let’s talk about tools. Using the right type of rollers in conjunction with your additives can really minimize stippling and heavy edges in those tight corners. So, why does this matter? Well, it can make the difference between a DIY job that looks professional and one that stands out for all the wrong reasons.
Honestly, these small adjustments can put you well on your way to a stunning door finish. Give it a try next time you’re painting, and see how much of a difference it can make. Have you used any additives in your painting projects before? What was your experience?
For the best results, ensure the surface is properly prepared and compatible with your paint, as adhesion and cure time greatly impact the final look when working on wood or panel doors adhesion and cure time.
Make Your Panel Doors Shine With These Final Touches
Have you ever finished a painting project only to look at your panel doors and think they still need something? It can be a bit frustrating when you’ve put in all that effort. But trust me, taking those extra steps to add final touches can really make your doors pop.
Start by applying a high-quality primer to fill in any imperfections. Work it into the corners and edges for best results. Once the primer’s dried, use a small-nap roller. This will help keep things smooth, which is what you want. Here’s a pro tip: lightly sand the areas between coats. It sounds tedious, but this really does help achieve that silky finish we all aim for.
When you finally roll on that last coat of paint, don’t just walk away. Grab a good brush and gently tip off the paint. This helps to smooth out any roller marks you might see. Honestly, this small detail is the secret to getting that flawless look. And remember, it’s all about applying thin layers. Thick edges can distract from the details you’re trying to highlight.
In short, putting in a little extra effort can completely transform your panel doors. So, next time you’re prepping for that final coat, think about these tips. What little adjustments will you make to enhance your project?
Frequently Asked Questions
How to Paint in Very Tight Corners?
When we’re tackling tight corners, we should use corner techniques like a small angled brush for precision. Also, masking tape helps us achieve crisp lines, ensuring our paint job looks clean and professional.
How to Avoid Roller Marks When Painting Doors?
Like a chef perfecting a soufflé, we’ve learned that the right roller technique and multiple light coats create a flawless door finish. Ensuring our paint’s mixed properly, we can avoid those pesky roller marks together!
What Is the Best Way to Paint a Panel Door?
To paint a panel door effectively, we should use a quality primer, apply multiple light coats with a small nap roller, and focus on sharp edges with an angled brush. Patience with drying times really helps too!
What Are Common Front Door Painting Mistakes?
Did you know that nearly 30% of DIY painters skip proper prep? We often find color selection and heavy paint application are common mistakes, leading to uneven finishes and disappointing results on our front doors.