As an Amazon Associate, we earn from qualifying purchases. Some links on this site are affiliate links at no extra cost to you. Our recommendations are based on thorough research and editorial judgment.

How to Paint Along Textured Ceilings Without Jagged Cut Lines
Painting along textured ceilings can be tricky, especially when you’re aiming for clean, sharp lines. Ever found yourself frustrated trying to avoid those jagged edges? Trust me; you’re not alone.
You may be interested


Here’s how to tackle that challenge like a pro! Start by preparing your space. Clear out as much furniture as possible and cover the floors to protect them from any spills. This makes a world of difference; it’s easier to focus on getting those lines right when you’re not worrying about the furniture.
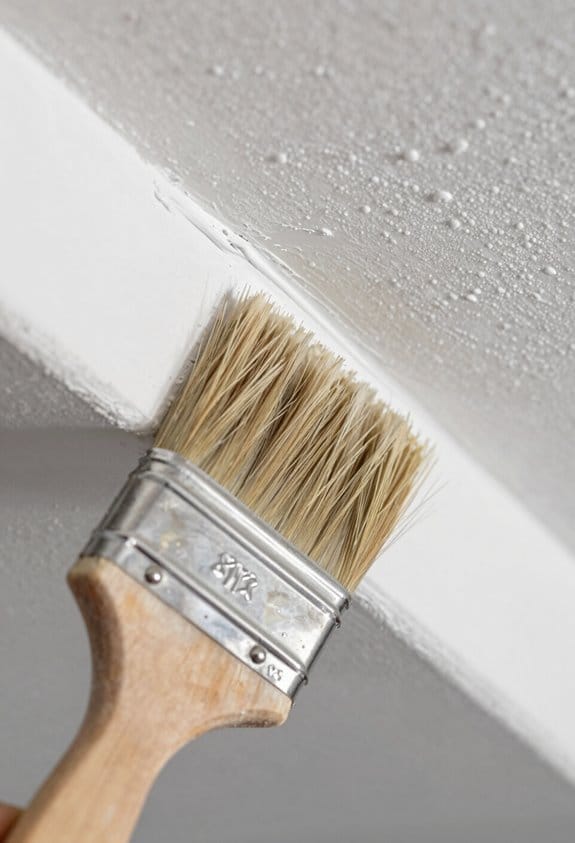
Next, grab a good quality angled paintbrush. This tool is essential for getting in those nooks and crannies near the ceiling. Here’s the trick: before you start painting, apply painter’s tape along the edges. But don’t stop there—seal that tape with clear caulk. This step may seem minor, but it really helps keep the paint from seeping underneath.
When you’re ready to paint, get a roller with a thicker nap. It gives a better texture coverage and helps blend where the wall meets the ceiling. And remember to keep a steady hand; it takes practice but it’s worth it.
Honestly, the whole process can feel a bit tedious, but it pays off when you see those clean, crisp edges. By following these steps, you won’t just paint a ceiling; you’ll elevate your space.
So, what do you think? Ready to dive in and give it a try?
Key Takeaways
- Apply painter’s tape along ceiling edges to create a clean and defined barrier for painting walls.
- Use a high-quality angled brush for greater control and precision while cutting in at the ceiling line.
- Apply a thin line of caulk along the edge of the tape to seal gaps and prevent paint bleed.
- Paint the ceiling color along the taped edge first to create a barrier against splatters.
- Remove painter’s tape immediately after painting for sharper lines and smoother transitions.
Preparing Your Space for Painting

Ready to paint a textured ceiling? Before you grab that brush, let’s make sure your space is ready to go. It can feel overwhelming, but trust me, a little prep can save you from a lot of headaches down the line.
Start off by getting rid of any furniture in the room. You want a clear space to work, and it’ll keep accidents at bay. If you have items you can’t move, cover them with drop cloths or old sheets—better safe than sorry! For your floors, especially if they’re carpeted, heavy-duty drop cloths are a must. This way, you won’t have to stress about paint spills ruining your carpets.
When it comes to those light fixtures, don’t forget to protect them. Painter’s tape is your best friend here. Just tape around the edges to catch any drips, or wrap them in plastic to keep everything nice and clean. So, why does this matter? Because a little precaution now can save you from a lot of detail work later!
Ventilation is crucial, too. Keeping windows open and fans running helps that paint dry faster and can even make the whole process smoother. And here’s the trick: have a small paint bucket handy while you’re on the ladder. It keeps everything organized and makes your job much quicker. Selecting a paint pail with ergonomic features can make handling easier and reduce fatigue during extended painting sessions.
In short, prepping your space properly sets you up for success. An ounce of prevention is worth a pound of cure, right? What’s your go-to tip for prepping a room for painting?
Essential Tools for Crisp Edges

Ever tried painting around a textured ceiling and ended up with messy lines? It can be frustrating, but with the right tools, you can get those crisp edges you’re after.
Start with a high-quality angled paint brush. This simple tool gives you more precision and control—nothing beats the ability to finesse those tricky spots. Then, don’t forget about painter’s tape. It’s crucial to place it carefully so it sticks well to both the wall and ceiling. That tape creates a nice barrier, helping you avoid those unwanted drips and bleeds.
Want to level up? Here’s the trick: apply some clear, paintable caulk along the edge of the tape. Doing this helps seal it and really cuts down on paint leaks. And if you’re tackling larger areas, grab a small roller designed specifically for textured surfaces. It’ll help you blend everything together for that smooth finish.
One more thing—keeping your tools clean and well-maintained is a must! You want them to work effectively so you can achieve the professional-looking results you’re aiming for. Using a high-quality flexible plastic putty knife can also help with smoothing out any patched areas before painting for a flawless finish.
Techniques for Cutting In Around Textured Ceilings
Cutting in around textured ceilings can be a tricky task, can’t it? One little slip with the brush and you’ve got paint where you don’t want it. But there’s a way to tackle this challenge and get those clean lines you’re after.
Start by applying a thin line of caulk between the painter’s tape and the ceiling. This little trick gives you an extra edge in accuracy. Next, grab a high-quality angled brush. Hold it perpendicular to the wall and gently push and pull as you apply your paint. Don’t rush! This approach helps you navigate those bumpy surfaces beautifully.
Now, here’s a tip: Overlap the wall color slightly into the ceiling color before you tape. It might sound odd, but sealing the tape with the wall color really helps keep things tidy. And when you’re finally done painting, remove that painter’s tape immediately after the last coat dries. Trust me, this will ensure you get those crisp, sharp lines that make the whole room look polished.
Honestly, with these steps, you’re on your way to achieving professional-looking results. Have you tried these techniques before? If you’re about to do a paint project, give this a shot and see how it goes! For textured surfaces, selecting the right nap length on your roller cover can enhance paint application and finish quality.
Tips for Smooth Transitions Between Ceilings and Walls
Achieving smooth transitions between textured ceilings and walls can be tougher than it seems. If you’ve ever struggled to get those clean lines, you’re not alone! It might feel daunting, but with a few tips, you can make it look easy.
Try this: start by placing painter’s tape along the edge of the ceiling. This can help protect that area and give you a clean line to work from. Before you paint the walls, here’s the trick: apply a thin line of caulk to any gaps. This not only seals things up but also helps prevent paint from seeping where it shouldn’t.
Now, painting can be a bit of an art, right? I’ve found that using a bit of ceiling color along the tape edge can make a big difference. It acts like a barrier against those jagged lines that can ruin your look. And don’t forget to grab a quality angled brush! This tool gives you more control over your strokes and helps keep everything neat.
After painting, let the caulk set for just a bit, and then remove the tape while the paint is still wet. This can lead to a much sharper edge, giving your textured walls a flawless finish. So, why does this matter? A clean transition between the ceiling and walls can really elevate the whole room.
For best results, choose a painter’s tape with medium adhesion that suits your ceiling texture to ensure clean removal without residue.
Select the Right Paint for a Smooth Finish
Selecting the right paint for textured ceilings can feel overwhelming, right? You want that smooth finish without all the hassle. High-quality ceiling paint is your best bet here. Look for options specifically made for textured surfaces—this type of paint provides better coverage and sticks well, helping to hide those little imperfections that can drive you nuts.
Here’s the scoop: a matte finish does wonders in covering up irregularities. It gives your ceiling a nice, uniform look that you’ll appreciate. But don’t just grab the first can you see; it pays to use a paint roller cover that’s designed for textured ceilings. Grab one with a thicker nap to ensure even distribution as you roll it on.
Before you go full steam ahead, try this: test the paint on a small, hidden spot first. This little trick helps you see how the paint interacts with your ceiling’s texture, so you’re not guessing when you start the full job.
Honestly, a steady hand during application is crucial. It helps to avoid those frustrating drips and streaks that can ruin your hard work. In short, take your time, choose wisely, and give your ceiling the upgrade it deserves.
For marking your progress without damaging the surface, consider using washi tape, which is repositionable and leaves no sticky residue.
Common Painting Problems and How to Fix Them
Have you ever found yourself struggling with paint seeping into your textured ceiling while trying to cut in? It can be pretty frustrating, right? A good brush can make all the difference. Go for a high-quality angled brush; it’ll give you more control and help you create that nice, straight line you’re after.
Before you even think about taping, try this: run a thin line of clear paintable caulk along the edge. This little step can help keep the paint from seeping under the tape. Once you’ve got your tape in place, go ahead and reinforce the taped edge with some ceiling color. It creates a seal and, honestly, can really minimize the risk of any unwanted drips.
Overlapping the wall color onto the ceiling can make the transition less noticeable, which is a neat trick if you want a polished look. And remember, the moment you finish painting, resist the urge to rip off that tape right away. Let it dry first! When it’s time to peel it back, do it slowly and carefully to reveal those clean lines you’re striving for. If you spot any bumps, a small scraper tool can help smooth things out.
It’s all about taking those extra steps to get the result you want. To ease application and reduce strain during long sessions, consider using tools with ergonomic handles. So, what’s your latest painting challenge?
Using Painter’s Tape for Clean Lines
Getting started with painter’s tape can make a real difference when you’re aiming for clean paint lines, especially on those pesky textured ceilings. You want to begin by carefully applying the tape along the edges where the wall meets the ceiling. This step is crucial to keep any paint from bleeding underneath the tape.
Now, here’s the trick: use an angled brush to cut in along the tape line just before you apply your final coat. This extra bit of care can really boost your precision. After that, add a small amount of ceiling paint along the tape to seal the edges—this creates a nice barrier that’ll keep the paint where you want it, not where it shouldn’t be.
Don’t overlook the importance of timing with the tape. When it’s time for the final coat, make sure to peel the tape off while the paint is still wet. This little detail will help ensure you end up with those sharp, clean lines you’re after, without peeling or jagged edges ruining your hard work.
Honestly, taking the time to do this small task can save you a lot of cleanup later. So, go ahead, roll up your sleeves and make that ceiling look flawless! How do you plan to tackle your next painting project?
Top Paint Brands for Interior Walls
After you’ve got those crisp lines along the textured ceiling, it’s time to think about how to bring your interior walls to life with paint. Choosing the right color can feel a bit overwhelming, but don’t sweat it, I’ve got some solid recommendations for you.
Sherwin-Williams is a go-to for many homeowners, thanks to their wide variety of colors and quality finishes. If you’re looking for something that holds up in residential areas, this brand should be at the top of your list. On the other hand, if you want something that offers great coverage and durability, especially in bright sheens, check out Benjamin Moore.
For those busy, high-traffic spots in your home, consider Behr. Their stain-resistant options can help keep your walls looking fresh, even with all the wear and tear. And if you’re watching your budget, Valspar offers affordability and decent coverage across a variety of shades.
Eco-conscious? PPG Paints has you covered with eco-friendly choices that don’t skimp on quality. Remember, the finish you pick matters too—different surfaces call for different types of finishes for the best results. You may also want to consider applying an oil-based primer underneath your paint to enhance adhesion and prevent stains.
Frequently Asked Questions
How to Paint Sharp Lines on Textured Walls?
To paint sharp lines on textured walls, we should use painter’s tape techniques, select the right brush, and invest in quality edging tools. This way, cutting in becomes effortless, resulting in clean, professional-looking lines.
How to Paint a Textured Ceiling Without Making a Mess?
Picture us wielding a light saber against the chaos of painting! With ceiling painting tips like painter’s tape, textured surface techniques for clean edges, and mess-free application, we’ll conquer that project together, ensuring smooth edge solutions!
How to Paint a Ceiling Without Getting Lines?
To avoid lines when painting ceilings, we should use painter’s tape effectively, apply cutting in techniques with a quality brush, and blend our roller brush methods for a smooth finish. Every step counts for perfect results!
How to Paint a Ceiling With Grooves?
We can master groove painting techniques by using essential painting tools like an angled brush and small roller. Choosing the right ceiling paint and texture blending methods will help us achieve a flawless finish effortlessly.


