As an Amazon Associate, we earn from qualifying purchases. Some links on this site are affiliate links at no extra cost to you. Our recommendations are based on thorough research and editorial judgment.

Painting Baseboards: Getting Crisp Lines and Smooth Build
Feeling frustrated with uneven and messy paint lines when tackling those baseboards? You’re not alone! Getting those crisp lines and a smooth finish can be tricky, but I’ve got some straightforward tips that can really help.
You may be interested


Start with the prep work. This means cleaning the baseboards thoroughly and filling in any nicks or holes with spackle. It seems like a bit of a hassle, but trust me; taking the time to prep properly pays off big time.
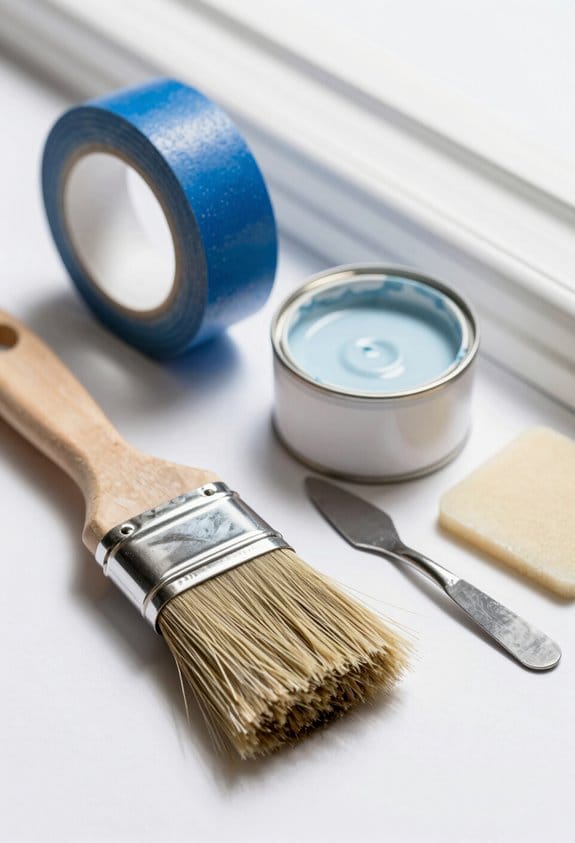
After that, grab some quality painter’s tape—this is essential for achieving those sharp edges you’re after.
When it comes to paint, choose a semi-gloss or satin enamel; both give a beautiful finish that’s easier to clean. Here’s the trick: when you’re painting, use an angled brush for those tight spots. It makes a world of difference!
And don’t rush the process. Apply two thin coats of paint, letting it dry properly between each one. This really helps in achieving that polished finish you’re aiming for.
So, why does all this prep matter? It’s simple—putting in that initial effort ensures you won’t have to deal with touch-ups later on.
Follow these steps, and you’ll be well on your way to perfect baseboards. Any thoughts on how you like to prepare for a painting project?
Key Takeaways
- Start with thorough cleaning and preparation, ensuring baseboards are free of dust and imperfections for optimal paint adhesion.
- Use high-quality painter’s tape to create sharp edges, preventing paint bleed and ensuring clean lines during application.
- Employ an angled brush for precise painting in hard-to-reach areas, maintaining a consistent application throughout the baseboards.
- Apply two thin coats of paint instead of one thick coat to achieve a smooth finish and even coverage.
- Remove painter’s tape while the final coat is slightly wet for the sharpest lines and to avoid color inconsistencies.
Common Challenges in Painting Baseboards and the Tools You Need to Overcome Them

Painting baseboards can feel like an uphill battle. Have you ever noticed how small details can trip you up? One minute you’re all set to add a fresh coat, and the next, you’re grappling with peeling paint or strange textures. To steer clear of these hassles, proper prep work is key.
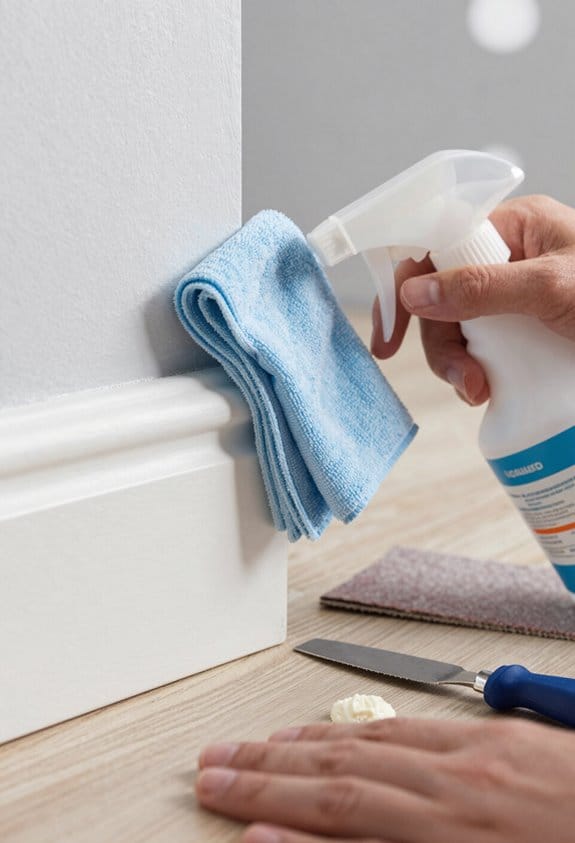
Start by giving those baseboards a good clean. Dust and grime won’t help paint stick, so make sure to sand them down too. This step is crucial for ensuring the paint adheres nicely. Following that, grab some high-quality painter’s tape and run it along the edges of your walls and floors. Trust me, clean and sharp lines make a world of difference.
For those tricky corners and tight spots, an angled brush is your best friend. It works wonders for getting in there and providing better control. And, when you’re done painting, remember to score around the tape with a putty knife before you pull it off. Why, you ask? This little trick prevents the paint from peeling along with the tape, which helps you achieve those crisp lines we all strive for.
Patience can be your greatest ally here. Wait for each coat to dry thoroughly before adding another. Rushing through this can lead to a bumpy finish that’s anything but smooth.
Using the right tools, such as a paint scraper to remove any loose paint before you start, will make prep easier and ensure a smooth surface.
In the end, taking your time with prep and application can really pay off. Are you ready to tackle those baseboards? With a little effort, you’ll be left with a result you can be proud of!
Essential Tools and Supplies for Flawless Baseboard Painting
Painting baseboards can feel like a daunting task, especially if you’re new to it. But trust me, with the right tools and materials, you can achieve a professional-looking finish that’ll impress everyone. Let’s break down what you need to set yourself up for success.
Start by picking a semi-gloss or satin enamel trim paint. This type of paint is tough enough to last, so it’s worth the investment. An angled brush is another must-have; it’s perfect for getting into those hard-to-reach spots and ensuring your edges look crisp and clean. Along with that, grab some painter’s tape. This will safeguard your walls and create those sharp lines you want.
You might also want to address any imperfections before you start painting. Fill in any dents with putty or spackle, and don’t forget the fine-grit sandpaper to smooth everything out. Sealing gaps with paintable acrylic latex caulk using a caulking gun is crucial—trust me, it makes a difference.
Finally, lay down drop cloths or plastic sheeting to protect your floors from paint splatters. You’ll thank yourself later when cleanup is a breeze! So, why does this matter? Having the right tools makes the job easier and ensures that your baseboards look fantastic.
Consider applying a shellac-based primer before painting to ensure excellent adhesion and block any stains or odors that may affect your finish.
In short, gathering these essentials will help you achieve a flawless finish. Are you ready to tackle your baseboards?
Step-by-Step Preparation for Baseboards: Cleaning and Repairing
Have you ever noticed how neglected baseboards can ruin the vibe of a room? A little TLC goes a long way here. To get your baseboards looking fresh and ready for a new coat of paint, start with a thorough cleaning.
First, grab your vacuum and suck up any dust or grime lurking around. Next, take a damp cloth and wipe down the surfaces with a mild cleaner. After that, it’s time to inspect those baseboards. Look for nail holes, dents, or any rough patches. If you find any, just fill them with spackle and let it dry before you sand it smooth. It makes a world of difference.
If your baseboards have a glossy finish, here’s the trick: you’ll want to scuff sand those areas to help the new paint stick better. After prepping the surface, apply paintable acrylic latex caulk along the top edges where the baseboards meet the wall. This not only seals the gaps but also helps achieve that polished look you’re going for.
Don’t forget the painter’s tape! Taping off the walls and flooring ensures you’ll get those crisp lines. It really ties everything together when you paint.
For any cracks or deeper damage, using a quality paintable wood filler can ensure a smooth, durable repair before painting.
Techniques for Crisp Baseboard Lines
How do you get those baseboard lines to look sharp and professional? Start by applying high-quality painter’s tape along the edges. This little step can make a big difference in keeping paint from bleeding over, which is the main culprit for messy lines. You might also want to extend the paint slightly onto the wall. It helps with those seamless shifts that really tie a room together.
Here’s the trick: before you peel the tape off, score it gently with a razor blade. This creates a clean separation and prevents the paint from pulling up with the tape, which is a total headache. And don’t forget to apply some caulk along the top edge of the baseboard. Filling in any gaps not only looks nicer but can give an overall polished finish.
Honestly, timing is everything. You want to remove that painter’s tape while your final coat is still a bit wet. Doing it this way helps avoid any peeling and cements that crisp, clean edge. Following these steps will definitely lead to fantastic results every time! Ensuring your work area has a stable and secure setup, similar to using a stable scaffold platform, can help maintain precision and safety during the painting process.
Top 5 Pitfalls in Baseboard Painting and How to Avoid Them
Painting baseboards can feel like an arduous task, can’t it? As you work to perfect those crisp lines, it’s easy to overlook a few common pitfalls that can really mess up your efforts.
First off, make sure your baseboards are clean, sealed, and sanded. This alone can save you from having to deal with rough, uneven spots later on. And don’t even think about skipping primer—especially if you’re painting over bare or patched areas. It might seem like an extra step, but it’ll help you avoid that frustrating uneven color.
When it comes to your paintbrush, here’s the trick: dip it just 1 to 1.5 inches into your paint and then tap off the excess. This little habit can help prevent those annoying drips and streaks that we all want to avoid. You’ll get a smoother finish, trust me. Plus, applying two thin coats instead of one thick one makes a huge difference. And don’t forget to allow for adequate drying time!
Also, take a time-out to remove dust before diving into the painting. No one wants particles ruining their perfect finish. Honestly, another key tip is to remove painter’s tape when the last coat is still slightly wet; this ensures those sharp edges we’re all aiming for. For the best results, consider using a painters caulk to fill gaps before painting, ensuring seamless and professional looking edges.
Understanding Drying Times and Care Tips for New Baseboard Paint
Waiting for paint to dry can feel like watching paint dry, right? It’s the least fun part of sprucing up your home, but taking the time to understand the drying process can really pay off in the long run. For instance, acrylic latex trim paints usually dry to the touch in about 1 to 2 hours. But don’t dive in just yet—allow them a full 24 to 48 hours to dry completely.
If the baseboards still feel a bit damp, just be patient. Rushing this part can lead to a less-than-perfect finish. When it comes to recoating, time it right—aim for anywhere between 2 to 4 hours, and always check the manufacturer’s instructions.
Here’s a tip: once you’ve got that lovely finish, hold off on heavy cleaning until the paint fully cures. That can take anywhere from 7 to 30 days. Want to dust the surface? A gentle touch with a tack cloth will do the trick without messing up your hard work. For indoor projects, using a primer with low-odor formulations can help maintain air quality while waiting for paint to dry.
Frequently Asked Questions
How to Get Clean Lines When Painting Baseboards?
To get clean lines when painting baseboards, we should focus on precise tape application, select the right primer and paint, and use a careful brush technique. That’ll help us achieve the crisp finish we’re after.
What Is the 7 Rule for Baseboards?
Just like a well-tailored suit, the 7 Rule for baseboards keeps our spaces looking sharp. When we choose baseboard styles, painting tools, and color choices, remembering primer’s importance helps us achieve uniformity and visual harmony.
How to Get a Smooth Finish on Baseboards?
To get a smooth finish on baseboards, we should focus on effective sanding techniques, choose high-quality paint, use the right application tools, and adhere to proper drying times between coats for the best results.
How to Avoid Streaks When Painting Trim?
To avoid streaks when painting trim, we should focus on prepping surfaces well, choosing suitable paints, and using the right brushes. Also, letting each coat dry completely before applying the next is essential for smooth results.


