As an Amazon Associate, we earn from qualifying purchases. Some links on this site are affiliate links at no extra cost to you. Our recommendations are based on thorough research and editorial judgment.

Painter’s Tape 101: Adhesion, Removal Timing, and Edge Bleed Prevention
Want to get those perfect, crisp lines when painting? Painter’s tape is your go-to. It helps keep colors separate and prevents that pesky edge bleed that can ruin your hard work.
You may be interested


Choosing the right tape makes a big difference. If you’re working on fresh drywall, delicate surface tape is best. For rough textures, high-adhesion tape will do the trick.
And don’t forget to prep your surfaces! Clean them thoroughly before applying your tape, and make sure to press it down firmly. A tight seal is key to a clean finish.
Timing is everything when it comes to removing the tape. You’ll want to pull it off within 1-2 hours after you’ve finished painting, or when the paint feels dry to the touch. Pulling at a 45-degree angle helps a lot, so keep that in mind.
Avoid stretching the tape as you apply it, too. This can compromise that sharp edge you’re aiming for.
So, why does this matter? Because your hard work deserves that polished look!
Here’s a tip: If you notice any bleeding on the edges after you remove the tape, don’t panic. A little touch-up with a small brush can fix it right up.
In conclusion, with the right tape and some careful techniques, you can achieve those beautiful lines you’ve been dreaming of. What project are you looking forward to tackling next?
Key Takeaways
- Select the right type of painter’s tape based on the surface to ensure proper adhesion and prevent paint bleed.
- Prepare surfaces thoroughly by cleaning and drying them to enhance tape stickiness and adherence.
- Apply the tape firmly, using a putty knife to ensure a tight seal along the edges for minimal seepage.
- Remove tape within 1-2 hours after paint feels dry to the touch, peeling at a 45-degree angle for clean edges.
- Avoid stretching the tape during application and ensure fresh tape is used to maintain effective adhesion and prevent jagged lines.
Understanding the Different Types of Painter’s Tape

When you’re diving into a painting project, one of the simplest yet most impactful choices you’ll make is picking the right painter’s tape. What’s the big deal, you ask? Well, the right tape can make or break your clean lines and overall look!
Different types of painter’s tape are designed for various surfaces. If you’re working with fresh drywall or wallpaper, delicate surface tapes are a lifesaver. They’re gentle but effective, allowing you to peel away without damaging your surfaces. But if you’re tackling something like brick or stucco, you’ll want a high-adhesion tape that stands strong against those rough textures.
For general masking, give 3M’s ScotchBlue No. 2090 a try. It’s reliable and works well in most scenarios. However, if you need those super clean edges for detailed work, consider yellow FrogTape. It’s known for its excellent adhesion and really shines when it comes to precise lines.
So, why does this matter? Understanding the unique adhesive properties of each type of painter’s tape is key to achieving those sharp, professional-looking results. Remember to think about your surface before you grab that tape. Making the right choice can save you time and effort in the long run. Also, consider the adhesive strength based on your project surface to ensure clean removal without residue.
Recommended Products

READY. SET. PAINT!: 4 rolls of 1.41 inch wide Scotch Delicate Surface Painter's Tape, a versatile solution for protecting surfaces that require a little extra care when preparing to paint your living or working environment

READY. SET. PAINT!: 1 roll of 0.94 inch wide Scotch Delicate Surface Painter's Tape, a versatile solution for protecting surfaces that require a little extra care when preparing to paint your living or working environment
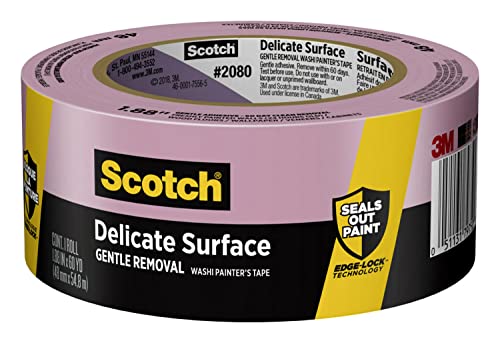
READY. SET. PAINT!: 1 roll of 1.88 inch wide Scotch Delicate Surface Painter's Tape, a versatile solution for protecting surfaces that require a little extra care when preparing to paint your living or working environment
What Is Painter’s Tape and Its Importance?

Have you ever started a painting project, only to find yourself staring at messy edges and blotchy lines? It can be super frustrating, especially when you envisioned a flawless finish. That’s where painter’s tape comes in.
This stuff is like your best friend on any painting job. It’s a special type of masking tape that sticks lightly enough to avoid damage but securely enough to create tight seals against paint drips. Choosing the right painter’s tape is crucial to keeping your painting clean and avoiding those dreaded paint bleeds. When you get it right, it really can make a difference in your final look.
Here’s the trick: Use painter’s tape that matches your surface. For example, if you’re working on a delicate surface, snag a tape that’s gentle enough to peel away without taking paint with it. You’ll find painter’s tape in various colors, too—how nice is that? The popular medium blue ScotchBlue is a favorite among many, but you can pick what fits your vibe best.
Frankly, painter’s tape’s real strength lies in its ability to peel off easily, leaving no sticky residue behind. Nobody wants to deal with a mess after they’ve just finished their beautiful work. So, why does this matter? Because when you take the time to tape correctly, whether it’s for fine details or larger, rougher surfaces, you can achieve a professional-looking result that’ll impress anyone who sees it.
To wrap up, painter’s tape is a must-have for both DIY enthusiasts and seasoned pros. It saves time, effort, and ensures a cleaner outcome on your painting projects. Selecting tapes with UV and moisture resistance can also extend their usability for both indoor and outdoor applications. What will you be painting next?
Preparing Surfaces for Painter’s Tape

Have you ever started a painting project only to have the paint bleed everywhere because of that darn tape? It’s super frustrating! The key to avoiding that mess starts way before you dip that brush in paint. Let’s talk about how to properly prep your surfaces for painter’s tape.
First off, cleaning those walls is crucial. Grab a damp rag and go to town on the surface. You want to wipe away all the dust, dirt, and any lingering moisture. It might seem like a small step, but taking just a few minutes to do this sets you up for better tape adhesion.
Once you’ve wiped down the walls, don’t rush to slap on that tape! Make sure the walls are completely dry. If you’re dealing with porous surfaces like drywall, adding a primer coat can really help the tape stick better. It might feel like an extra step, but trust me on this one—it’s worth it.
Another thing to check? High-traffic areas. It’s easy for dust to accumulate in these spots, and that can mess with your tape’s stickiness.
So, here’s the trick: preparing your surfaces isn’t just about slapping on some tape and hoping for the best. By investing time in cleaning and drying, you’ll maximize that tape’s performance and get those crisp, clean edges you’re after. Using fine mesh materials ensures that any particles that could interfere with adhesion are minimized.
Before you know it, your painting project will look professional, and you’ll be able to admire your work without the hassle of paint bleeding. What prep tips have you found helpful in your own painting adventures?
Pro Techniques for Applying Painter’s Tape
Getting the application of painter’s tape right can really affect your project’s outcome. So, what can you do to ensure those lines are crisp and clean? Start by measuring and marking your guidelines with a pencil. This step is key for ensuring straight lines and a professional look.
When you’re laying down the painter’s tape, make sure it’s at a consistent angle. Avoid pulling or stretching it as this can lead to those pesky uneven edges. Press down the edges firmly with something like a putty knife or even a credit card. This creates a tight seal that keeps the paint from seeping underneath, which we all want to avoid.
Try to use long sections of tape whenever you can. This reduces the number of seams, which are notorious for causing paint to bleed through. If you’re dealing with tricky surfaces, here’s the trick: score along the tape’s edge with a utility knife. This will help you get those clean lines and make the tape come off easier once you’re done painting.
Using a tape with PaintBlock Technology can further prevent paint bleed and improve your final results.
When’s the Right Time to Pull Off That Tape?
When’s the Right Time to Pull Off That Tape?
Ever wonder how to get those perfect lines when you’re painting? Knowing the right moment to remove painter’s tape can make all the difference in your finish. Ideally, you want to pull that tape off within 1-2 hours after the paint feels dry to the touch. That way, you’ll get crisp lines and keep smudging at bay. But if you’re doing multiple coats, hold off until the final layer is fully dry to maintain adhesion.
Here’s the trick: when it’s time to peel off the tape, do it at a 45-degree angle. This gives you better control and cleaner edges. Now, what happens if the tape doesn’t want to budge? That can be frustrating! If you feel resistance, try scoring the edge with a utility knife to protect the paint underneath.
So, why does this matter? Waiting until the paint is completely cured can lead to the best results. It makes sure everything sets properly and looks sharp. Also, choosing a tape with the right adhesive strength ensures easy removal and prevents residue.
In a nutshell, timing is everything when it comes to painter’s tape. Keep these tips in mind next time you’re tackling a paint project, and consider: what’s your biggest challenge with tape?
Techniques to Prevent Edge Bleed During Painting
How frustrating is it when you’ve painted a beautiful piece, only to see that pesky edge bleed smudging your hard work? If you’re aiming for those sharp lines that make your project pop, there are a few techniques you can try to keep that paint where it belongs.
First off, make sure your surface is spotless and dry. Any dust or moisture can really mess with the adhesion of your painter’s tape, leading to those unwanted smudges. After you’ve prepped the surface, press that tape down firmly. A putty knife or even a credit card can work wonders here to create a tight seal.
Here’s the trick: If you’re looking for perfection, consider brushing a thin layer of watered-down clear coat along the edge of the tape. This creates a bit of a barrier against seepage. When it’s time to paint, always brush away from the tape edge. This little maneuver can really cut down on unwanted bleeding.
Now, when you go to remove the tape, do it while the paint’s still wet. This is key for cleaner lines. Ideally, wait until your paint is just dry to the touch, usually about 1-2 hours, to avoid smudging later on. Using tools with an ergonomic grip can also help maintain steady hands and precise application when working near tape edges.
Common Mistakes to Avoid With Painter’s Tape
Sharp lines and clean edges are what we’re all aiming for when using painter’s tape, but getting it right isn’t just about technique—it’s also about avoiding common pitfalls. Ever had an edge that looked more like the surface of a mountain than a crisp line? It’s all about the details.
First, let’s talk about the right tape for your project. Not all painter’s tape is created equal. Make sure you select one that’s suitable for your surface, as this will help it stick better and ultimately give you cleaner lines. You wouldn’t want to use tape meant for delicate surfaces on something rough, right?
Before you stick that tape down, give that surface a good cleaning. Dust, dirt, and moisture can really mess with how well your tape adheres. You don’t want to be halfway through your project only to find the tape peeling up because it couldn’t grip properly.
When you’re applying the tape, try this: don’t stretch it. Just lay it down with steady pressure. This helps create even lines. So, why does this matter? Uneven tension can lead to those frustrating jagged edges or paint bleeding under the tape.
Patience is key when it comes to removing the tape. If you pull it off too soon, it’s likely your paint will smudge, and you’ll end up with those annoying, jagged edges again. Wait until your paint is dry, and then pull it off gently at a 45-degree angle for the cleanest look.
Lastly, be honest with yourself—are you using old tape? Dried-out tape is more trouble than it’s worth and will definitely spoil your hard work. Fresh tape isn’t just a suggestion; it’s a must if you want your project to come out looking sharp and professional.
Also, using clean tools and materials, such as paint strainers, can help ensure that your paint goes on smoothly without clogging or impurities that might affect adhesion and edge quality.
In a nutshell, pay attention to these details, and you’ll get the clean, crisp lines you’re after. What’s your best tip for using painter’s tape?
Fixing Common Mistakes With Painter’s Tape
Mistakes happen to all of us when we’re working with painter’s tape, and trust me, it can be frustrating. Ever used the wrong tape on a surface? It’s a good idea to just start over. For fresh drywall, delicate surface tapes work wonders. Cleaning the area before applying tape is crucial; dust and moisture can wreck the tape’s grip.
Have you ever tapped on freshly painted walls? It’s best to wait until that finish is fully cured to avoid any damage. Stretching the tape might seem tempting, but applying it with even pressure helps create those crisp, straight lines we all aim for.
Now, here’s the trick: wait until the paint is dry to the touch before peeling the tape off. This little step can save you from smudging or jagged edges, which are the last thing you want on your project. By keeping these tips in mind, you’ll easily fix common mistakes and end up with those clean, professional results we all strive for. Why not give it a shot on your next painting adventure?
Also, choosing a tape with a delicate adhesive strength can prevent damage to paint while still providing a secure hold.
Creative DIY Ideas Using Painter’s Tape
Have you ever found yourself struggling to keep your surfaces safe while painting? While painter’s tape is commonly seen as just a painter’s go-to tool, it can actually be a lifesaver for plenty of DIY projects around the house.
For starters, have you thought about sprucing up your walls? You can easily create cool wall designs like stripes, chevrons, or even geometric shapes just by applying strips of tape in different directions. It’s a simple way to give your room a unique flair without a ton of effort.
If you’ve got little ones running around, painter’s tape can also come to the rescue when it comes to child-proofing. Cover those sharp edges of electrical outlets with tape for a quick fix that keeps curious hands safe. Not every parent thinks about safety until it’s too late, so why not take a few moments to tape them up now?
Have snacks that need sealing? Here’s a great tip: painter’s tape works wonders for keeping your favorite snacks fresh. Just seal up those potato chip bags to keep the crunch alive. You’ll thank yourself later when your chips are still crisp.
Looking for something fun to do indoors? Try creating a colorful hopscotch court right on your floor with painter’s tape. It’s super easy to lay down, and when you’re done, it peels off without any damage. Everyone loves a bit of childhood nostalgia, right?
The best part is that painter’s tape isn’t just for the pros—it’s for anyone looking to add a dash of creativity at home. Remember that preparing your surface properly can make all the difference, so surface preparation is key to getting the best results from your tape projects.
So go ahead, grab that tape and let your imagination run wild! What cool DIY project will you start today?
Frequently Asked Questions
How to Avoid Paint Bleeding Under Painters Tape?
To avoid paint bleeding under painter’s tape, we should choose the right tape selection for our surfaces. Firmly apply and burnish the tape edges, and always paint away from the tape edge for better results.
How Long Should You Leave Painters Tape on Before Removing?
When we’re tackling our projects, we usually remove painter’s tape within 1-2 hours for best results. Let’s keep tape longevity in mind to achieve those sharp edges and flawless finishes we love!
Is It Better to Pull Painters Tape Wet or Dry?
It’s definitely better to pull painter’s tape while the paint’s still wet. Using various tape types, we find that gentle removal at a 45-degree angle helps us achieve those crisp, clean lines we all love.
What’s the Difference Between Blue and Green Painter’s Tape?
When we plunge into tape applications, blue painter’s tape offers reliability for general jobs while green tape, with its magical PaintBlock technology, promises pristine edges for those critical projects. Choosing wisely makes all the difference!


