As an Amazon Associate, we earn from qualifying purchases. Some links on this site are affiliate links at no extra cost to you. Our recommendations are based on thorough research and editorial judgment.

Practice Board Method: How to Train Your Spray Pass Before the Real Job
Have you ever started a spray painting project only to realize halfway through that your technique wasn’t what you thought it was? It’s frustrating, right? That’s why practicing before diving into the real job is so important. A great way to hone your skills is through a method I like to call the practice board method.
You may be interested


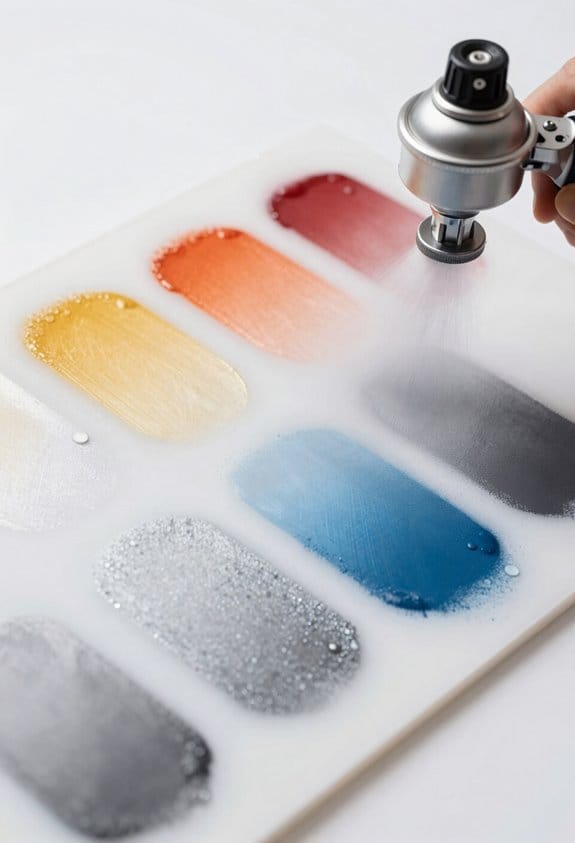
Start by picking a board that closely resembles the surface you’ll be working on for your actual project. It can be a scrap piece of wood or anything else that’s similar. Then, grab the right spray tip and set your compressor between 30-50 PSI. This pressure range allows for an even application and helps prevent drips.
Now, here’s the trick: maintain a steady distance of about 6 to 8 inches from the board. As you spray, overlap your passes. This not only gives a nice finish but also helps you get a feel for how the paint distributes.
Throughout this practice session, pay close attention to your spray patterns. If something doesn’t look right, adjust your distance or pressure until you find that sweet spot.
Keeping a journal of your spray painting sessions can also be valuable. Jot down what works and what doesn’t to see how you improve over time. Truth is, consistent practice leads to better results.
So, why does this matter? Well, every painter knows that a solid technique is crucial to achieving the results you want. It can save you time and frustration when you finally tackle that big project.
In summary, practicing on a board before the real deal can really set you up for success. Have you tried this method yet? If not, why not give it a shot before your next project?
Key Takeaways
- Select a practice board that resembles your actual project for relevant skill development.
- Use the appropriate spray tip size to achieve an efficient spray pattern.
- Set your compressor to the recommended pressure for even application.
- Maintain a consistent spray distance of 6 to 8 inches for muscle memory practice.
- Document observations and techniques during practice to track progress and improve skills.
Why the Practice Board Method Is Essential for Spray Painting

Are you diving into the world of spray painting but feeling a bit overwhelmed? You’re not alone. Many people jump in without practicing, only to find out that a little prep can go a long way. Enter the Practice Board Method—an essential technique that can really help you nail down your skills.
Practicing on a board lets you get comfortable with your spray application. You can fine-tune your pressure and pattern before you start painting your actual project. It’s like warming up before a game—totally necessary. Plus, it’s a great way to figure out which spray tip works best with different paints. You’ll spend less time fixing your mistakes, like running paint, because you’ll have a reliable technique under your belt.
Time management is a biggie when it comes to spray painting jobs. The more you practice, the better you’ll get at estimating how long different tasks will take. It helps ensure you’re efficient, so you can save on supplies and time.
So, why does this matter? Well, immediate feedback on your spray patterns is huge. You can see what you might need to adjust in real-time, making it easier to apply what you learn on the practice board to your actual projects. Truth is, the more you practice, the better you become.
In short, the Practice Board Method is your best friend in the spray painting journey. It sharpens your technique and builds your confidence. Why not give it a try and see how much smoother your next project goes? Additionally, understanding the ideal operation pressure for your sprayer can further enhance your control and achieve flawless finishes.
Effective Preparation Techniques for Spray Painting
Want that perfect finish on your spray painting projects? It all starts with some solid prep work. First off, let’s dive into surface preparation. You should clean the area really well using a mild detergent, and then give it a light sanding. This little trick enhances paint adhesion, which you definitely want for a smooth application.
Next, think about your workspace. Proper ventilation is super important—open those windows and set up fans to keep the air flowing. Not only does this cut down on fumes, but it also creates a way more enjoyable painting atmosphere. And don’t forget to cover any surrounding areas with some handmade poly to catch any overspray. No one likes a messy aftermath, right?
Now, let’s talk equipment. Make sure you adjust your spray gear correctly. Test out different tips and pressure settings before you dive in. It’s all about finding what works best for your project—it really makes a difference in the end result.
Using an airless sprayer with the right flow rate and pressure settings can help you achieve a flawless finish efficiently.
So, why does this matter? Taking the time to prep properly means a cleaner, more professional finish on your projects. Trust me, those small steps can elevate the final look.
In recap, prepare your surfaces, set up a safe and ventilated area, and ensure your tools are ready. What DIY project are you tackling next?
Essential Tools for Spray Painting Success

Ever tried spray painting and ended up with a messy finish? You’re not alone. Getting the right tools can make a world of difference, so let’s break down what you really need for success in your next project.
First up is spray tip selection. It may sound simple, but picking the smallest suitable tip for your paint really helps with both performance and finish. A smaller tip means better control, which is key to avoiding those dreaded drips.
Next, let’s talk about pressure settings. You might be wondering, “How do I know what’s right?” A good rule of thumb is to check the product data sheets for the paint you’re using. Ideally, you want to stick in that sweet spot of around 30-50 PSI. This helps you achieve a smooth spray pattern.
Now, thinning your paint is another essential step that can’t be overlooked. The right consistency allows for better flow and lowers the chance of running, which can ruin your whole project. A mix of water or any recommended thinner can do wonders, so experiment a bit until you find that sweet spot.
And don’t forget to practice on boards. Not only does this let you refine your technique, but it also gives you a chance to play around with different spray patterns without the pressure of ruining your actual project. Practicing can heighten your efficiency and confidence.
Additionally, using specialized stain brushes can help achieve smoother applications on surfaces that require detailed finishes, complementing your spray painting efforts.
To wrap it all up, having the right tools—good spray tips, proper pressure settings, effective paint thinning, and plenty of practice—sets you up for better spray painting results. What’s been your biggest challenge with spray painting so far?
Recommended Products
Colorful Practice Board: Elevate your face painting skill with this vibrant and colorful board made of washable PP material. The board is presented in 2 angles, front view and 45 degree side view, with side-by-side double images to compare different make-up effects
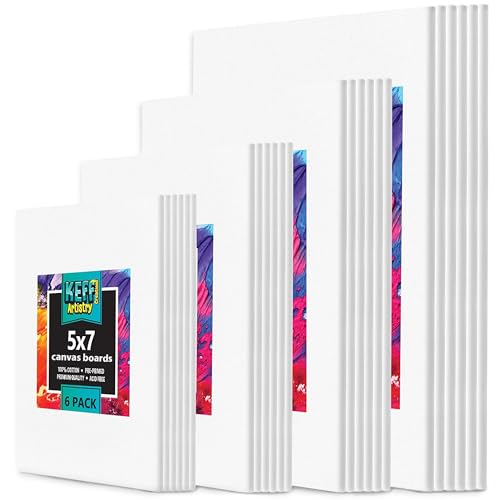
【 Ultimate Canvas for Painting Set 】 This premium canvas boards for painting pack includes 6 pieces of each size - 5"x7", 8"x10", 9"x12", and 11"x14" canvases. Use a large canvas for expressive strokes or mini canvases for painting for fine detail. Each paint canvas is triple-primed and crafted for use with acrylics, oil paint set, watercolor, or tempera. A perfect addition to your painting, drawing & art supplies for adults or any age, these blank canvases for painting are a staple for any art class, home project, or art studio.

PERFECT SAMPLES: These 12" x 9" white, styrene panels provide a smooth, warp-free surface for testing up to 5 color samples with paint, stain or other coatings.
Step-by-Step Guide for Using the Practice Board
Ever get nervous before starting a big spray painting project? You’re not alone! Practicing on a board can really help you fine-tune your skills and boost your confidence before diving into that actual job.
Start by picking a practice board that looks similar to what you’ll be painting. This way, you get a feel for the surface and how the paint will behave. Next, choosing the right spray tip size can make a big difference—this affects your spray pattern, and you want it just right. Setting your compressor to the pressure recommended on the product data sheet is crucial for achieving those even sprays you’re aiming for.
Try to keep a consistent distance from the board while you practice. A good rule of thumb is to overlap each pass to ensure you’re covering everything uniformly. Once you’re done, take a moment to evaluate your work. Look for drips or areas that might need some attention. This is a key step to refining your technique before tackling the real project.
Honestly, practicing on a board can really enhance your skills and get you ready for anything. So, why not give it a shot? You might just surprise yourself with how much progress you make! And don’t forget to protect yourself with the right paint suit material to stay safe and comfortable during your practice sessions.
Recommended Products

What include:Each set include 4 colorful design boards A4 size. Colorful exquisite design with A4 size 8.27" x 11.69", Colorful deisgn board is peferct for cheek design,forhead design, full face design,eye designs.The black board is peferct for line,stroke practice.

【Face Painting Practice Boards】Unlock your artistic potential with our durable and portable Face Painting Practice Boards. Featuring clear patterns and a smooth, wear-resistant surface that closely mimics skin texture, these boards offer a realistic practice experience.

【Reusable】Face Painting Practice Board can be reused. It is used to practicing art design and creation such as face painting, eye painting, cheek painting, and special effects makeup. Suitable for beginners or experienced artists.
Avoid These Common Mistakes When Practicing
While improving your spray painting skills sounds exciting, it’s easy to make a few mistakes that can really hold you back. Have you ever found yourself frustrated after a practice session? One of the first things to consider is keeping your practice board clean. A messy surface can lead to uneven results, so make it a habit to remove debris before you start. And when it comes to getting that real-world feel, try to match the paint and spray tip to what you’d actually use on a job.
Another crucial point is maintaining a consistent spray distance. Aim for about 6 to 8 inches from the surface. This isn’t just about comfort; it’s key for building muscle memory. Have you noticed how your control improves when you’re consistent with your distance? Speaking of control, pay close attention to the consistency of the paint. If it feels clumpy or thick, drop it and get something smoother.
Now, let’s talk about trigger control. It’s easy to get excited and press too hard or fast, but that can lead to problems like uneven coverage or annoying overspray. Instead, focus on making steady movements. The best part is that with practice, this will become second nature!
As you practice, keep an eye out for those annoying dry spots. If you see them, don’t hesitate to make adjustments. Maybe you need to change your spray angle, speed, or distance. Truth is, practicing correctly will help you avoid these rookie mistakes in the long run.
To recap, keep your board clean, stick to the right distance, and control that trigger. Using equipment with kink resistance features can also help maintain smooth airflow and steady paint application. So, what will you focus on in your next practice session?
Recommended Products

41-color professional palette for unlimited creativity: OPHIR's split cake palette delivers 41 water-activated colors in three professional finishes: 2 matte primaries for classic base work, 20 pearlescent metallics for festive shimmer, and 19 UV-reactive neons for blacklight parties. The removable color group design lets you customize your setup for specific events—bring neons to summer pool parties, metallics to winter formals, or the full range to all-day festivals. Each 5.14 oz section provides ample paint for dozens of full-face applications, ensuring you never run out mid-event.

COLORFUL Design: Bowitzki Practice Board is made of PP material,Colorful designs are printed on the plastic sheet.Its surface are slightly textured, not smooth,it will avoid brush slipping when you painting. A4 size 8.27" x 11.69" and light weight to carry.

COLORFUL Design: Bowitzki Practice Board is made of PP material,Colorful designs are printed on the plastic sheet.Its surface are slightly textured, not smooth,it will avoid brush slipping when you painting. A4 size 8.27" x 11.69" and light weight to carry.
Evaluating and Improving Your Spray Technique
Evaluating and Improving Your Spray Technique
Ever feel like your spray paint job just isn’t cutting it? You’re not alone. After getting the basics down, it’s crucial to evaluate your spray technique if you want to see real improvement.
Begin by checking out your spray pattern on a practice board. This is where you can really test the waters. Try different distances and angles to see what gives you the best coverage. It’s all about finding that sweet spot where the paint lays down nice and smooth.
Next, pay close attention to your pressure settings. Adjusting the pressure can significantly change the spray width and the size of the droplets. So, here’s the trick: don’t just stick to one setting. Experiment with different pressures to see how it affects your results.
Also, consider the tip size you’re using. Swapping out tips can feel like a small change, but it can make a big difference in your paint application. Make a note of which sizes work best for you; this way, you’ll have a handy reference for future projects.
As you practice and evaluate, don’t forget to jot down your observations. Keeping track of what you’ve tried will guide your decisions and help you see your progress. With some patience and dedication, you’ll find your groove and turn out work that not only looks good but also gets the job done efficiently. Remember to use sprayers with adjustable pressure settings to fine-tune your technique for the best results.
Recommended Products

Compatible Size Models: Our airless sprayer nozzles have 6 different models, 211, 315, 417, 515, 517 and 523, the corresponding nozzle diameters are 0.011'', 0.015'', 0.017'', 0.015'', 0.017'', 0.023'', and the spraying range is 4 to 12 inches

Package Includes: 2 x 235486 Swivel Joint

Package Quantity: You will get 13pcs reversible spray tips(111,109,211,213,313,413,411,415,315,515,517,621,623),4pcs 30CM paint sprayer extension wand, 2pcs nozzle tip guards, airless paint spray gun swivel joint and box
Frequently Asked Questions
How to Learn Spray Control?
To learn spray control, we should practice spray technique tips, focusing on aiming accuracy drills and recoil management strategies. Regular practice helps us refine our skills, ensuring consistent and smooth application in our projects.
How to Train Spraying CS2?
To train spraying CS2, we should start with strategic spray technique drills, focusing on recoil management and perfecting our aim training. Practicing regularly will sharpen our skills and lead to smoother, more successful application.
What Are Some Things to Do to Obtain the Correct Spray Pattern?
To obtain the correct spray pattern, we should focus on mastering spray techniques, choose the right weapon selection for our needs, and utilize map knowledge to position ourselves effectively for ideal spraying results during gameplay.
What Is the Command for the Spray Pattern in CS2?
Oh, we’d love to just spray aimlessly, but that won’t win matches! To command our spray patterns in CS2, we type “r_cleardecals” and tackle weapon recoil with practice techniques. Let’s become pros together!


