As an Amazon Associate, we earn from qualifying purchases. Some links on this site are affiliate links at no extra cost to you. Our recommendations are based on thorough research and editorial judgment.

Sprayer Cleanup Step-by-Step: Flushing, Filters, and Tip Storage
Cleaning your sprayer can seem daunting, right? But it doesn’t have to be! A good cleaning routine can save you headaches down the line and keep your equipment running smoothly.
You may be interested


Start by flushing the system with clean water. Let at least three tankfuls flow through the hoses and nozzles. This step makes a real difference in getting rid of residue and buildup.
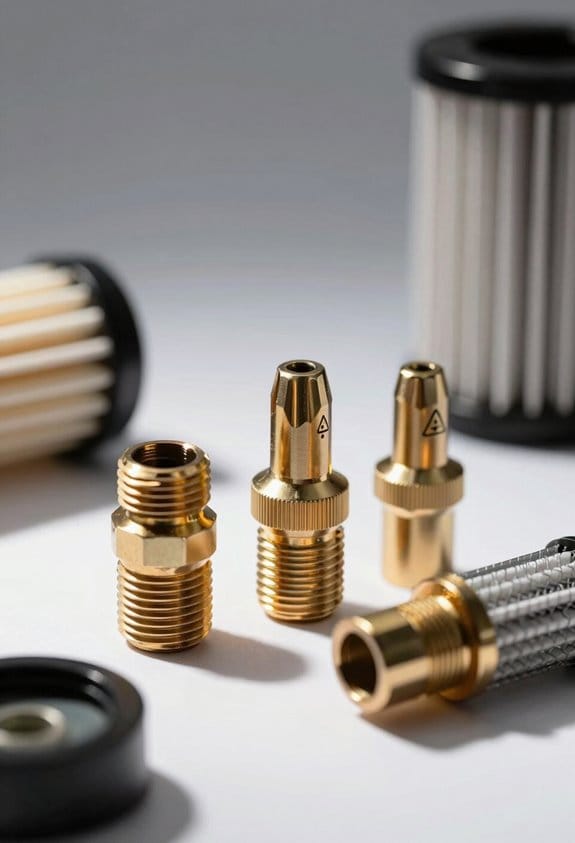
Then, take a moment to inspect the filters and screens. Pull out any debris you see and give them a good rinse. Avoiding clogs later on is key to efficient spraying.
Now, you can’t forget about the tips and nozzles. Clean these using a specialized cleaning solution. Once they’re spotless, store them in a moisture-proof container. This little extra effort can prolong their life and keep your sprayer in tip-top shape.
So, why does this matter? Regular maintenance not only prevents problems but also ensures better performance out in the field. Honestly, it’s easier than most people think.
And remember, there’s plenty more to explore when it comes to safe disposal practices and caring for all those components. Keeping everything in check could save you from spending more on repairs later.
Have you ever experienced a sprayer issue that could’ve been avoided with better cleaning?
Key Takeaways
- Begin by flushing the tank with clean water, ensuring it circulates through hoses and nozzles to remove residual chemicals.
- Remove and thoroughly clean filters, screens, and nozzles to prevent clogs and ensure optimal performance.
- Use multiple rinses with clean water and a cleaning agent to effectively dislodge and remove all residues.
- Store tips and nozzles in a moisture-proof area to protect against corrosion and retain their performance.
- Regularly inspect and replace worn seals and gaskets to prevent leaks and maintain sprayer integrity.
Start With Proper Sprayer Cleaning Techniques for Safe Crop Use

Want to know the secret to keeping your sprayer in top shape? It all starts with cleaning up right after you apply any products. Trust me, spraying out any leftover product is a must to prevent any gunk from building up over time.
Next, give that tank a good rinse. Use clean water and make sure it runs through the entire system—hoses and nozzles included. Don’t forget about the filters and strainers; take them out and give them a thorough clean too. This helps you dodge clogs in the future and makes sure your sprayer performs at its best when you need it.
Here’s the trick: after rinsing, mix a specific cleaner with water, following the instructions on the label. Agitating that solution can work wonders for getting rid of stubborn residue.
Before you hit the fields, try testing a small batch on some non-sensitive plants. It’s a smart way to ensure your cleanup worked well and that your crops are safe.
For best results, maintaining efficient drying time during cleaning processes can drastically improve equipment longevity and performance.
Crucial Safety Precautions for Sprayer Cleanout Preparation
Have you ever thought about the risks involved in cleaning out your sprayer? It sounds simple, right? But taking the right safety precautions is a must for everyone who’s part of the process.
Start by gearing up—gloves, goggles, long sleeves, and a waterproof apron are essential to shield yourself from any chemicals. Choose a cleanout spot wisely; keeping it away from drift zones and sensitive crops will help you avoid any accidental contamination. I can’t stress enough how important it is to be mindful of your surroundings.
Before jumping in, prepare a spill kit with absorbents, buckets, and extra gloves. You never know when an unexpected leak might pop up. Having those supplies right there will make handling spills a lot easier. You might think it won’t happen to you, but it’s better to be safe than sorry!
Stay informed about the rules regarding rinsate disposal in your area. Local, state, and federal regulations can vary, so make sure you’re on the right side of compliance. You don’t want to run into trouble down the road, right?
Additionally, keep the lines of communication open with everyone involved. Make sure your team understands the importance of these safety measures. It can turn what could be a risky situation into a safe and smooth operation. Working together enhances your overall safety during the cleanout.
Using a multi-stage filtration system during cleanup helps reduce airborne contaminants and improves safety.
To wrap it up, following these precautions can save you from potential headaches down the line. So, what steps are you taking today to ensure a safer cleanout process?
Key Components to Inspect During Sprayer Cleanout

Have you ever faced the frustration of a sprayer that just doesn’t perform as it should? Cleaning out your sprayer is essential for making sure it operates effectively for each application.
Start with the nozzles. Check them for any signs of wear and make sure there’s no residue build-up. Even the tiniest bit can throw off your spray pattern, leading to uneven application.
Next up, don’t underestimate the importance of screens, strainers, and filters. A thorough cleaning can help you avoid clogs. If they’re not clear, you risk impairing flow and introducing contaminants into your work.
And let’s not overlook the end caps on the boom. You’d be surprised how much residue can hang around there. Also, inspect seals and gaskets for any wear or damage. Compromised seals? They’re just asking for leaks, which nobody wants to deal with.
Lastly, be sure to check your mixing and loading equipment. It’s crucial to clean it thoroughly to prevent carryover of any hazardous chemicals. This not only helps your equipment last longer but also keeps your future applications safe and effective.
Remember to assess the surface compatibility of your materials before spraying to ensure optimal adhesion and finish quality.
Step-By-Step Cleaning Procedures for Filters, Screens, and Nozzles
Cleaning filters, screens, and nozzles can feel like a hassle, but it’s totally necessary to keep your sprayer working like a champ. After you’ve used it, take a moment to remove all the parts. Trust me, doing this right away helps prevent that annoying gunk from building up.
Once everything’s off, rinse those components really well with clean water. You want to get in there and agitate things a bit to knock loose any leftover chemicals. So, why does this matter? Well, a clean sprayer means better performance, and who doesn’t want that?
Here’s the trick: soak filters, screens, and nozzles in a cleaning solution mixed with water. Just follow the instructions on the product label for best results. After soaking, give everything a good flush with clean water, ideally rinsing it multiple times. Usually, two thorough rinses do the trick to make sure all residues are gone.
It’s also important to keep an eye on your filters and nozzles for any signs of damage. Regular inspections and replacements will help ensure your sprayer runs at its best and lasts longer. Honestly, taking these simple steps can save you time and headaches in the long run.
For optimal maintenance, using sprayers made from chemical-resistant plastics helps prevent damage during cleaning and extends the lifespan of your equipment.
Best Practices for Cleaning Sprayer Components
Cleaning your sprayer components can feel like a chore, but keeping them in top shape is key to avoiding problems down the line. After each use, take a moment to check and clean the filters, strainers, and nozzles. Trust me—this simple step keeps clogs at bay and helps your sprayer work like it should.
Got some residues from previous sprays? That’s common. Make sure to pick a cleaning solution that matches those residues; some detergents do a better job than others when it comes to getting everything off. Regularly inspecting and replacing worn seals and gaskets is also a must; those leaks can turn into big headaches if you’re not careful.
Here’s a good routine: try implementing a consistent flushing process. Aim for at least two water rinses followed by a rinse with a cleaning agent. You’d be surprised at how much cleaner everything is after following this method.
And let’s not forget about nozzle preservation. How annoying is it when a nozzle corroded from moisture? To avoid that, store your tips and nozzles in a moisture-proof space. This little tip can save you from needing new parts sooner than you’d like.
Using accessories like the PowerFlush Adapter can simplify and improve your cleaning routine by allowing efficient flushing with a garden hose connection.
Keeping up with these maintenance tips can significantly extend your sprayer’s lifespan. So, what’s your go-to cleaning tip for sprayer components?
How to Safeguard Tips and Nozzles During Storage
Have you ever pulled out your sprayer only to find the nozzles and tips clogged or damaged? It’s such a hassle and can really mess up your plans. Safeguarding these parts during storage is key to keeping everything in good shape.
Start off by giving your nozzles and tips a good clean. This helps avoid hardened residues that might cause clogs later. It might seem tedious, but it pays off when you’re ready to use your sprayer again.
Next, think about how you store them. Using organized containers or racks can keep everything neat. Make sure you place these storage solutions in a cool, dry area away from direct sunlight. Why is this important? Sunlight can degrade the materials over time, leaving you with less effective tools.
Regularly checking your stored components is another crucial step. Inspect them for any wear or damage. You’ll want everything to be in top shape for your next project. And if you really want to go the extra mile, consider using protective lubricants made specifically for sprayer components. They can enhance both the longevity and performance of your equipment during storage.
In addition, following the cleaning process recommended by manufacturers ensures you remove paint residues thoroughly and helps prevent clogging.
This routine isn’t just about protecting your tools; it’s about making sure you’re ready to go when the time comes. By taking these simple steps, you can save yourself from a lot of hassle later on. So, what’s your go-to tip for keeping your gardening tools in top condition?
Top Mistakes You Should Avoid During Sprayer Cleanout
When you’re getting ready to clean out your sprayer, it can be easy to overlook a few key things that could really impact how well your equipment performs in the long run. For starters, don’t let any leftover spray mix hang out in the tank. You might think it’s okay for a day or two, but believe me, that stuff hardens fast and makes cleaning a total nightmare.
Next up, don’t forget about those boom end caps. It’s tempting to overlook them, but any residue left there can mess up your next application and contaminate your crops. When you’re rinsing everything out, make sure you’re using enough water or cleaner. You want to ensure you get every bit of residue out—half-hearted rinsing just won’t do the job.
Regular maintenance is vital, so take a couple of minutes to check your filters, strainers, and nozzles. Clogs can sneak up on you, and the last thing you want is for your sprayer to fail midway through a job. It might feel like a hassle, but trust me, it’s worth it in the end.
And hey, don’t skip out on following the label instructions for any cleaning agents. Seriously, you might think a little deviation won’t matter, but it can lead to legal troubles and could potentially harm future crops. Choosing a biodegradable paint cleaner can also help minimize environmental impact while ensuring effective cleaning.
What You Need to Know About Rinse Water Disposal Laws?
How can you make sure your sprayer rinse water disposal is on the right side of the law? The truth is, rinse water regulations can differ quite a bit depending on where you are. So, it’s really important to check out the local, state, and federal guidelines. Looking through resources from the Environmental Protection Agency (EPA) and your state’s agricultural department can point you in the right direction for disposing of wash water the right way.
Keep in mind, safe disposal practices aren’t just a good idea—they’re a must. You might even need to document how you handle your rinse water. In some places, this means having containment systems or following specific treatment processes for your rinsate. By sticking to these guidelines, you’re not just being a good steward to the environment; you’re also keeping yourself out of legal hot water. Additionally, choosing eco-friendly formulations can minimize environmental impact and help comply with safety standards.
Frequently Asked Questions
How to Clean Your Sprayer Using Power Flush?
To clean our sprayer using power flush, we should guarantee effective cleaning solutions, circulate clean water for minimum times, and benefit from the sprayer maintenance tips to guarantee peak performance and longevity of our equipment.
How to Properly Clean a Sprayer?
It is understood that cleaning a sprayer might seem tedious, but proper sprayer maintenance tips guarantee longevity. Use recommended cleaning solvents, flush out residues, and regularly check filters to troubleshoot any sprayer issues. We’ve got this together!
How to Prepare a Paint Sprayer for Storage?
To prepare our paint sprayer for storage, we’ll make certain all sprayer accessories are cleaned, lubricate moving parts, and choose a cool, dry storage environment, keeping it safe from extreme temperatures and sunlight’s harsh effects.
How to Clean Airless Sprayer Tips?
To clean airless sprayer tips, we soak them, scrub gently, rinse thoroughly, and let air dry. For peak tip maintenance, we prioritize proper tip storage and timely tip replacement to guarantee consistent performance.


