As an Amazon Associate, we earn from qualifying purchases. Some links on this site are affiliate links at no extra cost to you. Our recommendations are based on thorough research and editorial judgment.

How to Fix Nail Pops, Hairline Cracks, and Small Dents Before Painting
Got nail pops, hairline cracks, or small dents in your walls? You’re not alone. These little annoyances can show up just when you’re getting ready to paint, but don’t worry—fixing them isn’t as hard as it sounds.
You may be interested


Here’s where to start: knock any loose nails back in place, then secure them with screws. This prevents further issues down the line.
For those pesky hairline cracks, it’s a good idea to widen them just a bit before you slap on some joint compound. This simple step helps the compound stick better, leading to a smoother finish.
Now, if you’re dealing with small dents, grab some lightweight spackling. Apply it to the dent and let it dry. After that, sand everything down until it’s nice and smooth to the touch. Frankly, this is the step that makes a huge difference when you finally apply that fresh coat of paint.
And let’s not forget about priming your repairs. It’s crucial for ensuring the paint adheres well and gives you a nice, even finish. So, why does this matter? Because the better the prep work, the less likely you’ll run into issues later.
Wrapping it all up, these foundational fixes are key to achieving a professional look. Don’t skip them!
Have you ever tackled a wall repair like this before, or are you ready to give it a go?
Key Takeaways
- Repair nail pops by driving the nail back in and adding screws for stability, then cover with joint compound and sand smooth.
- Widen hairline cracks with a utility knife, fill with joint compound, and reinforce with mesh tape for durability before sanding.
- For small dents, apply lightweight spackling compound, sand it down once dry, and use joint compound for deeper gouges.
- Always spot prime repaired areas to ensure even paint absorption and prevent shiny spots after painting.
- Use high-quality exterior primer and satin or eggshell finishes for better durability and coverage during the final paint job.
Causes of Wall Imperfections

Have you ever looked around your home and noticed those annoying wall imperfections? Nail pops, hairline cracks, and small dents can really take away from a room’s charm. But why does this happen, and what can you do about it?
Nail pops are pretty common, especially in older homes. They occur when drywall fasteners get loose due to the wood framing expanding and contracting over time. You might think it’s just a little annoyance, but if left unchecked, it can ruin the smooth look of your walls. Hairline cracks show up at drywall seams, which are stress points for your walls. They’re often made worse by humidity and settling of the structure, and regular temperature changes can really make the situation worse.
You may also notice small dents from everyday life—little bumps from moving furniture or just general wear and tear. So, how do you deal with these imperfections? Here’s a trick: conduct regular inspections. If you spot issues early, you can tackle repairs quickly and save yourself a ton of time and hassle later on. It’s all about keeping that painting surface smooth and pretty. Applying a high-quality exterior primer before painting can help protect and strengthen the surface for a more durable finish.
Tools You Need for Wall Repair
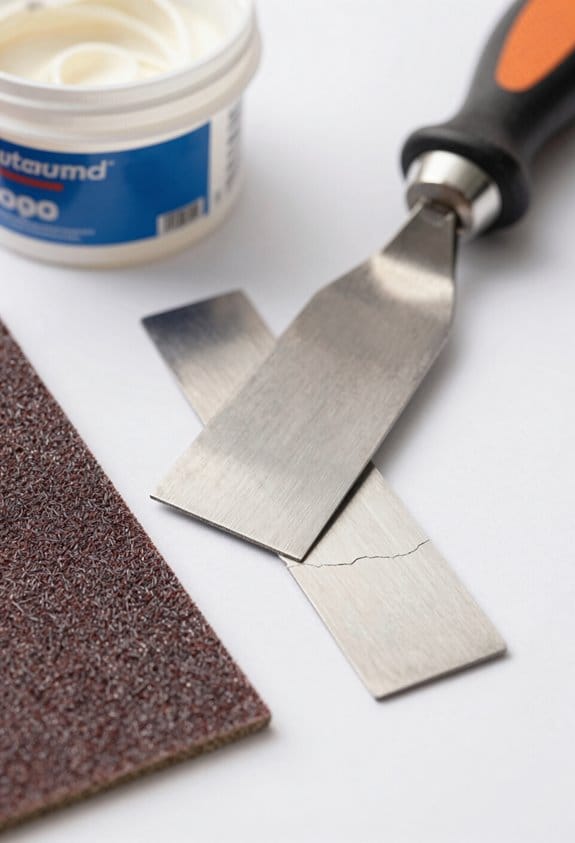
Got a wall that needs some TLC? You know those frustrating little dings and scratches that seem to multiply overnight? Let’s get you set up with the right tools to tackle those imperfections and bring your walls back to life.
Start with a putty knife to apply spackle or joint compound smoothly. This tool is your best friend for filling in small holes and cracks—trust me, it makes the job so much easier! If your walls have some hairline cracks, a utility knife is great for opening them up just a bit. This step is crucial because it ensures the materials stick well.
You’ll want a sanding block with fine-grit sandpaper to buff out any rough patches after your repairs. A smooth finish makes a huge difference when you finally paint over those areas. If you’re dealing with larger cracks, don’t skimp on mesh tape to reinforce those spots before slapping on the joint compound. By the way, make sure to keep a damp cloth nearby. It’s super helpful for cleaning up dust and debris—better adhesion means a more professional-looking result.
Oh, and don’t forget about primer! It’s important for sealing those patched areas and helping your paint stick beautifully. After all your hard work, you want that finish to look consistent and flawless.
For the best results, choose fast-drying wood fillers to speed up your repair process and reduce downtime.
Recommended Products

Drywall repair kit can be used for repairing interior or exterior surfaces like drywall, plaster, wood, brick and stone

Complete Repair Kit: Contains 1 pieces repair putty(8.5oz), 2 inch wall repair patches(2pcs), 4 inch wall repair patches(1pcs), 2 pieces of sandpaper, and 4 plastic scrapers.
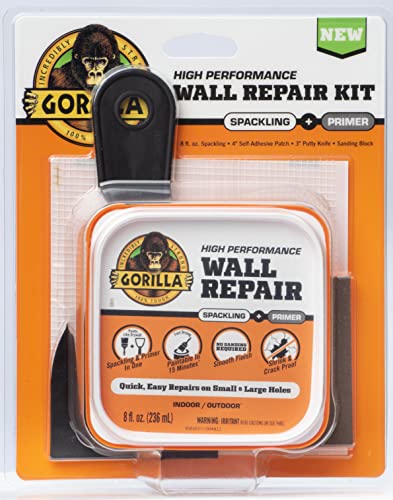
ALL IN ONE WALL REPAIR KIT: Contains all of the tools you need to complete strong, durable repairs on walls, ceilings and both small and large holes for a fast, professional-looking finish
Fixing Nail Pops: A Step-by-Step Guide

Nail pops are one of those annoying little problems that can really catch your eye. But don’t worry, fixing them is easier than you might think. Let’s get into it!
Start by driving the existing nail back in to get it nice and tight. After that, it’s a good idea to add two more drywall screws—one above and one below the nail pop. This locks the drywall into the stud and helps prevent any future issues. Sounds simple, right?
Now comes the fun part: applying the joint compound. Use 2-3 thin layers, making sure to feather out the edges for that seamless look. Once everything’s dry, it’s time to sand the area until it’s flush with the wall. You want to eliminate any bumps so it blends in perfectly.
Truth is, the last step is just as important as the others. Spot prime the repaired area to ensure the paint sticks well and looks consistent. This will make all the difference when it comes time to paint.
In short, fixing nail pops isn’t as daunting as it sounds. Using tools with material durability and strength can also make your repair work easier and more efficient, especially when handling drywall. So, what are you waiting for? Grab those tools and get started!
Recommended Products
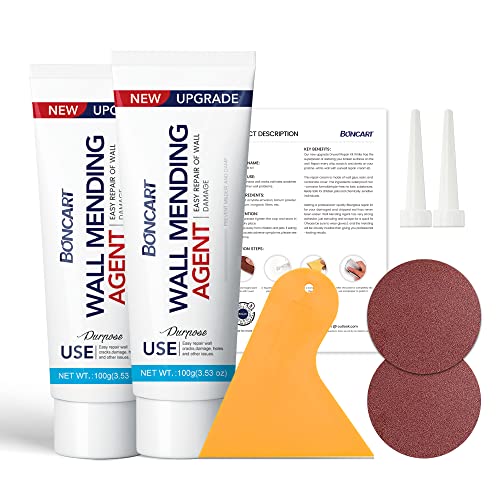
The drywall repair kit includes 2x Wall mending agent (100g), 2x Nozzle Extender, 1x Scrapers, and 2x Sandpaper.

MAKES REPAIRS 3X FASTER than traditional vinyl spackling
Effective Methods for Repairing Hairline Cracks
Repairing hairline cracks in drywall can feel like a daunting task, but it doesn’t have to be. Have you ever noticed those annoying little cracks appearing on your walls? Here’s a simple way to tackle them without stressing out.
Start by widening the crack a bit with a utility knife. It might sound counterintuitive, but this step really helps the joint compound stick better. Once you’ve done that, fill it in with a thin layer of joint compound. If the crack is stubborn or deep, don’t hesitate to apply multiple layers—just make sure each layer dries completely before adding the next.
For those larger cracks you might encounter, consider reinforcing them with fiberglass mesh or paper tape. This extra step helps keep everything nice and sturdy. Once filled, give the area a good sanding to make it smooth, and feather the edges to blend it seamlessly into the surrounding wall.
Now, here’s the trick: don’t skip priming the repaired areas. This seals the joint compound, which is crucial for even paint absorption later on. After all that work, you’d want the paint to look perfect, right?
To ensure a professional and durable finish, use a drywall primer specifically formulated to promote adhesion and block stains before applying your topcoat.
Recommended Products
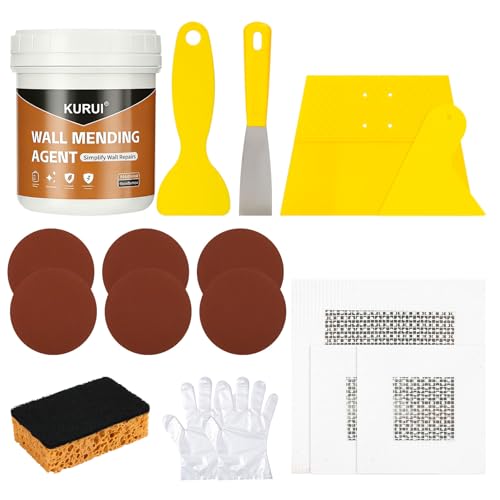
COMPLETE DRYWALL REPAIR KIT-The kit includes 1 pack 8.8oz wall mending agent, 1 textured sponge,6 sanding sheets,2pcs 2-inch wall repair patches, 1pc 4-inch wall repair patches, 4 scrapers in different sizes, and 1 pair gloves.
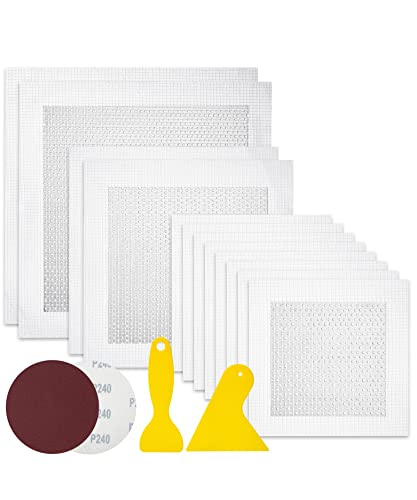
Package includes 12 pieces of drywall repair patch in three different sizes (8 pieces of 4-inch, 2 pieces of 6-inch and 2 pieces of 8-inch), 2 pieces of sandpaper (240 grit), and 2 plastic scrapers.

UPGRADE PACKAGE WITH TOOLS NEEDED - This wall hole patch kit includes: 1 Repair Putty(9.8oz), 2pcs 2"+1pcs 4" aluminum repair patch and 4pcs scrapers+2pcs sandpaper , all tools needed have been ready for you.
Smoothing Out Small Dents and Surface Imperfections
Have you ever noticed small dents and surface imperfections only after you’ve started painting? It can be frustrating! But fixing these little annoyances is manageable if you know what to do.
To tackle small dents, try this: grab a lightweight spackling compound. With a putty knife, spread a thin layer over the dent, making sure it’s slightly raised. Once it dries, lightly sand the area until it’s even with the wall. Don’t forget to feather the edges a bit to help blend everything smoothly. Honestly, taking your time here can really pay off.
Got deeper gouges? You might want to switch to a joint compound or Bondo since these provide a stronger fill. They can be a bit trickier to work with, but just remember, it’s all about getting that perfect finish. So, be sure to sand down carefully and routinely check your work to ensure you’ve covered all the bases.
Repairing each dent gets you set for a solid paint job ahead. Your walls deserve that level of care! What are some other DIY tasks you’ve tackled recently?
Using the right putty knife size for each repair task can greatly improve your results and ease of application.
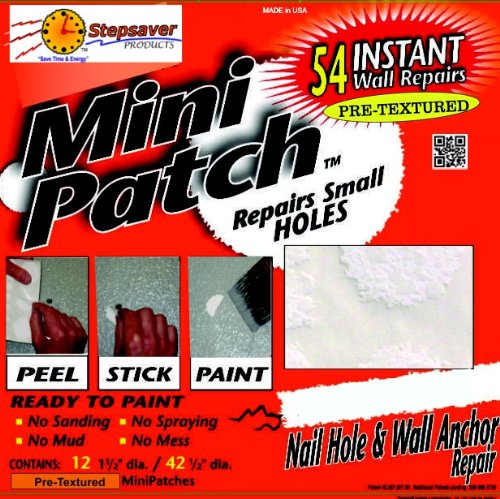
Recommended Products

Durable spackle allows you to patch and prime in one step, completing projects quickly

EFFORTLESS REPAIRS: Fill holes, cracks, and dents in one easy application, saving time and effort on your DIY projects

Durable spackle allows you to patch and prime in one step, completing projects quickly
The Importance of Priming Before Painting
Ever thought about diving straight into painting without priming your walls first? It might seem tempting, but that could lead to a lot of hassle down the road. Taking the time to prime is key to getting the professional finish you want.
Priming does a few important things. It seals any repaired areas, helps the paint stick better, and boosts the durability of your paint job. Plus, it tackles those pesky uneven paint absorption spots, especially where patching’s been done. Nobody wants to deal with strange flashing or mismatched textures. If you use primer, you’ll often need fewer coats of your top paint, which can save you time and energy.
But that’s not all. High-quality primers are also great at blocking stains. This means those not-so-pretty marks won’t sneak through and ruin your final look. A clean, uniform finish is what you’re after, right?
So, why does this matter? Well, priming isn’t just an annoying extra step; it truly protects your efforts and boosts the overall durability of your paint job. Additionally, some primers offer stain-blocking capabilities that prevent discoloration from bleeding through your topcoat, ensuring a flawless appearance.
Common Wall Repair Mistakes You Should Avoid
When you’re fixing up your walls, it’s easy to trip up on some common mistakes that can mess with your paint job. Have you ever noticed those annoying nail pops or tiny cracks after you’ve finished? It’s super important to check for those first. If you skip this step, those flaws will definitely ruin your hard work. Open up any hairline cracks just a bit with a utility knife before you slather on the joint compound. This little trick ensures everything sticks properly.
Now, don’t forget about sanding. Feathering the edges of your repairs is a must for that smooth finish you’re after. Here’s the thing: you really shouldn’t cut corners on joint compound. Aim to apply at least two coats for a more even surface. And let’s be real, who wants to deal with bumps and patches after all that effort?
Another mistake to steer clear of is using paper tape for drywall seams. It can tear easily, which just creates more headaches when you’re trying to get everything looking seamless. Trust me on that one. Instead, go for fiberglass mesh tape; it’s much more durable.
And before you start painting, always prime those repaired areas. This prevents any weird differences in sheen or color from showing up after your hard work. To ensure the best adhesion and durability, selecting the right adhesion primer for your surface is crucial.
To wrap things up, careful prep is key to achieving a flawless finish. Do you feel ready to tackle your wall repairs with confidence?
When to Seek Professional Help for Repairs
When it comes to wall repairs, it’s tough to know when to tackle things yourself or call in the pros. Have you ever found yourself staring at a crack in your wall, wondering if it’s a simple fix or a warning sign? Honestly, those full-height wall cracks or ceiling drywall cracks can indicate something much more problematic lurking beneath the surface. If you see them, it’s probably time to get a professional’s eyes on the situation.
Don’t overlook multiple nail pops in your walls, either. They might seem minor, but this can point to stability issues that need attention. The last thing you want is for stuff to get worse because you didn’t act quickly. And if you notice bubbles in your paint or any signs of moisture creeping in, you should definitely jump on that. Water damage can escalate quickly, and you don’t want to deal with the consequences later on.
Truth is, if you have tried some repairs before and they didn’t stick, that’s also a red flag. It’s best to call someone with experience to get to the bottom of whatever’s really causing the issue. A professional will have the know-how to handle these problems correctly and prevent further damage down the road.
Proper preparation, including the use of paint strainers to ensure clean, smooth paint application, can make a significant difference in the final outcome of your project.
In a nutshell, when you spot these signs, don’t hesitate. It’s smart to let the experts handle it to save yourself time, money, and a lot of headaches. So, when will you take action on those repairs?
Recommended Paint for Wall Repairs
Repairing nail pops and cracks can really change the feel of a room, but don’t forget about the paint afterward. It’s just as crucial. You’ll want to start with a good quality primer; it’s key for letting your paint stick and can do a great job at hiding those repairs. Remember, paint won’t cover up mistakes, so don’t skip this step.
When it comes to finishes, opt for something like satin or eggshell. They not only add durability, but they also help with coverage. Plus, these finishes can mask spots where you’ve used fiberglass mesh for support. If you want an easier route, try a paint that has a built-in primer. This combo helps your paint bond better with the walls and can give you a longer-lasting finish.
Now, here’s a tip: matching your paint color to the existing wall is super important for a seamless blend. You might want to test out some sample patches first to avoid any surprises later on. Nothing’s worse than realizing a color mismatch after you’ve gone all in on the project. And, just a heads up—flat paints can sometimes bring out flaws, so steer clear if you can.
Also, make sure to allow sufficient drying time for primers before applying your topcoat to achieve the best adhesion and finish.
To sum it up, tackle those repairs, choose your finishes wisely, and don’t rush the color matching process. Have you ever had an unexpected result after a paint job? It can be frustrating, but with the right steps, you can nail that perfect look!
Recommended Products

Designed for interior and exterior surfaces

Self-Priming formula - requires no sanding

All Match Paint: Our All Match Paint kit is Paint+Primer in one, no sanding, no priming, no top coat needed
Frequently Asked Questions
How to Fix Hairline Cracks Before Painting?
Before painting, we tackle hairline crack repair by widening the crack slightly, applying joint compound, feathering the edges, and sanding it smooth. It’s essential for paint preparation—just like a knight sharpening their sword!
Can I Paint Over Nail Pops?
We can’t paint over nail pops without addressing them first. Ignoring those imperfections will only lead to larger issues later. Let’s follow some painting tips to guarantee a smooth, professional-looking finish we’ll be proud of.
Can I Fix Nail Pops Myself?
Absolutely, we can fix nail pops ourselves! With common materials like screws and joint compound, our DIY repairs will save money and enhance our walls’ appearance. It’s a straightforward task we can tackle together!
How to Fix Nail Holes Before Painting?
To fix nail holes, we clean the area, apply spackling paste with a putty knife, and let it dry. Sanding smooth the wall repair guarantees a seamless finish before we paint. Let’s get started!


