As an Amazon Associate, we earn from qualifying purchases. Some links on this site are affiliate links at no extra cost to you. Our recommendations are based on thorough research and editorial judgment.

How to Load a Roller Properly: Less Splatter, More Coverage
Do you ever feel like you’re battling paint splatter when using a roller? Loading a roller properly can make all the difference, trust me. Start by attaching a good microfiber cover to your roller frame. You want it tight so it doesn’t fall off during your painting mission.
You may be interested


Now, here’s where you need to be careful. Lightly dip the roller into the paint. You want it saturated but not dripping wet—about 1/3 to 1/2 full is just right. Always roll it against that textured grid in your tray to get rid of any excess paint before you start. This simple step can save you from a messy floor.
As you paint, aim to keep a consistent wet edge. That means if you let one area dry too much before painting the next, you might end up with a patchy finish. So, while applying, check back often to see if your roller still has enough paint on it.
So, why does this matter? A well-loaded roller reduces splatter and gives you more even coverage as you go along. You’ll be amazed at how much easier it is to get a professional-looking finish when you take the time to load your roller right.
Before you dive back into your project, remember these tips for a smoother experience: Check your roller cover, avoid over-saturation, and always roll off the excess.
Painting doesn’t have to be fraught with mess. Have fun experimenting, and who knows? You might discover even more techniques for that perfect finish. What’s the next home project on your list?
Key Takeaways
- Choose the right nap size for your surface texture to ensure optimal paint application and minimize splatter.
- Lightly dampen the roller before loading paint to enhance absorption and reduce drips during application.
- Submerge the roller only partially in paint, using quick strokes for even coverage and to avoid overloading.
- Regularly check and reload the roller to maintain consistent saturation for a smoother finish and prevent patchy spots.
- Use a textured grid paint tray for even paint loading and to help minimize drips and splatter.
Why Roller Splattering Happens and How to Avoid It

Ever tried painting with a roller and ended up with more splatters on the floor than on the wall? It’s a common headache for many of us. But once you understand why roller splattering happens, you can take steps to prevent it and keep your painting project under control.
Splattering tends to occur when paint is applied too quickly or when the roller is overloaded. You might think you’re speeding up the process, but that extra paint can easily end up going everywhere but the wall. Choosing the right nap-size cover is crucial—using one that’s too thick or too thin can lead to all sorts of chaos. That little choice can really affect how the paint goes on, so it’s worth paying attention to.
Another common culprit? Thinning your paint too much. If you make it too runny, it loses its viscosity and can splatter like crazy. Always check the manufacturer’s recommendations for the roller type and size, and stick to those guidelines. This is key to achieving nice, even coverage without the mess.
Here’s a tip: High-quality roller covers can make a world of difference. They’re built to last and help distribute paint evenly, so you won’t feel like you’re painting in a storm. And remember, it’s all about how you apply the paint. Avoid overworking it on the wall; a gentle, steady motion does wonders.
Wrapping it up, to have a smoother painting experience without the dreaded mess of splatter, pay attention to your technique and tools. Selecting roller covers with the appropriate nap length for your surface is essential to reduce splattering and ensure even paint distribution. Have you ever had a painting mishap that threw off your whole day? It happens to the best of us!
Essential Tools for a Smooth Roller Application

To get a smooth roller application, there’s no beating around the bush—you need the right tools. Choosing a high-quality microfiber roller cover can make a big difference. It helps with paint pickup and cuts down on splatter, which is always a plus.
Now, nap size is another crucial factor. Thicker naps are great for textured surfaces, while thinner naps are better suited for smooth finishes. It’s all about matching the roller to your walls, so don’t just grab whatever’s on sale.
Don’t forget a tray liner! It makes cleanup a breeze and lets your roller roll freely, reducing the chance of too much paint gathering in one spot. You want to avoid that dreaded drip, right? Keeping an eye on paint saturation is smart too. A consistent load on your roller leads to a more even application.
Speaking of drips, keeping that roller damp is key. It can help you avoid overloading with paint, keeping those pesky drips at bay. So, why does this matter? Because nobody wants to spend an afternoon painting only to end up with a wall that looks like a hot mess.
In short, having the right tools on hand and following these simple tips can really promote smooth strokes and an efficient painting process. It’s all about those little tricks that can lead to a big impact. What’s your go-to tip for a hassle-free painting project?
Using brushes with ergonomic handles can also improve comfort and control during detailed texturing or cutting-in around edges.
Recommended Products


HIGH GLOSS “WET LOOK” FINISH (TILE + GROUT) – Creates a clear, high-sheen surface film across tile faces and grout joints for a refreshed look and easier day-to-day wipe downs—ideal for shoppers searching high gloss tile sealer / porcelain tile sealer wet look.

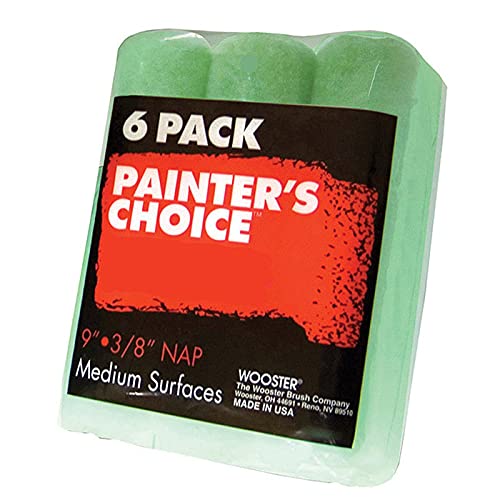
Premium microfiber material with a shedless and lint-free quality (Ensure covers are thoroughly rinsed before use to guarantee a truly shedless painting experience).
Step-By-Step Guide: How to Load Your Roller Correctly

Loading your roller correctly is key to getting that smooth, professional finish you’re after. So, let’s dive right in with a few simple steps. First off, make sure that roller cover is securely attached to the frame. This isn’t just a step you can skip—it’s essential for a hassle-free painting experience.
Next, drag the edge of your roller cover through the paint in the tray. Here’s the catch: don’t submerge it completely. Instead, roll it on the grid toward the well a few times with quick strokes until it’s nicely saturated but not dripping with excess paint. This can really save you from a messy situation later. The best part? If you give it a few minutes to soak up the paint—especially if you’re using woven covers—you’ll thank yourself later when it comes time to paint.
Don’t forget to thoroughly mix your paint before starting. And if you’re using water-based paints, conditioning them beforehand can help a lot. It’s those little things that can make the biggest difference. Also, keep an eye on your roller cover to avoid overfilling it—too much paint means streaks, and nobody wants that.
So, why does this matter? A well-loaded roller isn’t just for looks; it actually helps you achieve that even application we’re all striving for.
In short, taking the time to load your roller correctly can save you a world of trouble down the road. Are you ready to give your walls a fresh makeover? Remember, using the right tools, like a scraper with a properly designed edge design, can help you prepare surfaces perfectly before painting.
Recommended Products

【Shopping Tips】Sold hardware only, doors not included. Needs at least 9" ceiling clearance to install. Doors cannot be thicker than 2" or the kit won't work. Do not install it on sheetrock walls or drywall without studs. Please contact us on Amazon if you need different-length spacers or roller bolts.

【Shopping Tips】Sold hardware only, doors not included. Needs at least 9" ceiling clearance to install. Doors cannot be thicker than 2" or the kit won't work. Do not install it on sheetrock walls or drywall without studs. Please contact us on Amazon if you need different-length spacers or roller bolts

【User-Friendly Control Interface】Equipped with a versatile control interface, this fully automatic washing machine offers 10 distinct washing programs plus 4 water temperature choices for hassle-free use. The LED screen clearly shows the remaining wash duration, while the child lock function guarantees family-safe operation. It also includes a tub self-clean feature to effortlessly maintain the cleanliness of the inner tub.
Tips for Keeping Your Roller Saturated Consistently
Have you ever noticed how easy it is to get uneven paint coverage? When you’re using a roller, keeping it consistently saturated is key to achieving that smooth, flawless finish. Regularly checking the paint availability on your roller is a good practice—allowing it to run dry will only lead to those frustrating patchy spots.
So, what’s the best way to keep that roller filled? Reload it often. Simply drag the edge through the paint and then roll it against the grid inside your tray. This method helps saturate the roller without overloading it, which can save you from a messy application. If you push too far without adding more paint, you might find the flow gets restricted, making you work harder and increasing the chance of splatter.
When you’re first loading your roller, take that moment to work the paint down into the fabric, all the way to the core. This step is important—it ensures your roller stays saturated for the long haul. Keep an eye on how the paint looks as you go. If it starts to look thin or uneven, don’t hesitate to reload. We all want a wet edge for a smooth finish.
Using a compatible roller frame designed for ease of cleaning can also make frequent reloading and maintenance hassle-free.
To wrap it up, keeping your roller saturated is all about those little habits. Consistently checking and reloading ensures a great paint job every time. What tips do you have for painting like a pro?
How to Reduce Paint Drips and Splatter When Rolling
Reducing paint drips and splatter is key for a tidy finish, especially when you’re rolling walls or ceilings. Ever been frustrated by those messy drips ruining your hard work? One solid step is to drag the roller cover through the paint in the tray well. You want to get it nice and saturated, but not so much that it starts dripping everywhere. Roll it on the grid a few times to get that perfect amount.
Keep your application speed steady and don’t press too hard. Rushing can really make splattering worse, and nobody wants that. It also helps to invest in high-quality roller covers. These tend to be more resilient, which means they can help cut down on splatter as you work.
Pay attention to your paint levels, too. If the paint’s running low, you’re likely to have uneven coverage and a higher chance of splattering. Try checking your roller cover regularly, reloading when necessary to keep things smooth.
Using ergonomic handles on your paint tools can also reduce fatigue, helping you maintain consistent pressure and movement throughout your project.
Recommended Products
WATERPROOF ELASTOMERIC ROOF SEALANT: Liquid Rubber Color Roof Sealant is a liquid rubber waterproof coating designed for flat roofs, low-slope roofs, and metal roofs. Forms a seamless, flexible membrane that helps stop roof leaks and water intrusion while protecting the roof for years to come

✔ PREMIUM MICROFIBER PAINT ROLLERS: Add some color to your space with True Blue Premium Microfiber Paint Roller Covers. Our premium microfiber paint roller covers are perfect for painting all types of surfaces; just pick the nap length appropriate for your use. Our microfiber roller covers pick up and release 3x more paint than a standard roller cover allowing you to paint faster and deliver excellent coverage and a smooth finish in one coat.
What Techniques Help Prevent Splatter on Ceiling Surfaces?
Getting paint on ceilings can be a hassle, right? Splattering paint everywhere can lead to frustrating cleanup later, but there are some straightforward ways to avoid it.
First off, consider starting with a good-quality microfiber roller cover. Before you dive in, prime it to soak up more paint. When you’re loading the roller, make sure it’s not too saturated. If you overdo it with paint, you’re just asking for splatters. Try rolling a manageable area. After you load the roller, roll some excess paint back onto the tray to give yourself a better chance to control that roller when applying it.
Here’s the trick: use quick forward strokes to cover the surface evenly. Stay consistent and keep moving in one direction. This means no dragging paint back or excessive rolling in the opposite direction, which can lead to unnecessary splatters and dry spots. Who wants that?
Using tools designed for precision, like paint sprayers with adjustable flow control, can also help minimize overspray and splatter on delicate surfaces.
So, why does this matter? Well, these little habits can lead to smooth, flawless ceilings without the added stress of cleaning up a paint mess later. At the end of the day, a little preparation and technique can save you time and effort.
Keep these tips in mind next time you tackle a ceiling project, and you’ll be amazed at how much easier it can be. Are you ready to give it a shot?
Recommended Products

SHED-RESISTANT DESIGN: This paint roller cover features shed-resistant microfiber fabric that delivers a smooth, consistent finish without leaving behind fibers or lint. No fuzz, pro-level painting.

✔ PREMIUM MICROFIBER PAINT ROLLERS: Add some color to your space with True Blue Premium Microfiber Paint Roller Covers. Our premium microfiber paint roller covers are perfect for painting all types of surfaces; just pick the nap length appropriate for your use. Our microfiber roller covers pick up and release 3x more paint than a standard roller cover allowing you to paint faster and deliver excellent coverage and a smooth finish in one coat.

✔ PREMIUM MICROFIBER PAINT ROLLERS: Add some color to your space with True Blue Premium Microfiber Paint Roller Covers. Our premium microfiber paint roller covers are perfect for painting all types of surfaces; just pick the nap length appropriate for your use. Our microfiber roller covers pick up and release 3x more paint than a standard roller cover allowing you to paint faster and deliver excellent coverage and a smooth finish in one coat.
Common Loading and Application Mistakes to Avoid
Ever had your paint job turn out to be a complete disaster? You’re not alone! Many of us run into the same issues, whether it’s those frustrating brush marks or splatters that just won’t quit. A lot of this comes down to common mistakes we make while loading and applying paint.
First off, overfilling the well is a biggie. It might seem tempting to really drench that roller, but that just leads to messy results. Instead, try this: lightly dampen your roller, then roll it in the paint for even saturation. It may take a minute or two, but patience pays off. This way, you’re ensuring good coverage without that dreaded paint drag.
Another thing to keep in mind is covering your surfaces before you start painting. It’s easy to get caught up in the excitement, but not checking the roller can starve it of paint, making it a pain to reload. You want a steady flow for a smooth application. So, don’t skip that step.
Here’s where it gets trickier: if you don’t maintain a wet edge while painting, those annoying lines can appear. Ever notice how one section looks great but then your next stroke ruins it? It’s all about consistency. Make sure you overlap your strokes while the paint is still wet to avoid those telltale marks.
Using a paint tray with a textured grid can help evenly load paint onto your roller, minimizing drips and splatter during application.
So, why does this matter? Getting these little details right can save you a ton of frustration and time in the long run. Instead of stressing over a sloppy finish, you can focus on enjoying your newly painted space.
In the end, just be mindful of these tips, and you’ll see a big difference in your painting efforts. What’s been your biggest painting challenge?
Best Practices for a Smooth, Flawless Finish
It might look easy, but loading a roller the right way is key to getting that smooth, flawless finish we all want. Start by placing your paint tray in a convenient spot to cut down on time wasted. Now, roll the cover against the grid towards the paint well, making several quick forward strokes—just don’t dip it all the way in. This little trick can help you avoid oversaturation and minimize splatter.
Another tip: give those woven fabrics enough time to soak up the paint properly before you start applying it on your walls. It’s also smart to keep checking the roller cover’s saturation during your project. If it starts to feel a bit low, don’t hesitate to blot it lightly. Why does this matter? If the fibers get compressed due to low paint levels, it’s going to mess with your application.
When working with water-based paints, conditioning the roller is vital. This ensures that the cover works well on the frame, giving you an even and consistent finish. The best part is that it doesn’t take much time, but it makes a big difference in the end result.
To wrap it up, focus on loading your roller correctly and keeping an eye on saturation as you go. It’s those small details that lead to a perfect finish. Ready to tackle your next project? Using tools with ergonomic handles can also help reduce fatigue during long painting sessions.
Recommended Products


Pro Solutions signature woven fabric is our professional quality roller cover containing tightly woven, lint free fabric that delivers a smooth, professional finish

SUPERIOR FLEXIBLE SEALANT: Liquid Rubber's foundation sealer creates a permanent waterproof membrane for basement waterproofing, foundation leak repair, shower liners, and planter boxes. This professional-grade sealer delivers unmatched protection with 900% elongation, preventing leaks and water damage more effectively than traditional sealants
Frequently Asked Questions
How to Prevent Paint Splatter When Using a Roller?
To prevent paint splatter with a paint roller, we should guarantee surface preparation, choose the right roller nap, utilize proper loading techniques, and maintain steady paint technique with drop cloths for wall protection and color consistency.
How to Get Even Coverage With a Roller?
To get even coverage with a roller, we need to choose the right roller type, adjust paint consistency, use proper rolling speed, apply consistent pressure, and employ the crosshatching method for corners and textured walls.
How to Properly Load a Roller?
Loading a roller’s not intimidating! We can explore roller types and loading techniques together. Using the right nap with consistent paint, we’ll master application pressure, edge control, and enjoy easy clean-up on any wall type.
How Do I Get a Perfect Line Between My Wall and Ceiling?
To achieve a perfect line between our wall and ceiling, we’ll use painter’s tape at the ceiling edge. Utilizing an angle technique with a brush guarantees visual alignment and line uniformity before careful tape removal.


