As an Amazon Associate, we earn from qualifying purchases. Some links on this site are affiliate links at no extra cost to you. Our recommendations are based on thorough research and editorial judgment.

Rolling Ceilings Without Rain: Technique and Tool Setup
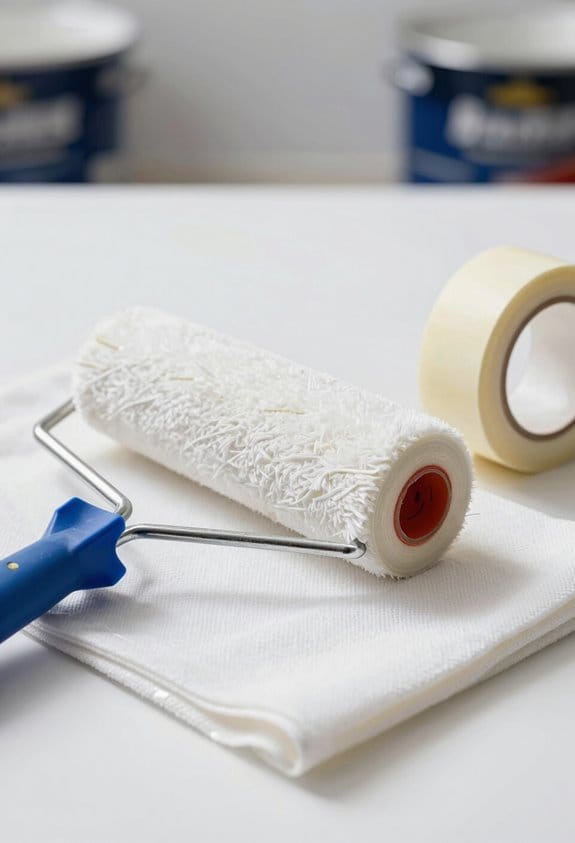
When you’re tackling that ceiling paint job and the weather’s not cooperating, it can feel a bit frustrating. You want to get the job done right, but you need the right tools. Start with a ⅜ inch nap roller for those smooth surfaces combined with a sturdy roller frame.
You may be interested


And don’t forget about an adjustable extension pole—it’ll help you reach those high spots without worrying about any spills.
Before you dive in, make sure to prep the area properly. Lay down some drop cloths and apply painter’s tape where you want clean lines. This little step saves so much cleanup later.
While you’re painting, keep in mind to maintain a wet edge by overlapping your strokes—nobody wants drips ruining their hard work!
Now, sometimes you might run into issues. For instance, if you’re noticing roller marks or uneven coverage, don’t stress. Simply go back over those spots lightly while the paint’s still wet.
The best part is that taking breaks to check on your progress can make a huge difference.
So, are you ready to tackle that ceiling? Remember to have fun with it and don’t stress too much over the little things. Happy painting!
Key Takeaways
- Use a quality roller with a sturdy frame and appropriate nap to ensure even coverage and reduce splatter on ceilings.
- Maintain a wet edge by overlapping strokes while painting to prevent lap marks and achieve a smooth finish.
- Lightly load the roller with paint, dipping one-third into the bucket, to minimize drips and ensure consistent application.
- Clear surrounding furniture and use drop cloths for a mess-free environment, facilitating easier cleanup after painting.
- Consider using ceiling-specific paint to enhance the drip-free finish and improve overall paint adherence.
Essential Tools for Your Ceiling Painting Project

Starting a ceiling painting project can be a bit daunting, right? But trust me, having the right tools can save you time and effort. First off, pick a quality paint roller. For smooth ceilings, go for a nap thickness of ⅜ inch. If your ceiling’s textured, you’ll want something with a ½ to ¾ inch nap to really get into the grooves.
You’ll also need an adjustable extension pole. It’s a lifesaver for those high ceilings, letting you paint without the worry of spills. A sturdy roller frame is just as important for applying that paint evenly. And when it comes to edges, a 2 to 2.5-inch angled brush works wonders for cutting in neatly.
Don’t forget about painter’s tape. This can keep your lines sharp and your work looking professional. Using a paint tray lined with a paint grid is another smart move. It helps you load your roller evenly and dramatically cuts down on drips.
Here’s the trick: gather these essential tools before you start, and you’ll find the whole process a lot less stressful. Trust me—being well-prepared can make a world of difference. What’s stopping you from getting started on that ceiling? For a precise finish, consider using an edger tool with a rotating handle to effortlessly reach tricky corners and maintain clean lines.
Recommended Products


First choice for value and performance in a production cover, excellent paint pickup and release

How to Prepare for a Mess-Free Ceiling Painting
Preparing for a mess-free ceiling painting job isn’t just about rolling paint on—it starts long before. Have you ever looked at a freshly painted ceiling and noticed splatters everywhere? To avoid that, it’s wise to clear out all your furniture and use drop cloths for anything that can’t be moved. Doing this not only protects your belongings but also saves you a ton of cleaning time later.
Now, let’s talk about the painter’s tape. This is where you can achieve those crisp, clean lines that make your ceiling look professional. Tape around the tops of your walls and around any light fixtures. It’s a small step that makes a big difference. Don’t forget to check for any cracks in the ceiling. Filling those in will make your painting job look polished and well-done. Believe it or not, properly prepping can account for 80% of your success.
When it comes to selecting the right tools, the nap roller cover is crucial. For smooth ceilings, a ⅜-inch nap is ideal, while you’ll want to opt for ½ to ¾-inch for textured ones. And here’s the trick: using a 5-gallon bucket with a paint grid will help you control how much paint you’re applying. This way, you’ll minimize excess paint and avoid those dreaded drips.
Choosing a paint sprayer with adjustable spray patterns can also help achieve a more even and mess-free ceiling finish.
The best part is, with these simple steps, you can achieve a great-looking finish without all the mess. So, are you ready to tackle that ceiling project? With careful prep and the right tools, you’re well on your way to a stunning result. Remember, the effort you put in upfront pays off!
Recommended Products

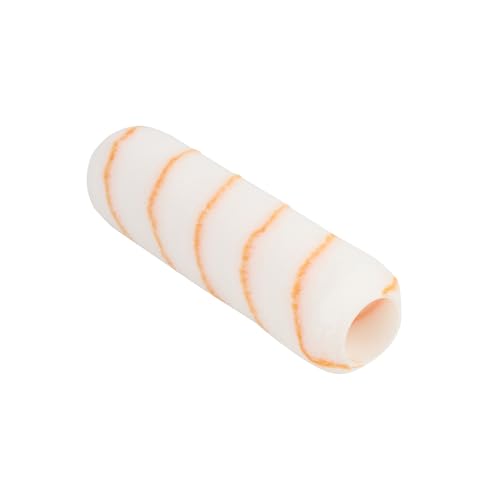
Pro Solutions signature woven fabric is our professional quality roller cover containing tightly woven, lint free fabric that delivers a smooth, professional finish


The polyamide fiber holds as much paint as Lambskin yet is much more durable
Proven Techniques to Prevent Paint Drips

To keep paint drips at bay while you’re rolling the ceiling, it helps to know a few solid techniques. For starters, you’ll want a quality roller with a sturdy frame and a nap cover between ⅜ to ½ inch, especially if you’re working on smooth ceilings. Think about it: a good roller makes a huge difference in how evenly the paint goes on.
One of the keys is maintaining a wet edge by working in small sections. Overlapping your strokes helps prevent any lap marks, and trust me, you don’t want those! When loading the roller, don’t dip it too deep; about one-third into the paint is perfect. After dipping, be sure to roll off the excess on the grid to avoid overloading the roller.
Applying gentle, even strokes with consistent pressure really helps control the paint flow and keeps those annoying drips to a minimum. And here’s an insider tip: consider using ceiling-specific paint, like Benjamin Moore Waterborne Ceiling Paint. It’s designed to reduce splatter and makes it easier to achieve that clean, drip-free finish.
Honestly, taking these steps can save you a lot of trouble later on. Using tools with adjustable spray patterns can further enhance even paint application and reduce waste. So, are you ready to tackle that ceiling without the mess?
Recommended Products

SHED-RESISTANT DESIGN: This paint roller cover features shed-resistant knit fabric that delivers a smooth, consistent finish without leaving behind fibers or lint. No fuzz, just pro-level painting.

✔ PREMIUM MICROFIBER PAINT ROLLERS: Add some color to your space with True Blue Premium Microfiber Paint Roller Covers. Our premium microfiber paint roller covers are perfect for painting all types of surfaces; just pick the nap length appropriate for your use. Our microfiber roller covers pick up and release 3x more paint than a standard roller cover allowing you to paint faster and deliver excellent coverage and a smooth finish in one coat.
Common Ceiling Painting Problems and How to Solve Them
Have you ever found yourself staring up at that ceiling, paint roller in hand, and just feeling completely overwhelmed by the task ahead? Those common ceiling painting problems can really test your patience. To avoid the mess of excess paint dripping from the roller, it helps to load your roller lightly—less is definitely more here. Applying minimal pressure will ensure you get that even coat you’re after.
Want to keep your strokes nice and smooth? Remember to maintain a wet edge by overlapping each stroke slightly while you work in sections that are easy to manage. Dealing with textured ceilings? A roller with a nap of ½ to ¾ inches will make a huge difference in preventing those annoying paint puddles.
Now, let’s talk about paint adherence. If you’re seeing spots where the paint just won’t stick, using a primer can really set you up for success. And don’t skimp on tools! Grab a sturdy roller frame and a good brush for cutting in, and you’ll find that everything flows a lot smoother.
After the first coat dries, don’t forget to follow up with a second coat for that professional finish. Honestly, taking those extra steps can turn a frustrating job into a more satisfying one. For large ceiling projects, using a paint sprayer with adjustable flow control can significantly improve coverage and reduce painting time.
Recommended Products

Use with all-purpose oil and latex enamels, stains and flat paints

First choice for value and performance in a production cover, excellent paint pickup and release
Knowing When to Hire Ceiling Painting Professionals
Painting your ceiling can feel like a DIY dream come true. But let’s be honest—there are times when it’s just smarter to call in the pros. If you’ve got a ceiling with intricate textures or unique architectural details, hiring a skilled painter could save you a lot of headache. Pros know how to handle those tricky spots without making a mess. You don’t want paint splattering on your fancy light fixtures, right?
And what about those ceilings that have seen better days—all wet or damaged? Pros can step in to make those repairs and use the right primers that keep future stains at bay. If you try to mask those issues alone, you might find yourself in a bigger mess than you started with.
When it comes to tackling heights, think twice before climbing that ladder. Working high up can be dangerous. Professionals are trained in safety protocols and have the right tools, like extension poles, to manage those high ceilings without any risk to you.
Honestly, hiring pros usually leads to better quality work. They often provide guarantees, so you can breathe easier knowing touch-ups are less likely down the line. Plus, aren’t you tired of spending every spare moment just trying to keep up with home projects? If it saves you time and hassle, sometimes it’s worth the investment to go with the experts.
They also know how to select and apply the best KILZ primers to ensure a flawless and lasting finish.
Recommended Products

PRIMER | SEALER | STAINBLOCKER: KILZ RESTORATION Primer (Formerly KILZ MAX) is a new generation water-based primer, sealer and stainblocker offering performance of traditional oil and shellac-based primers. It blocks tough stains and odors and provides superior adhesion. Ideal for restoration and disaster recovery painting jobs.
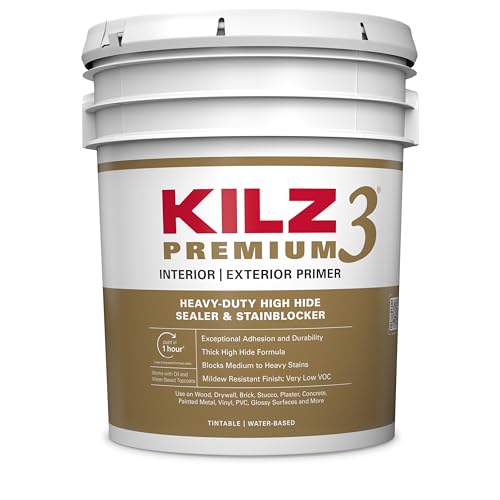
PRIMER|SEALER|STAIN-BLOCKER: PRIMER KILZ 3 PREMIUM Primer is a heavy-duty high hiding primer, sealer and stain blocker. It seals porous surfaces, features an ultra white and thicker finish and blocks medium to heavy stains. It also has exceptional adhesion performance to help the topcoat adhere to most interior and exterior surfaces. KILZ 3 PREMIUM Primer is mildew resistant, has low odor and very low VOC and cleans-up easily with soap and water.

Frequently Asked Questions
What Is the Best Way to Roll a Ceiling?
To roll a ceiling effectively, we should use the best rolling technique by choosing the right roller nap, managing paint thickness, maintaining a wet edge, and safely using our ladder while blending with a brush.
How to Avoid Lines When Rolling Paint?
Like a painter sweeping a canvas, we can avoid lines when rolling paint by using overlapping strokes, keeping the roller nap consistent, checking paint consistency, and timing our breaks to respect drying time.
How Do I Get a Perfect Line Between My Wall and Ceiling?
To get a perfect line between our wall and ceiling, we should use wide painter’s tape, guarantee proper paint consistency, carefully brush the edge for precision, and choose the right roller type for our ceiling height.
What Are the Mistakes When Painting With a Roller?
We’ve all been there—using an overloaded paint roller with incorrect pressure can cause dry edges and uneven coverage. Choosing a poor roller cover often leads to streaky finishes and color mismatches. Let’s avoid those mistakes together!


