As an Amazon Associate, we earn from qualifying purchases. Some links on this site are affiliate links at no extra cost to you. Our recommendations are based on thorough research and editorial judgment.

Post-Paint Inspection: Finding Drips, Holidays, and Rough Spots Before They Cure
Have you ever stepped back to admire your freshly painted walls, only to notice a few drips or uneven patches? That can be pretty disappointing. Before the paint cures and makes your job tougher, it’s crucial to inspect it closely.
You may be interested


Start by grabbing a bright handheld work light. It can make a world of difference in spotting flaws you might miss in regular lighting. As you go over the surface, look for drips, missed spots, and rough patches. If you find any drips, don’t panic. Lightly sand them down and then touch up those missed areas with a small brush.
Checking for rough bits? A fine-toothed comb can help you discover those uneven sections.
So, why does this matter? Addressing defects right away can save you from headaches later on. A smooth finish not only looks better but holds up better over time.
Honestly, think about these techniques to refine your inspection process. You might want to follow up every coat of paint with a quick check. Or maybe even bring in a friend for a second opinion—sometimes, another set of eyes can catch what you’ve missed.
In short, a timely inspection can lead to a flawless finish and a more satisfying result. What’s one flaw you’ve spotted in your painting projects that you wish you’d caught earlier?
Key Takeaways
- Inspect the paint job in good lighting to easily identify drips, holidays, and rough spots before the paint fully cures.
- Use a lint-free cloth to clean the surface and ensure you can spot any imperfections without contamination.
- Look for drips or runs immediately after painting, allowing for prompt sanding and repainting if required.
- Check for unpainted areas, or holidays, with a straight edge to ensure even coverage before the paint dries.
- Conduct a thorough inspection within 3-7 days to catch problems early and improve the overall finish quality.
Common Issues to Look For

When you’re wrapping up a paint job, you’ve got to take a close look at the final result. Ever noticed those pesky drips or runs? They’re not just annoying; they can mess with the overall look of your hard work. A little sanding and a coat of paint can usually fix those issues right up.
Another problem to keep an eye out for is holidays—those sneaky unpainted spots that stick out like a sore thumb. Making sure you’ve touched those up is crucial if you want a professional-looking finish. And let’s not forget about rough spots, which can often signal that the surface prep or application wasn’t quite up to snuff. You might need to do some extra sanding here.
Contamination is another biggie. If there’s even a smidge of dust or dirt on the surface, it’ll ruin your finish faster than you can say “paint job.” So, remember to clean the area thoroughly before diving in.
Here’s the trick: when you’re inspecting the paint job, try to do it in good lighting. Sometimes, the flaws can hide in shadows. And while you’re at it, a good pair of work gloves can help you feel for any bumps or imperfections that your eyes might miss.
Finally, take a moment to step back and assess the whole picture. Sometimes a little distance can reveal things you wouldn’t notice up close. So, does this inspection process sound like a chore? Well, it’s totally worth it if you want a smooth and flawless finish that you’ll be proud to show off. Remember, a little extra care goes a long way!
For tackling this inspection safely and comfortably, using a sturdy platform ladder can provide better access and stability.
Quick Fixes for New Paint Flaws

Have you ever looked at your freshly painted walls and suddenly noticed a few flaws? It’s such a letdown, but don’t worry—catching and fixing those little mistakes early can save you a lot of trouble down the road. Let’s dive into some straightforward fixes that can make your paint job shine.
If you find some drips in your paint, here’s the trick: lightly sand them down until they’re smooth. Don’t forget to clean the area after sanding, then you can repaint it without worrying about those pesky bumps. Missing spots are common too, often called “holidays.” Use a small brush to touch them up; this keeps everything looking even and polished.
Rough spots can also be a headache. To deal with those, sand them down, wipe off the dust with a damp cloth, and then apply a new layer of primer before you repaint. It might feel like extra work, but it’s worth it for a smooth finish.
Want to avoid drips in the first place? Make sure to use drop cloths and painter’s tape whenever you’re painting. It might seem like a hassle, but a quick check a few hours after painting can help you catch any flaws while they’re still fresh.
For the best results, consider using paint trays with deep capacity to ensure even paint distribution and reduce the chance of application errors.
Recommended Products
Ultimate Concrete Protection: Industrial-strength coating resists wear, chemicals, and moisture, ensuring long-lasting durability for concrete surfaces

The Empire macaw cage is one of the largest cages available from Prevue Pet Products

Superior Rust Protection: Permanently stops rust and prevents corrosion on automotive metal surfaces, ensuring long-term durability
Analyzing Dried Paint: Identifying Problem Areas

Ever finish a paint job only to look closely and realize it’s not as perfect as you thought? You’re definitely not alone. After the paint dries, it’s important to give the surface a good inspection for any flaws that may have popped up during the drying process.
Start by grabbing a bright light source. Shining it on the painted surface helps bring any drips, runs, or missed spots to light. It’s like having a secret weapon against imperfections. Then, run your fingers over the surface—seriously, feel for any rough patches or weird textures. These might need a little sanding to smooth things out. Don’t overlook corners and edges; they often end up with imperfections that can be pretty sneaky.
As you go through, make a list of problem areas and what needs fixing. It’s a bit tedious, but trust me, taking the time to document everything now will pay off down the line. That way, when you revisit these spots, you won’t miss anything during future inspections.
Honestly, a thorough check now can save a ton of hassle later on. Have you experienced those annoying paint flaws after you thought you were done? Taking these steps can help ensure you end up with a smoother, nicer finish. Happy painting! For problem areas that persist, consider using paint removers designed to tackle multiple layers effectively before repainting.
Recommended Products

【New Outdoor Hillside Roof Designs】The classic hillside roof design is highly ornamental and the perfect addition to your garden lawn. Compared to flat roofs, the pitched design of a gambrel roof provides better rain and snow drainage, and is more resistant to a wide range of weather conditions, from cold to hot.

Meets all enclosure requirements towards PCI DSS (Payment Card Industry Data Security Standard) compliance

Why Post-Paint Inspection Matters for Flawless Finishes
Skipping post-paint inspections might seem like a time-saver, but it can really hurt the quality of your finished project. Picture this: you’ve just painted, and everything looks great at first glance. But after the paint cures, those little drips, missed spots, and rough patches become glaringly obvious.
To avoid this, it’s crucial to inspect your work thoroughly while the paint is still wet. Here’s the trick: check your project under proper lighting. This way, you’re more likely to spot those imperfections that could otherwise slip by unnoticed. Catching and addressing these issues right away can save you a lot of hassle down the road—think costly repairs and wasted materials.
Try this: make it a habit to do a post-paint inspection every single time. Grab a bright light and really look over your work. If you find something off, take immediate corrective action. Not only does this lead to a smoother finish, but it also makes sure you’re sticking to quality standards everyone expects.
Honestly, paying attention to this can boost the durability of your paint job and give it that flawless look you were aiming for. So, why put in all that effort and then skip this last step? It’s an essential part of getting things just right. Using a primer with superior adhesion and flexibility can also improve the overall finish and prevent issues like peeling or uneven paint.
Tools You Need for Thorough Inspection
Have you ever finished painting and looked at your work only to notice little mistakes you missed? It can be frustrating, right? That’s why having the right tools for a post-paint inspection is crucial.
Start with your protective gear. It might seem simple, but safety should always come first. You’ll also want a bright, handheld work light—this beauty really helps to highlight drips and imperfections by casting shadows, making it easier to spot what needs fixing. Clean the painted surfaces with a lint-free cloth to ensure you’re not overlooking any hidden flaws.
If you’ve got some uneven surfaces, grab a fine-toothed comb or a paint scraper. Run it lightly over the painted area; you might be surprised at what you uncover. Want to get a really close look? A magnifying glass is your friend. It can help you check for tiny inconsistencies that could be easy to miss with the naked eye.
And here’s the trick: keep a clean, straight edge or ruler handy. It’s perfect for spotting holidays—those areas where the paint hasn’t covered properly. You can easily compare the painted surface against your reference line to catch anything that needs touching up.
For an even more flawless finish, consider the importance of nozzle sizes when selecting your paint sprayer, as this can affect how smoothly the paint is applied and ultimately inspected.
Recommended Products

3 Blue Laser Mode: (1) with a precise single-line blue laser and an optimized optical path, the Sermoon S1 excels at scanning deep holes, narrow gaps, and recessed areas-capturing intricate details (2)The 34 cross laser lines enable quick and comprehensive coverage, significantly reducing the need for multiple passes during scans of larger items. (3) Each blue laser is only 0.1mm thick, and a single 7-line blue laser can capture an accuracy of 0.02mm. Whether scanning the intricate components of a modified engine part or the expansive curves of a custom car body, you can expect metrology-grade accuracy from this unique laser configuration
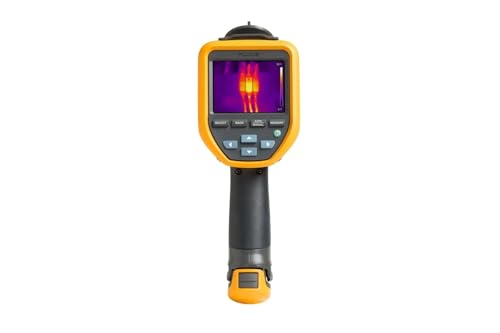
Fluke IR-Fusion - Simply slide your finger across the screen to adjust the level of infrared that you need.

Engineered for Precision and Scale:The scanner employs 22 cross laser lines and 7 parallel blue laser lines to efficiently capture data from medium to large objects. 22 Cross lines is for medium and large objects, while 7 Parallel Laser is for small objects.The cross laser lines enable quick and comprehensive coverage, significantly reducing the need for multiple passes during scans of larger items. Each blue laser is only 0.1mm thick, and a single 7-line blue laser can capture an accuracy of 0.02mm. Whether scanning the intricate components of a modified engine part or the expansive curves of a custom car body, you can expect metrology-grade accuracy from this unique laser configuration
Curing Times and Their Impact on Inspection
Have you ever finished painting a room, only to notice pesky imperfections once it’s too late? Understanding curing times is key to avoiding those frustrating moments. These times can range from a few hours to several days, depending on things like temperature, humidity, and the type of paint you’re using.
Here’s the trick: do your post-paint inspections before the paint dries completely. Checking things out early, particularly within the first 3-7 days, can really save you a headache. During this window, you might catch flaws like drips or rough spots that could spoil your fresh paint job. Following the manufacturer’s guidelines for timing is crucial. It makes correcting any issues much easier.
Honestly, if you wait too long, the paint can fully cure, and fixing any errors means sanding and a lot more effort than you want to put in. By making inspections a priority, you’ll ensure a smooth and professional appearance. So, why does this matter? Simply put, it keeps your hard work looking its best!
To wrap it up, paying attention to curing times and getting ahead of potential problems is essential. For optimal results, light sanding the primer after curing but before topcoating helps achieve a smoother finish. Are you ready to roll up your sleeves and make those inspections count?
How to Prevent Common Paint Defects
Ever struggled with pesky paint defects ruining your hard work? You’re not alone! To get the best results, pay attention to preparation and application.
Start by keeping your paint booth clean and stick to wearing lint-free spray suits. It might seem small, but it really helps to cut down on dirt and dust. The next step is mixing your hardeners and thinners according to the tech sheets. Trust me, this is key for ensuring strong adhesion.
When it comes to layering paint, think about drying time. Allow each layer to dry properly and aim to do as few coats as possible. Too much paint can lead to issues, like that annoying solvent popping. To improve your surface prep, don’t skip sanding and priming. These steps are crucial to prevent cracking and peeling later on.
The best part? Using quality exterior paints can help fend off chalking while keeping that surface sealed. Additionally, choosing a primer with excellent adhesion properties before painting can greatly enhance the durability and finish quality.
Following these tips can significantly reduce the risk of those frustrating paint defects.
Recommended Products
![3M 4510 White Medium Polyethylene/Polypropylene Disposable General Purpose & Work Coveralls - Fits 36 to 39 in Chest - Elastic Ankles, Elastic Wrists - XL457000013 [PRICE is per EACH]](https://m.media-amazon.com/images/I/419pyISf16L._SL500_.jpg)
The 3M Disposable Protective Coverall - 4510 helps provide a basic barrier protection against light liquid splashes and hazardous dusts|Other features include a 2 way zipper with a storm flap and elastic waist ankles and wrists for easy movement|The anti-static coating on both sides helps reduce static build-up and prevent the risk of static discharge during use|The 3M Disposable Protective Coverall - 4510 does not contain components made from natural rubber latex or silicone to help prevent reactions from those with sensitivities or restrictions|Typical applications for this safety work wear may include: spray painting metal polishing machine or vehicle maintenance and general industrial clean-up and processing

25 KleenGuard Coveralls/Case; Size Large; White; Zipper front
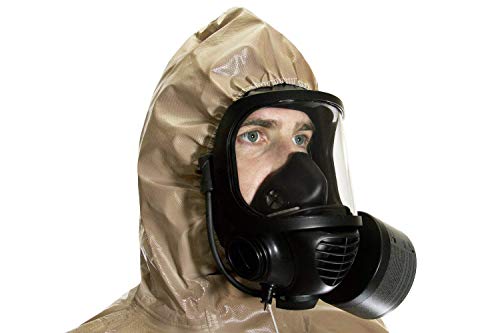
Effective barrier against a range of organic and inorganic chemicals, including many acids, bases, salts, greases, oils and cbrn agents
When to Seek Professional Help for Major Paint Issues
When you’ve got major paint issues, it can feel daunting to figure out when to call the pros. If you start spotting extensive cracks, flaking, or peeling that your DIY efforts just can’t handle, then it’s definitely time to reach out for some professional help. DIY fixes can be fun, but they sometimes hit a wall—and that’s okay.
It’s also worth keeping an eye out for blisters or bubbles in the paint. These often mean there’s some moisture trouble lurking underneath, something only the experts can sort out efficiently. And if you’re dealing with edge mapping or adhesion issues over large areas, it could indicate a need for specialized techniques to ensure that the new paint adheres just right.
Think about it—do you really want to go through the hassle of repainting only to have it peel again later? If you’re also facing contamination issues in your paint booth that ruin multiple layers, leaving it to the pros to clean and refinish is probably your best bet. For tricky situations like color bleeding or those spots where the new color just won’t settle evenly, it’s wise to trust professionals who know how to manage complex layering for that perfect finish.
In the end, the takeaway is simple: don’t hesitate to seek out expert help when the paint challenges get beyond what you can handle. It’s all about making your life easier and avoiding further headaches in the future. Have you ever called in the pros for your painting projects? What was your experience like?
Using professional equipment such as airless paint sprayers can also significantly improve the quality and longevity of your paint job when tackling tough issues.
Next Steps After Finding Defects in Your Paint
Finding defects in your paint job can really ruin your day, can’t it? But the good news is that tackling these issues head-on is key to getting that smooth, flawless finish you want. If you spot drips or rough spots, the first thing to do is let the paint fully cure. This waiting period is crucial!
Once it’s cured, grab some fine-grit sandpaper and gently sand those defects. You’ll want to smooth out those tricky areas while making sure to blend the edges for a seamless look. After sanding, don’t forget to give the surface a quick wipe with a damp cloth. This will help remove any dust left behind.
Need to patch things up a bit more? If you think it’s necessary, applying a coat of primer over the repaired areas can really help. Just be sure to follow the manufacturer’s drying times—this step matters more than you might think. When it’s time to repaint those sections, take your time. Feather the edges so that they blend naturally with the rest of the paint.
You want to avoid any visible lap marks or inconsistencies. Trust me, putting in the extra effort here will pay off in the end. So, what’s stopping you from getting started on this paint fix? With a little patience, your project can look polished and completely professional.
Recommended Products

Motor: 1HP, 110V, single-phase

Premium Epoxy: T-88 is a high-performance structural 2-part epoxy adhesive; Our wood- and marine epoxy is endorsed by leading designers, builders and organizations

9 Amp motor provides up to 3450 RPM
Frequently Asked Questions
How to Fix Paint Drip Spots?
We’ve all faced those pesky paint drips—like unexpected guests at a party. For drip remedies, let’s sand smooth dried spots gently, clean the area, and keep our drop cloths handy for future projects.
Why Does It Look Like I Keep Missing Spots When I Paint?
We’ve all noticed missed spots while painting, right? Spot detection issues can stem from poor lighting, inconsistent techniques, or varying surface absorption. Stepping back regularly helps us catch those sneaky holidays before they’re too late.
How Can You Tell a Bad Paint Job?
We can tell a bad paint job by looking for inconsistencies like drips, uneven texture, or missed spots. Poor paint quality often emphasizes these flaws, making it essential to inspect our work thoroughly before it cures.
Will Tacky Paint Eventually Cure?
Tacky texture typically troubles us, but it won’t always cure. If it lingers too long, we might need to sand and reapply. Let’s guarantee proper conditions to prevent persistent problems and achieve a smooth finish!