As an Amazon Associate, we earn from qualifying purchases. Some links on this site are affiliate links at no extra cost to you. Our recommendations are based on thorough research and editorial judgment.

Primer vs Paint: What Each One Does and When You Need Both
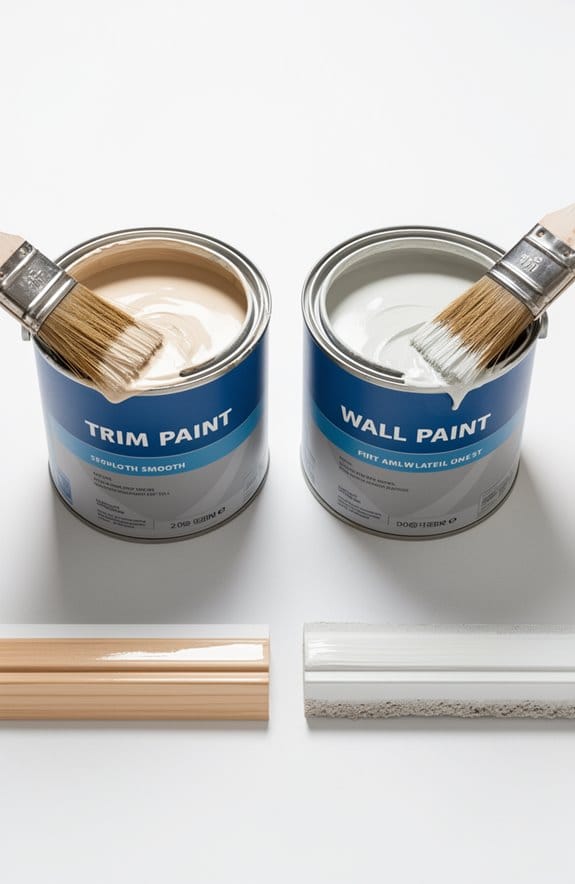
Have you ever painted a wall only to see the color not pop the way you imagined? That’s where primer comes in handy. Primer and paint might seem related, but they actually serve different purposes in your projects. A good primer preps surfaces for paint adhesion, especially on porous materials where paint tends to soak in.
You may be interested


Paint, on the other hand, is all about adding color and creating a protective barrier.
When should you reach for primer? It’s essential on stained or glossy surfaces and when you’re making significant color changes. You might think you can skip it for minor touch-ups, but using paint with primer can be a quick fix. Remember, though, that choosing the right products and tools is crucial for getting satisfying results.
Here’s a tip: if you’re unsure whether to use primer, think about the surface you’re painting. Is it raw wood, or have you painted over a darker color? It’s often better to err on the side of caution and add that extra layer of primer. You want that paint to adhere well and look seamless, right?
Truth is, the right application process can really make a difference in how long your paint job lasts. After applying primer, let it dry fully before moving on to paint—trust me, patience pays off!
Also, consider using a quality brush or roller, as they can help you achieve that flawless finish.
In summary, primer and paint are both vital in their own ways. Each has its role, and when used correctly, they can transform your space beautifully. Have you ever tried using primer before painting? If not, why not give it a shot?
Key Takeaways
- Primer preps surfaces for better paint adhesion and enhances durability, while paint adds color and protection.
- Use primer on porous, heavily stained, or glossy surfaces to ensure proper adhesion and coverage.
- Paint with primer (PPIO) is suitable for minor touch-ups or previously painted surfaces, but may require multiple coats.
- Shellac and stain-blocking primers address tough stains and odors effectively, while drywall primer minimizes flashing on new drywall.
- Always clean and sand surfaces before applying primer, and consider drying times for optimal results.
What Are the Key Differences Between Primer and Paint?

When you’re gearing up for a painting project, you might wonder whether to dive straight into paint or take a step back for primer first. Truth is, these two have very different jobs, and understanding that can make a big difference in the outcome of your work.
Primer’s main role is to prep the surface before you add that color. It may seem a bit boring since it doesn’t come in all those vivid shades you love, but that’s its strength! A good primer promotes better adhesion and helps your paint stick, which means you’re less likely to deal with peeling or cracking later on. On the flip side, paint is all about the finish. It brings the color and protects your surfaces while also giving your space personality.
So, what should you consider when choosing primer? Here are a couple of pointers:
- Oil-based primers are great if you’re trying to block stains or work on surfaces like wood.
- Latex primers dry really fast and are perfect if you don’t want to wait around between coats.
Finding the right type can help set you up for success. Honestly, using primer is a small investment of time and effort that pays off in the long run. You want your paint to look great and last longer, right? So, always start with a solid primer coat.
In short, while primer and paint might seem interchangeable, knowing the difference can save you a lot of headaches. It’s about laying a strong foundation for your chosen color. What project are you thinking of tackling next? For best outcomes, pay attention to surface compatibility to ensure primer effectiveness.
Understanding the Role of Primer in Painting Projects

Ever started a painting project only to be frustrated by peeling paint or uneven color? It happens to the best of us! That’s why understanding the role of primer can be a lifesaver in making your painting journey smoother.
Primer isn’t just some fancy extra step; it’s actually vital for prepping your surfaces. Think of it as a bonding agent that helps paint stick better to various materials. If you’re working with porous surfaces like wood or drywall, primer seals everything up and creates a uniform base. This small prep step can significantly boost the durability of your paint job and even block out stains or odors from past damage.
When choosing a primer, you’ve got options like oil-based or latex-based, which can be matched to the conditions of your project. So, why does this matter? By using primer, you can actually cut down the number of paint coats you’ll need, saving both time and money in the long run. Try this: when you’re ready to paint, take the extra time to apply primer first. It can really pay off in the quality of the final results.
Don’t overlook this crucial part of the process. It’s all about setting up a solid foundation for your paint to thrive on. If you want your project to last and look great, think of primer as your best friend. Plus, selecting a primer with good stain blocking ability can prevent discolorations from ruining your new coat of paint. So next time you pick up that paintbrush, remember: a little prep work can go a long way. What project are you thinking about tackling next?
When to Skip Primer and Use Paint With Primer?

When you’ve got a painting project on your hands, figuring out whether to use primer can feel a bit daunting. Why bother with the extra step if you don’t have to, right? Sometimes, you can just skip that primer and grab paint with primer (PPIO) instead. This is especially handy when working with surfaces that are already painted and just have a few minor imperfections you want to cover up.
If you’re thinking of doing touch-ups or a little repainting, these all-in-one products can save you time and effort. No need to fuss around with a separate primer – just roll up your sleeves and start painting. But hold on a second! If you’re dealing with heavily stained or porous surfaces, you’re going to want to stick with a traditional primer. Products like shellac primer are essential in those cases to ensure a good finish.
Here’s the trick: always choose high-quality products from reputable sellers. This guarantees that everything adheres properly and looks great when you’re done. So think about your specific painting project and choose wisely.
In the end, knowing when to use primer or when to skip it can really help streamline your painting process. For projects involving porous or stain-prone surfaces, consider using an oil-based primer for superior adhesion and stain blocking. What’s your next DIY project?
Pros and Cons of Paint With Primer
Have you ever found yourself standing in the paint aisle, overwhelmed by the choices? Paint with primer can seem like an easy solution to cut down on time and effort. It’s designed to bond well and often simplifies your shopping list by minimizing the need for extra materials. But, hold on—there are a few things to consider before grabbing that can.
For starters, while this paint offers decent adhesion, it might not be the best choice for surfaces that are heavily stained or porous. In those cases, you’ll want to prep with a separate primer for the best results. Also, keep in mind that not all “paint with primer” products live up to their name. It’s worth taking the time to select a high-quality option from a brand you trust.
So, what about coverage? Here’s the trick: you might still need to apply multiple coats. The effectiveness can depend on both how you apply it and the condition of the surface you’re painting. Frankly, while this type of paint can boost durability, it’s not a one-size-fits-all solution.
In the end, weighing these pros and cons can help you make a smart choice for your project. Have you had success with paint and primer in one, or do you prefer to keep them separate? Keep in mind that proper surface preparation is crucial to achieving a flawless finish when using any paint or primer combination.
Choose the Right Surfaces for Separate Primer and Paint Applications
Choosing the right surfaces for separate primer and paint applications can feel overwhelming at times, but the payoff is worth it when you see that flawless finish. Have you ever painted over old, glossy surfaces only to find the paint just doesn’t stick? That’s where a separate primer comes in. For really shiny surfaces like tiles or high-gloss paint, applying a primer is crucial for proper adhesion.
Bare materials like wood, metal, or masonry also need a specific kind of primer. This helps to ensure the paint adheres well, and you won’t have to deal with peeling later on. When you’re faced with surfaces that have stubborn stains or strong smells, a stain-blocking primer is your best friend. It’ll seal off those issues, making sure they don’t ruin your newly painted look.
If you’re working with new drywall, don’t skip the drywall primer. It’s designed to minimize flashing and gives a nice, uniform base for your topcoat. So, why does this matter? If you’re changing colors, especially if you’re going from dark to light, a good primer helps prevent those darker shades from bleeding through. It really helps to create a smooth canvas.
Here’s the trick: Before diving into your painting project, take a moment to assess the surfaces you’re dealing with. Different situations call for different primers, and investing that little bit of extra time upfront will save you headaches down the road. Additionally, considering primer compatibility with surface types like stucco or concrete ensures better adhesion and long-lasting results.
To wrap it up, choosing the right primer for different surfaces is key for a lasting finish. Are you ready to give your next painting project a fresh start?
Choosing the Right Primer and Paint for Your Needs
Finding the right primer and paint for your DIY projects can make a big difference in how everything turns out. So, what’s the secret to picking the right one? First off, think about the surface you’re painting. If you’re working with bare wood or trying to cover heavy stains, oil-based primers are a solid choice. On the other hand, latex primers are great for most interior jobs and dry pretty fast, making them super convenient. If you’re facing tough spots like high humidity, shellac primers stick well and stand up to those conditions.
Here’s a little tip: make sure to let each primer coat dry completely before slapping on the paint. This isn’t just some random advice—it helps the paint stick better and gives you that nice, smooth finish we all want. You also want to be careful to match your primer type with your final paint choice. Whether you go with oil-based or latex paint, ensuring compatibility is key for a durable result.
Need some quick advice? When you’re shopping, keep these in mind:
- Oil-based Primers: Best for wood and heavy stains.
- Latex Primers: Perfect for standard indoor projects.
- Shellac Primers: Great for challenging conditions.
Truth is, the right primer can set the stage for a flawless paint job. So, what steps will you take to prep your next painting project? Remember, a little preparation upfront can save you a heap of trouble later on! For projects involving textured surfaces, understanding how to work with surface compatibility during primer application can greatly enhance your results.
Essential Tips for Applying Primer Effectively
Want that picture-perfect finish when you’re priming? It all starts with prepping your surface properly. First off, make sure to clean it thoroughly. That means getting rid of any dust, dirt, or debris to help the primer stick better. If you’re working with bare wood, don’t skip the sanding. Smoothing out those imperfections makes a huge difference.
Choosing the right primer can really influence the outcome. You’ll want to grab an oil-based primer for anything made of bare wood. For porous materials, stick with a latex primer. When it comes time to apply, aim for even coverage. It’s usually best to do two coats—let the first one dry completely before moving on to the second.
Don’t forget about drying times! Oil-based primers often take a bit longer to cure, so plan accordingly if you’ve got a painting schedule. Ever had your excitement dampened by not accounting for drying times? Trust me, it can throw a wrench in your plans. Also, consider primers with quick-drying features like the Rust-Oleum sealer, which dries in about 10 minutes to speed up your project.
Common Mistakes to Avoid When Using Primer and Paint
You know that feeling when you finish painting, and it just doesn’t look right? One way to avoid that frustration is to not skip the primer, especially on porous or stained surfaces. If you’ve ever painted without priming first, you probably noticed uneven coverage that drives you crazy. Trust me, preparation is everything! Start by cleaning and sanding the surfaces to ensure better adhesion and a smoother final look.
If you’re dealing with really stained surfaces, one coat of primer might not cut it. It’s worth it to put in the extra time and apply those additional coats. And if you’re contemplating using oil-based paint, don’t just assume that a paint-and-primer-in-one will do the trick on bare wood or glossy finishes. That could spell trouble down the line.
Patience is key here. Let each layer of primer and paint dry completely before moving on to the next. This little step can save you from chipping and peeling down the road.
Want the best results? Keep these pointers in mind when tackling your next painting project. What steps do you think you’ll take to ensure a flawless finish this time around? Also, choosing primers with strong adhesion ensures your paint job lasts longer and looks flawless.
How to Fix Common Primer and Paint Mistakes?
Ever start painting only to find that your walls look worse than before? We’ve all been there. Common primer and paint mistakes can really mess things up, but don’t worry—you can avoid them with a few tips.
For starters, if you notice inconsistent sheen on drywall, it’s crucial to apply a quality drywall primer. This isn’t just for show; it helps achieve a uniform finish that makes a world of difference.
Now, water or smoke stains trying to peek through after you’ve painted? That’s where a stain-blocking primer comes into play. It does a solid job sealing those pesky stains so they don’t ruin your hard work.
Are you working with pre-painted surfaces that shine like they’ve been waxed? You’ll want to try a bonding primer. This product enhances adhesion and stops the paint from peeling off later on.
Drying time? Don’t skimp on it. Always let your primers dry completely before moving on to paint. Remember that oil-based primers tend to take longer than latex, so plan your project accordingly.
Thinking about changing colors from dark to light? Here’s the trick: consider a tinted primer. It boosts coverage and usually means you won’t have to apply as many coats of paint.
Using the right paint pads can also make your application smoother and help you avoid streaks and uneven coverage.
In the end, avoiding these common mistakes can save you time, money, and a lot of frustration. So, what painting project are you tackling next?
Achieving a Long-Lasting Finish on Various Surfaces
When you’re about to tackle a painting project, do you ever feel overwhelmed by how to get that long-lasting finish? It all starts with proper prep and picking the right products. For instance, don’t skip the primer! Applying a good one can really boost how well your paint sticks. This is especially crucial for surfaces that soak up paint, like bare wood and drywall.
If you’re using oil-based paint, a suitable primer can block out stains and imperfections, paving the way for a smoother finish. And if you’re dealing with glossy or ceramic surfaces, consider a bonding primer—it can make a huge difference by preventing peeling later on. How frustrating is it to see your fresh paint flaking off?
When it comes to new drywall, a quality drywall primer is your best friend. It cuts down on the number of paint coats you need and helps avoid that annoying flashing that can happen when the paint dries unevenly. The best part is that choosing the right primer gives you the durability you want, not to mention it enhances the overall performance of your paint. Additionally, ensuring your caulk is paintable within 2 hours can save you time and ensure a seamless finish.
Frequently Asked Questions
Do I Need Paint and Primer or Just Paint?
We often realize that using just paint isn’t enough for certain projects. Understanding painting techniques and surface preparation enhances paint adhesion, ensuring color saturation and finish types match our vision, while optimizing project budgeting and time efficiency.
What Are the Disadvantages of Using a Primer?
Using primer has disadvantages like longer drying time, additional costs, and potential finishing challenges. It might struggle with surface adhesion, moisture barriers, and color consistency, plus health concerns can arise with certain application techniques.
Is It Better to Prime and Paint Separately?
Yes, we believe it’s better to prime and paint separately. The prime benefits include improved paint adhesion, stain blocking, and enhanced texture. This approach offers better color saturation, cost efficiency, and long-term durability for our projects.
How Do I Know if I Need Primer or Not?
We can determine if we need primer by evaluating surface preparation. If we’re dealing with stain blocking, color change, or challenging existing finishes, especially on sheetrock or metal surfaces, primer enhances paint adhesion and finish durability for outdoor projects.